|
Thread Number: 37442
/ Tag: Recent Vacuum Cleaners from past 20 years
How I "refurbish" bagless vacuums |
[Down to Last] |  |
| Post# 399482 10/13/2018 at 19:13 (2,021 days old) by niclonnic (Bonney Lake, WA) | ||
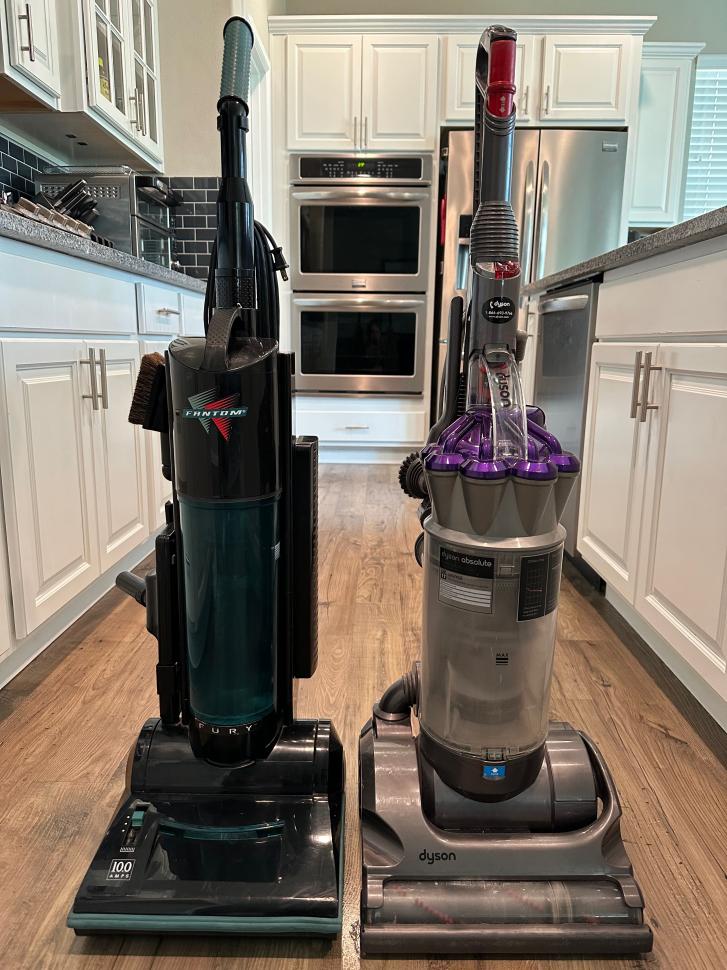
I've been doing this for a long time, but somehow didn't post about it, so I'm going to do so today.
Whenever one of my bagless vacuums gets really dirty from use, I take it through an entire "refurbishment" process. I put that in quotes because I don't know how to do electrical repairs. A couple months ago, I got a replacement hose for my Hoover WindTunnel 2 Rewind Pet. Electroluxxxx here on Vacuumland sent me a hose that was used, but in good condition. Thank you, Mike, for the generous donation! In addition, I ordered some new belts from Amazon the other day, and they came in today. So now I can restore this vacuum to its former glory. Let's get down to business! Here are some "before" photos. This was one nasty Hoover! | ||
| Post# 399483 , Reply# 1 10/13/2018 at 19:19 (2,021 days old) by niclonnic (Bonney Lake, WA) | ||
|
The process
I start by dismantling the vacuum, but not down to the motor. I then disassemble the dirt cup by removing a bunch of screws and pulling out each part of the cyclone assembly, including the cone, screen and filter.
Once the dirt cup is apart, I take each part into my bathtub and blast it with water from my shower head. I then take a sponge and wash each part with dish soap, except for the filter, which can't be washed, only rinsed. A lot of dirt comes out! After that, I dry each part off with a hand towel and set it by my windowsill to dry. Here are some pics of the process. The filter was the dirtiest of the bunch! | ||
| Post# 399484 , Reply# 2 10/13/2018 at 19:22 (2,021 days old) by niclonnic (Bonney Lake, WA) | ||
|
What about
The parts that can't be washed? I took the main body outside, grabbed my Ridgid shop vacuum, plugged the hose into the blower port and used it to blow out the dust that accumulated all over the machine!
For everything else that can't be washed, I use Windex to wipe down these parts.
View Full Size
| ||
| Post# 399485 , Reply# 3 10/13/2018 at 19:25 (2,021 days old) by niclonnic (Bonney Lake, WA) | ||
|
Letting everything dry
This is where everything goes after it has been washed and/or rinsed. I leave them here for at least a full day before putting the machine back together.
View Full Size
| ||
| Post# 399494 , Reply# 4 10/13/2018 at 21:28 (2,021 days old) by electromatik (Taylorsville, North Carolina, U.S.A.) | ||
|
GREAT job. I also wash vacuum parts if they are non-electric. | ||
| Post# 399534 , Reply# 5 10/14/2018 at 12:04 (2,020 days old) by completenutt (West Hollywood, California) | ||
Beautiful work!
What have you found is the best product to get gluey sticker residue off clear plastic without scorching the clear plastic?
View Full Size
| ||
| Post# 399561 , Reply# 7 10/15/2018 at 08:10 (2,019 days old) by eurekaprince (Montreal, Canada) | ||

My �go to� product for getting adhesive safely off plastic: lighter fluid. A liitle bit on a rag or a paper towel usually does the trick. You may have to keep adding more lighter fluid onto clean parts of the rag as you clean, because the goo accumulates on the rag.
Adhesive marketing labels are a pain! I always carefully remove this as soon as I bring the product home. Can�t stand labels left on Rubbermaid bins, Tupperware containers and other plastic housewares! | ||
| Post# 399598 , Reply# 10 10/15/2018 at 19:08 (2,019 days old) by niclonnic (Bonney Lake, WA) | ||
|
Wrapping things up
Now that everything's dry, I put the vacuum back together.
I replaced the belt with a new one; even though the brushroll was spinning at full speed, the old belt was a bit stretched, so it was time to replace it. I also put the new hose on. Here are the "after" pics. The first one shows the new belt vs. the old belt. | ||
| Post# 399604 , Reply# 12 10/15/2018 at 21:20 (2,019 days old) by huskyvacs (Gnaw Bone, Indiana) | ||

This is not normal everyday maintenance for a vacuum. Stripping it and giving it a full refurb to this degree is what you do when you first add a vacuum to your collection. You want to fix all the broken parts and get it all shiny and like new to admire in your collection, because it's not fun to have someone else's dirt and debris in your house! I do the same thing. I have a bunch of vacuums waiting in a big queue like the line for a fairground ride to get their chance to be operated on and shine like new again.
90% of people today never clean their vacuum at all (especially with bagless vacs) and when it gets clogged up, they throw it away or give it to Goodwill. Bagless vacuums have less tolerance for neglect than a bagged vac. You can get many expensive vacuums for cheap (or free) just because they are dirty and clogged because the owner says "it doesn't work anymore". As long as you know how, putting in the labor and time into fixing a free vacuum can give you huge savings versus getting a new one. I probably have over $2,000 in Dysons right now that I got for around $25-$40 each (going by their original MSRP). The people that run these vacuums into the ground and then toss them out are the people that get these vacuums into such a poor, filthy state and then some. Once the vacuum is cleaned and refurbished and all good to go again, you have no worries about it ever getting that dirty again so long as you are not one of those neglectful people and you empty the vacuum when you are supposed to and perform regular maintenance and don't let it get so bad. For a lot of people it's a refreshing and relaxing experience to take a vacuum apart, fix it up, and get it back onto the carpet again and keeping one less vacuum out of the landfill, especially if it's a rare one. It's so satisfying for me to take a vacuum that has an ear-numbing bearing squeal and horrible vibration and giving the motor a total restoration, and then plugging it back in again and having the motor sound like it just came out of the box. And then take it on a vacuuming spree across your house! Even better when you take a vacuum that's been rotting in a chicken coop for 80 years and getting it back into motion for the first time since Model T's were on the road and big band jazz music was on the radio. lol But back on topic, my brand new Eureka I bought in May is barely even dirty after 5 months of weekly use in a house with 2 dogs and a cat. It's got residual dust and particulates all over it, but no clogs and no built up dirt in any crevices. I empty the dirt cup after every use or whenever the dirt reaches the bottom of the cyclone screen. I give the filters a rinse afterwards, and its still in tip-top shape. As long as you do at least that, you won't get the hard-packed dirt that builds up all over the vacuum, as the dirt has a clear path to go into the filter and the bin where it is supposed to. Great job on the cleanup, niclonnic! It looks mint! CLICK HERE TO GO TO huskyvacs's LINK | ||
| Post# 399609 , Reply# 13 10/15/2018 at 23:59 (2,019 days old) by panasonicvac (Northern Utah) | ||
|
I'd second with others | ||
Post# 399612 , Reply# 14 10/16/2018 at 00:42 (2,019 days old) by tolivac  (Greenville,NC) (Greenville,NC) |
||
|
I am with the bag guys,too-If I see a dusty,dirty,broken bagless vacuum--don't care what brand-will just let it be a crunchy meal for a trash truck.Now if its a bagless vacuum such as a Rainbow,Filter Queen,Watermatic,Silver King-than I will rescue it. | ||
| Post# 399647 , Reply# 16 10/16/2018 at 20:29 (2,018 days old) by HoLeeFuk (Chai-nar qualitee...anything more = ip theft) | ||

I am use another vacuum to clean exterior and parts like clear bin, housings, seals, hoses, tubes, brushroll, or powerhead.
Dislodge hose with a broomstick and or compressair for intake/exhaust filters I am not bother take any cyclone apart or spray water. Wet cyclone or bin no good. spend time clean and treat seals prevent vacuum leak blast with an oscillating compressair gun each time the canister is emptied, which make clean even for high use dyson as show in pictures. ware the gas mask when empty bin outside. canister lots of extra work save $25, Sebo felix is pay change bag filters fast. | ||
| Post# 400294 , Reply# 17 11/2/2018 at 00:41 (2,002 days old) by mark40511 (Lexington, KY) | ||
I hate bagless
but I do have a Shark Rotator bought new Nov 7, 2014. So it's right at 4 years old. The thing is, I use it almost daily. Every few days I drag it into my laundry room where I keep my epic 6500 bagged canister and clean the shark up with the bagged canister. There don't seem to be nearly the amount of parts to take apart. Just the bin that holds the dirt.....the foam and flat filter, and the HEPA filter...I take all those out and vacuum around the areas where the filters are housed. I only use my shark to vacuum floors.. I use my rainbow for above floor cleaning. The filtration is REALLY good I notice no dust at all...It's just that keeping a bagless maintained is a pain, so I use a bagged vacuum to maintain it. In a perfect world for me (the shark rotator would be HEPA bagged), then I'd REALLY love it.
I do have a question about this: Is this level of maintenance required for someone who actually takes care of their machines like most people no here? In other words, if you had gotten this Hoover brand new, used it daily (but maintained it) would all of this STILL ultimately be necessary? | ||
| Post# 400297 , Reply# 18 11/2/2018 at 03:54 (2,001 days old) by huskyvacs (Gnaw Bone, Indiana) | ||
|
@ mark40511
It would still get dirty as any other vacuum, but as I said in my earlier comment, as long as you are not the kind of person who runs the vacuums into the ground and doesn't know that the dirt cup actually has to be removed and emptied, you won't have to worry about this problem for maybe 5-10 years in which it should be given a full service anyway. Obviously you still have to rinse the filters or bang them on a tree after every few vaccumings when they get dirty but that's about all there is to it. The main causes of vacuums getting this dirty to where they need a total teardown is people do not empty it and the dirt piles up (and up) (and up) and it doesn't have anywhere to go but clog up into other parts of the vacuum. I have a Dyson DC07 that is a perfect example of a neglectful owner that never emptied it. It would probably be an EPA Superfund site when I get around to cleaning it. lol I have a brand new Eureka that I bought in May from Walmart. I've never rinsed out the foam filters (not intentionally - just never got around to it) or done anything to it but empty the bin after each use.
Here's a some photos that I took of what the vacuum looks like right now as I make this comment at 4:30am on 11/2. I last used it on 10/27 to vacuum my bathroom top to bottom which filled the entire bin. The filters were never rinsed after that, but I will do that after the next time I use it. I have two dogs and a cat who all shed, one of the dogs being a Siberian Husky so this vacuum gets a heavy workout with the pet hair intake. Never had a clog yet even when picking up huge piles of fur. I've even sucked up a sock through the hose with it before and the vacuum ate it up and spit it into the bin before I even knew what happened! It's still looking pretty spiffy after 6 months of weekly use with no attention or care other than emptying the dust cup. Granted, I am cheating because this vacuum does not have a pleated filter. It uses a mesh screen similar to what you find on the filter basket of coffee pots. Also, here's a video of it when it was fresh out of the box: | ||
| Post# 400299 , Reply# 19 11/2/2018 at 09:00 (2,001 days old) by mark40511 (Lexington, KY) | ||
|
Thanks for the info
I have no problem maintaining my vacuum. The only problem I've ever had with my shark was a rip in the hose where it meets the handle......from just wear. Everything is washable but I have two sets of filters so I rotate them. The cord is also fraying so it's electrical taped in a spot on the cord. Recently, it's getting a burning smell upon initial startup of the vacuum, but it goes away and no burning smell after a few seconds.. I'm not sure, but I'm thinking the motor life might be coming to an end. That's fine. I've used the hell out of it and taken care of it. I'm talking daily, not once or twice a week, over 4 years time. What upright would you recommend that has all washable filters...? I've read some people say that multi cyclonic vacuums are a pain to clean because it's hard to clean the cyclones. I guess that's what I'm worried about.
| ||
| Post# 400304 , Reply# 20 11/2/2018 at 16:13 (2,001 days old) by vacuumdevil (Vacuum Hell ) | ||
|
| ||
| Post# 400565 , Reply# 21 11/8/2018 at 14:35 (1,995 days old) by TLFinland (Finland) | ||
|
WD-40 can also be used getting adhesive residue off. Nobody mentioned that yet. | ||
| Post# 400572 , Reply# 22 11/8/2018 at 16:57 (1,995 days old) by huskyvacs (Gnaw Bone, Indiana) | ||
|
@TLFinland | ||
| Post# 400592 , Reply# 24 11/9/2018 at 00:11 (1,995 days old) by Lesinutah (Utah) | ||
Hey
My experience.
My wife bought a shark navigator. It's about 4 years old. She stopped using it. Sifde story we bought another shark pro model at the thrift store for $5.00. I took it apart and cleaned exactly like you did. It came to life and ran like a champ. My wife wanted me to throw the navigator away. She said it didn't suck. I cleaned everything no clogs cleaned up nicely. The filters I took a shop vac blew out and washed foam ones. I told her to try it see how it runs. She was like wow it's like it's brand new. It goes to say they last longer if you maintain them. One last note bags are great. I drop a lot of scresd and random shiz. The shark picks them up not ruining vacuum. My Kirby's royals, riccars, sanitairre could cause Dame I love them. Les | ||
| Forum Index: | 
| Other Forums: |

|

|

|

|

|

 Comes to the Rescue!


;)
;)
;)
;)
;)
;)
;)
;)
;)
;)