|
Thread Number: 19941
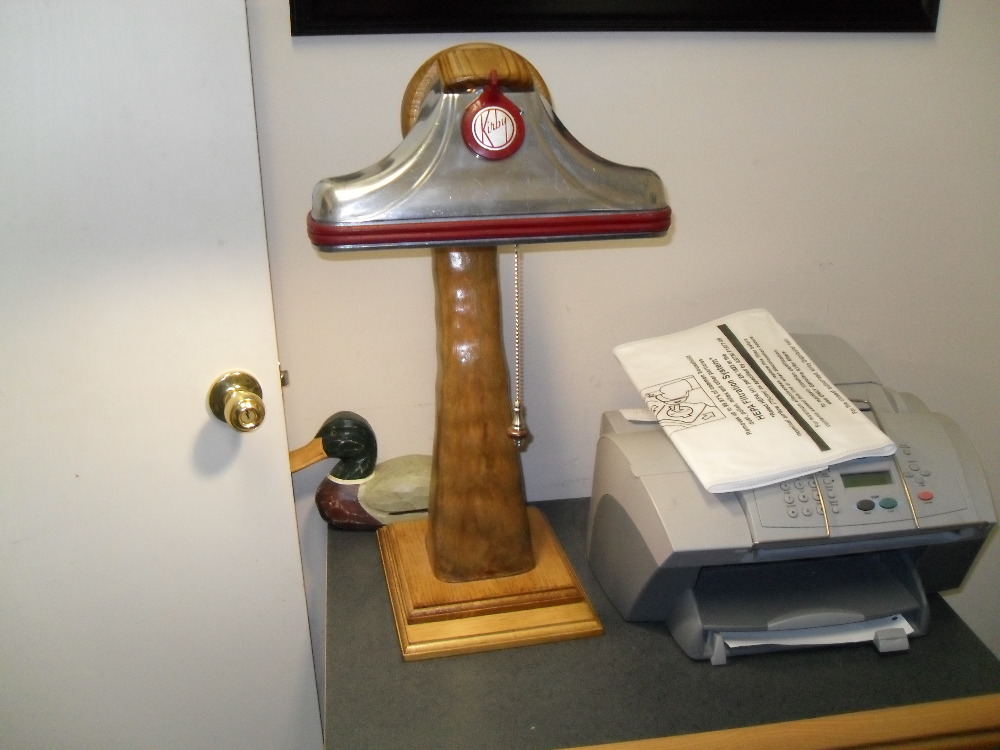
Kirby Desktop Lamp |
[Down to Last] |  |
| Post# 223192 3/11/2013 at 19:24 (4,063 days old) by cb123 (Mobile, Al.) | ||
 | ||
| Post# 223197 , Reply# 1 3/11/2013 at 19:37 (4,063 days old) by ElectroluxKirby () | ||
|
I like it! :-) | ||
| Post# 223213 , Reply# 2 3/11/2013 at 20:51 (4,062 days old) by vacuumman206 () | ||
|
I have an extra kirby sanitronic 80 head sitting around. How'd you do that? | ||
| Post# 223239 , Reply# 3 3/12/2013 at 02:41 (4,062 days old) by cb123 (Mobile, Al.) | ||
|
Hi, Vacuumman206
I'm glad that you liked the lamp. I've uploaded some photos of the wooden carcass of one I will be working on later. The things you will need are portland cement, sand, and acrylic fortifier...Then mix the cement and sand 1 to 1 ratio. Substitute all water with the liquid, acrylic fortifier - it will stabilize the cement better than water - it will be less prone to breakage, and more flexible with the woods movement over time. The color was applied with Infusion Reactive concrete stain ( acidic metallic salts ). Then over which was applied several coats of water base polyurethane. You can get these products at your local paint store. If you have a finishing air gun you can easly nail the hollow carcass together with cut up 1 by 4's and panel board. Remember to leave a string inside the carcass, because, you will have to pull your wire through. I have included a close up of how the carpet head is attached.
| ||
| Post# 223240 , Reply# 4 3/12/2013 at 03:01 (4,062 days old) by cb123 (Mobile, Al.) | ||
|
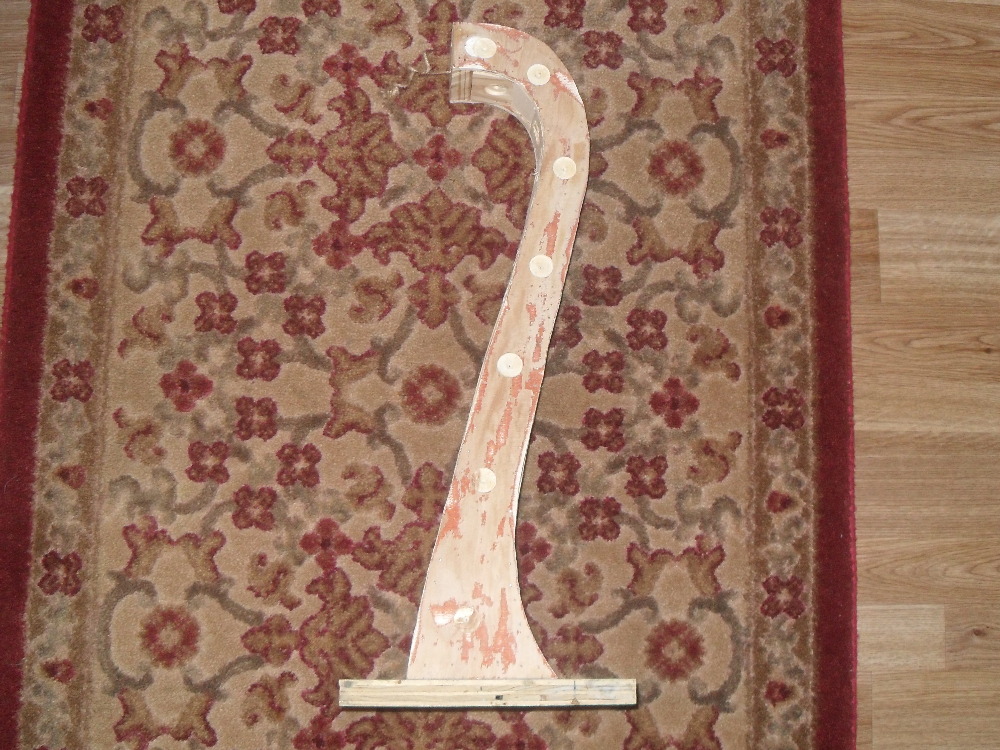
Carcass Pic#1 | ||
| Post# 223241 , Reply# 5 3/12/2013 at 03:15 (4,062 days old) by cb123 (Mobile, Al.) | ||
|
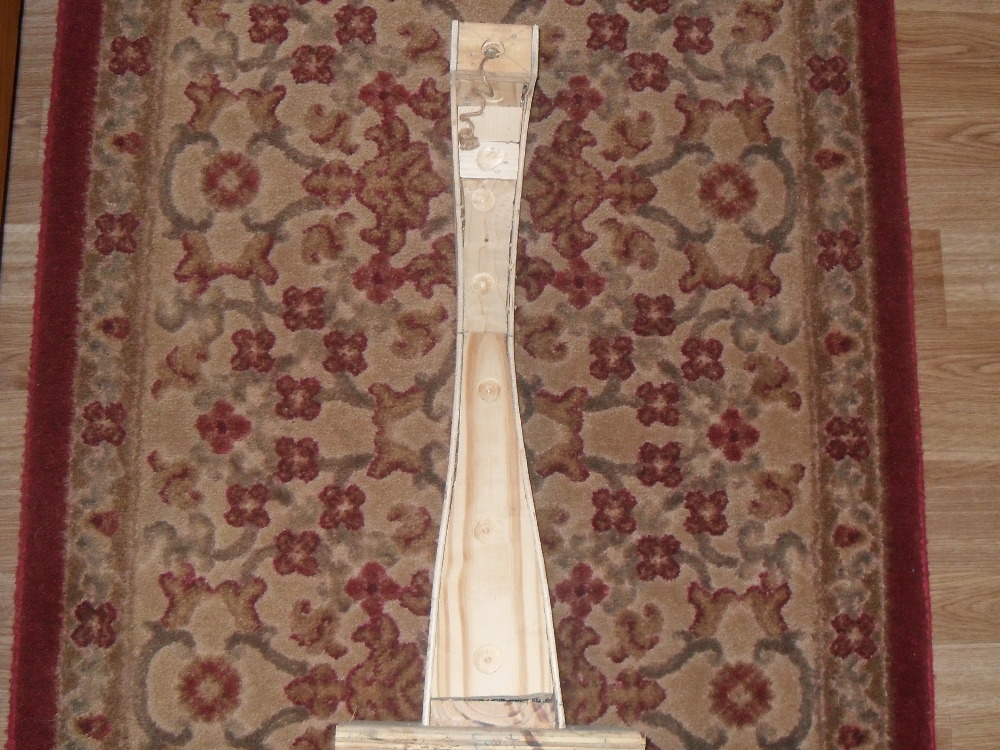
Pic#2 | ||
| Post# 223244 , Reply# 6 3/12/2013 at 04:01 (4,062 days old) by cb123 (Mobile, Al.) | ||
|
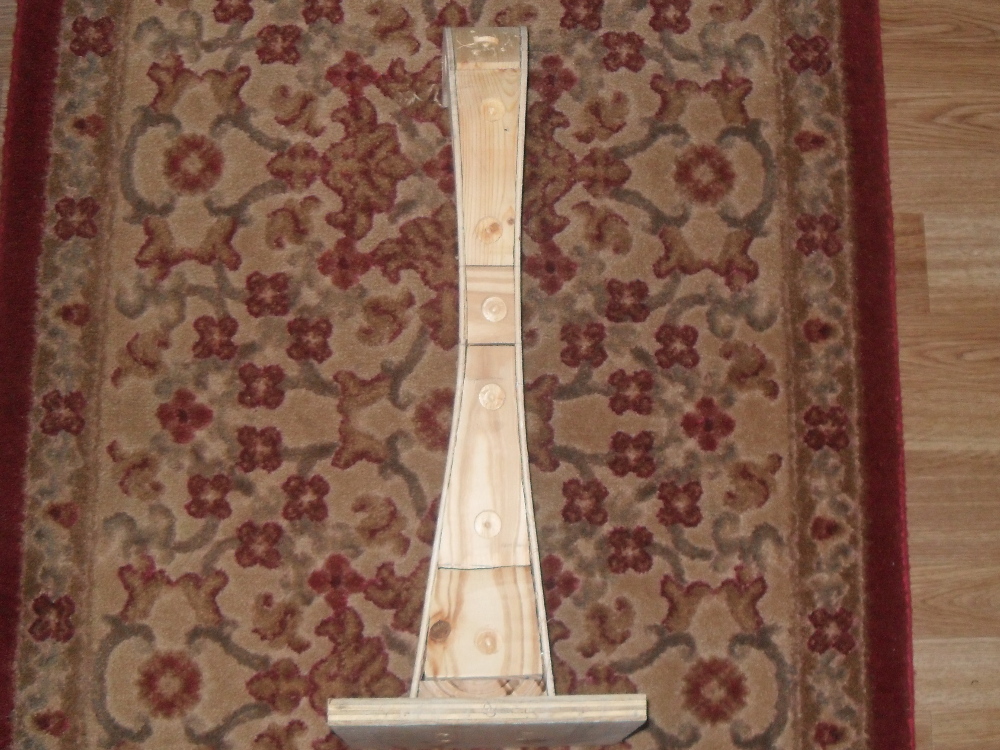
Pic#3 Backside
Make sure you screw a wooden scrap base to your carcass. This is where you will build your concrete up. Remember, use medical gloves to apply a thin coat of concrete - just enough to moisten the wood and dirty it up. This is your primer coat. Let it dry to a light grey color - Then apply heaver coats - slowly building it up. Don't fret to much, it will stick - you'll just have to fight it a little. Remember to keep it smooth and don't over work it. When done the concrete will be at lest 3 quarters of a inch to 1 and a half inches thick. Don't worry, it can vary a little - no problem.
| ||
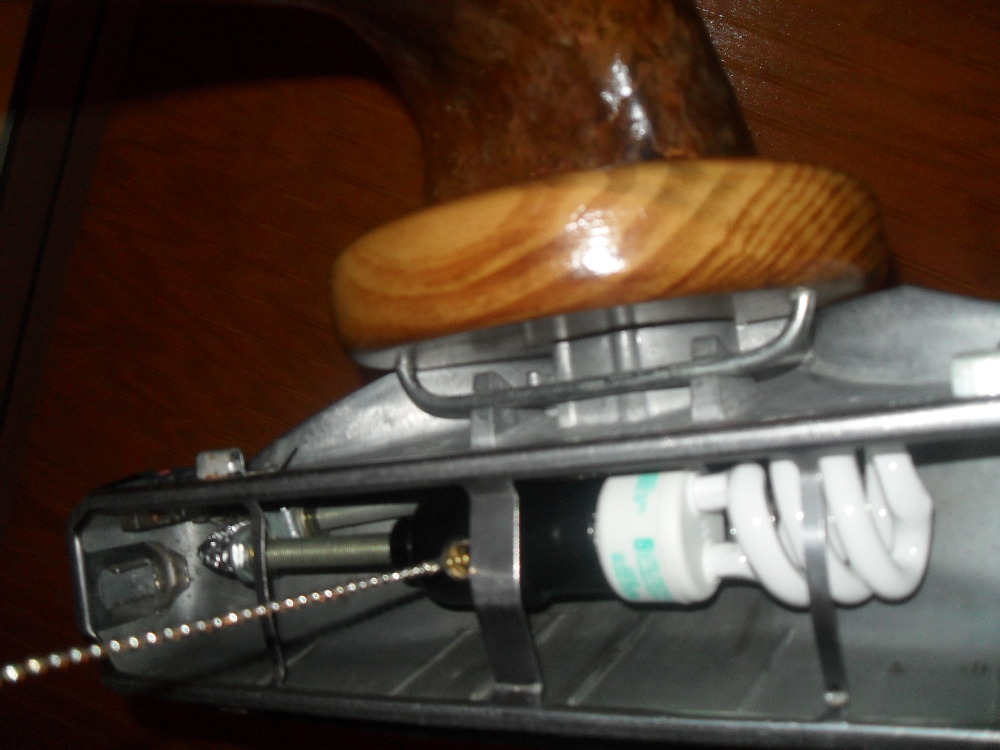
| Post# 223246 , Reply# 7 3/12/2013 at 04:28 (4,062 days old) by cb123 (Mobile, Al.) | ||
|
Pic#4 Carpet head
Now, after a day or two, depending on the temperature, you can use fine grit sandpaper to polish the unstained concrete. Remember to use a mask while doing this. The silicate can shred your lungs - if you do it a lot. The head is attached to a 2x6x6 inch wooden disk - screwed to the carcass with 3 inch fasteners. Remember to put a peice of scrap wood at the top of the carcass to form the concrete at the end of the neck.
| ||
| Post# 301015 , Reply# 8 10/8/2014 at 03:38 (3,487 days old) by cb123 (Mobile, Al.) | ||
|
| ||
| Post# 301096 , Reply# 9 10/8/2014 at 20:31 (3,486 days old) by super-sweeper (KSSRC Refurbishment Center) | ||
|
| ||
| Post# 301125 , Reply# 11 10/9/2014 at 03:01 (3,486 days old) by cb123 (Mobile, Al.) | ||
|
| ||
| Post# 301190 , Reply# 12 10/9/2014 at 13:57 (3,486 days old) by anthony (leeds uk) | ||
|
it | ||
| Post# 301209 , Reply# 13 10/9/2014 at 16:24 (3,486 days old) by super-sweeper (KSSRC Refurbishment Center) | ||
|
| ||
| Forum Index: | 
| Other Forums: |

|

|

|

|

|

 Comes to the Rescue!