Thread Number: 17911
Kirby Sani-Emptor Modification
[Down to Last]

Vacuumland's exclusive eBay Watch:
scroll >>> for more items --- [As an eBay Partner, eBay may compensate vacuumland.org if you make a purchase using any link to eBay on this page]
Post# 194909   8/14/2012 at 17:45 (4,272 days old) by Kirbyrama (Pennsylvania)        

Is there any way to alter a 500-series Sani -Emptor to accommodate a fill tube and bag for a Heritage II? A few years ago, I retrofitted my 519 model with this type of bag assembly, but just recently found some thin plastic broken away inside the neck of the Mini-Emptor-where the rubber gasket is glued. In my opinion; this is too flimsy and years ago I had to replace the Mini-Emptor for my H-II because of this. I would just like to have the original metal Sani-Emptor which is quite durable take the place of the plastic emptor. Does anyone have any ideas how this could be done? I am sure alot of Kirby owners have been inventive and tried out this set up.

Post# 195281 , Reply# 1   8/15/2012 at 21:44 (4,271 days old) by djtaylor (Salt Lake City, Utah)        

djtaylor's profile picture
Louis,
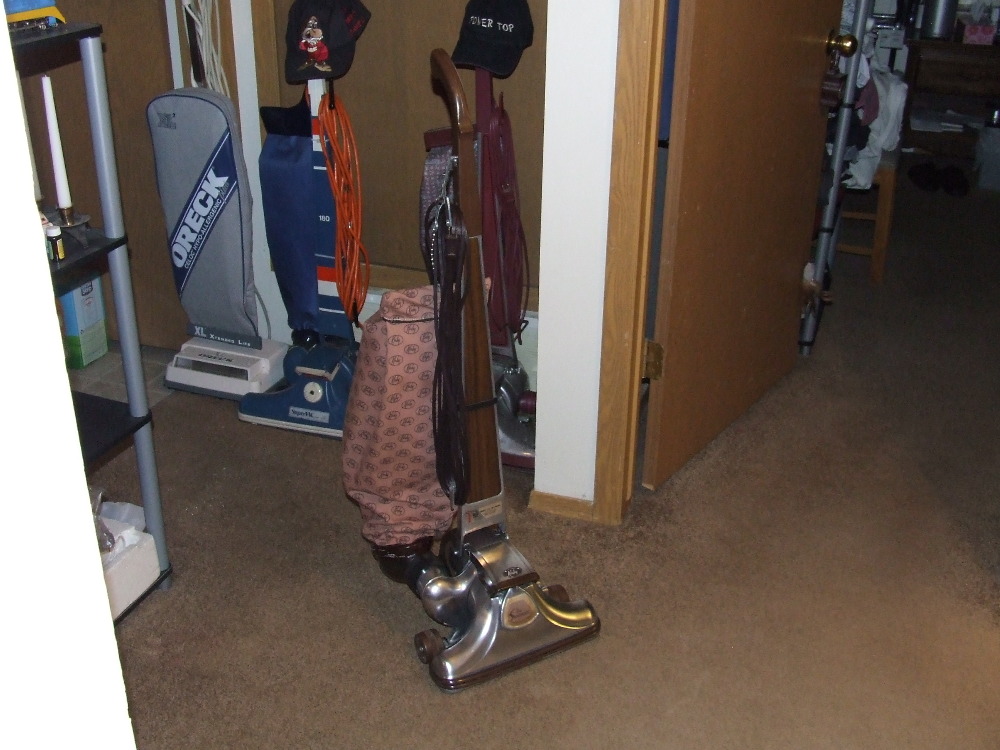
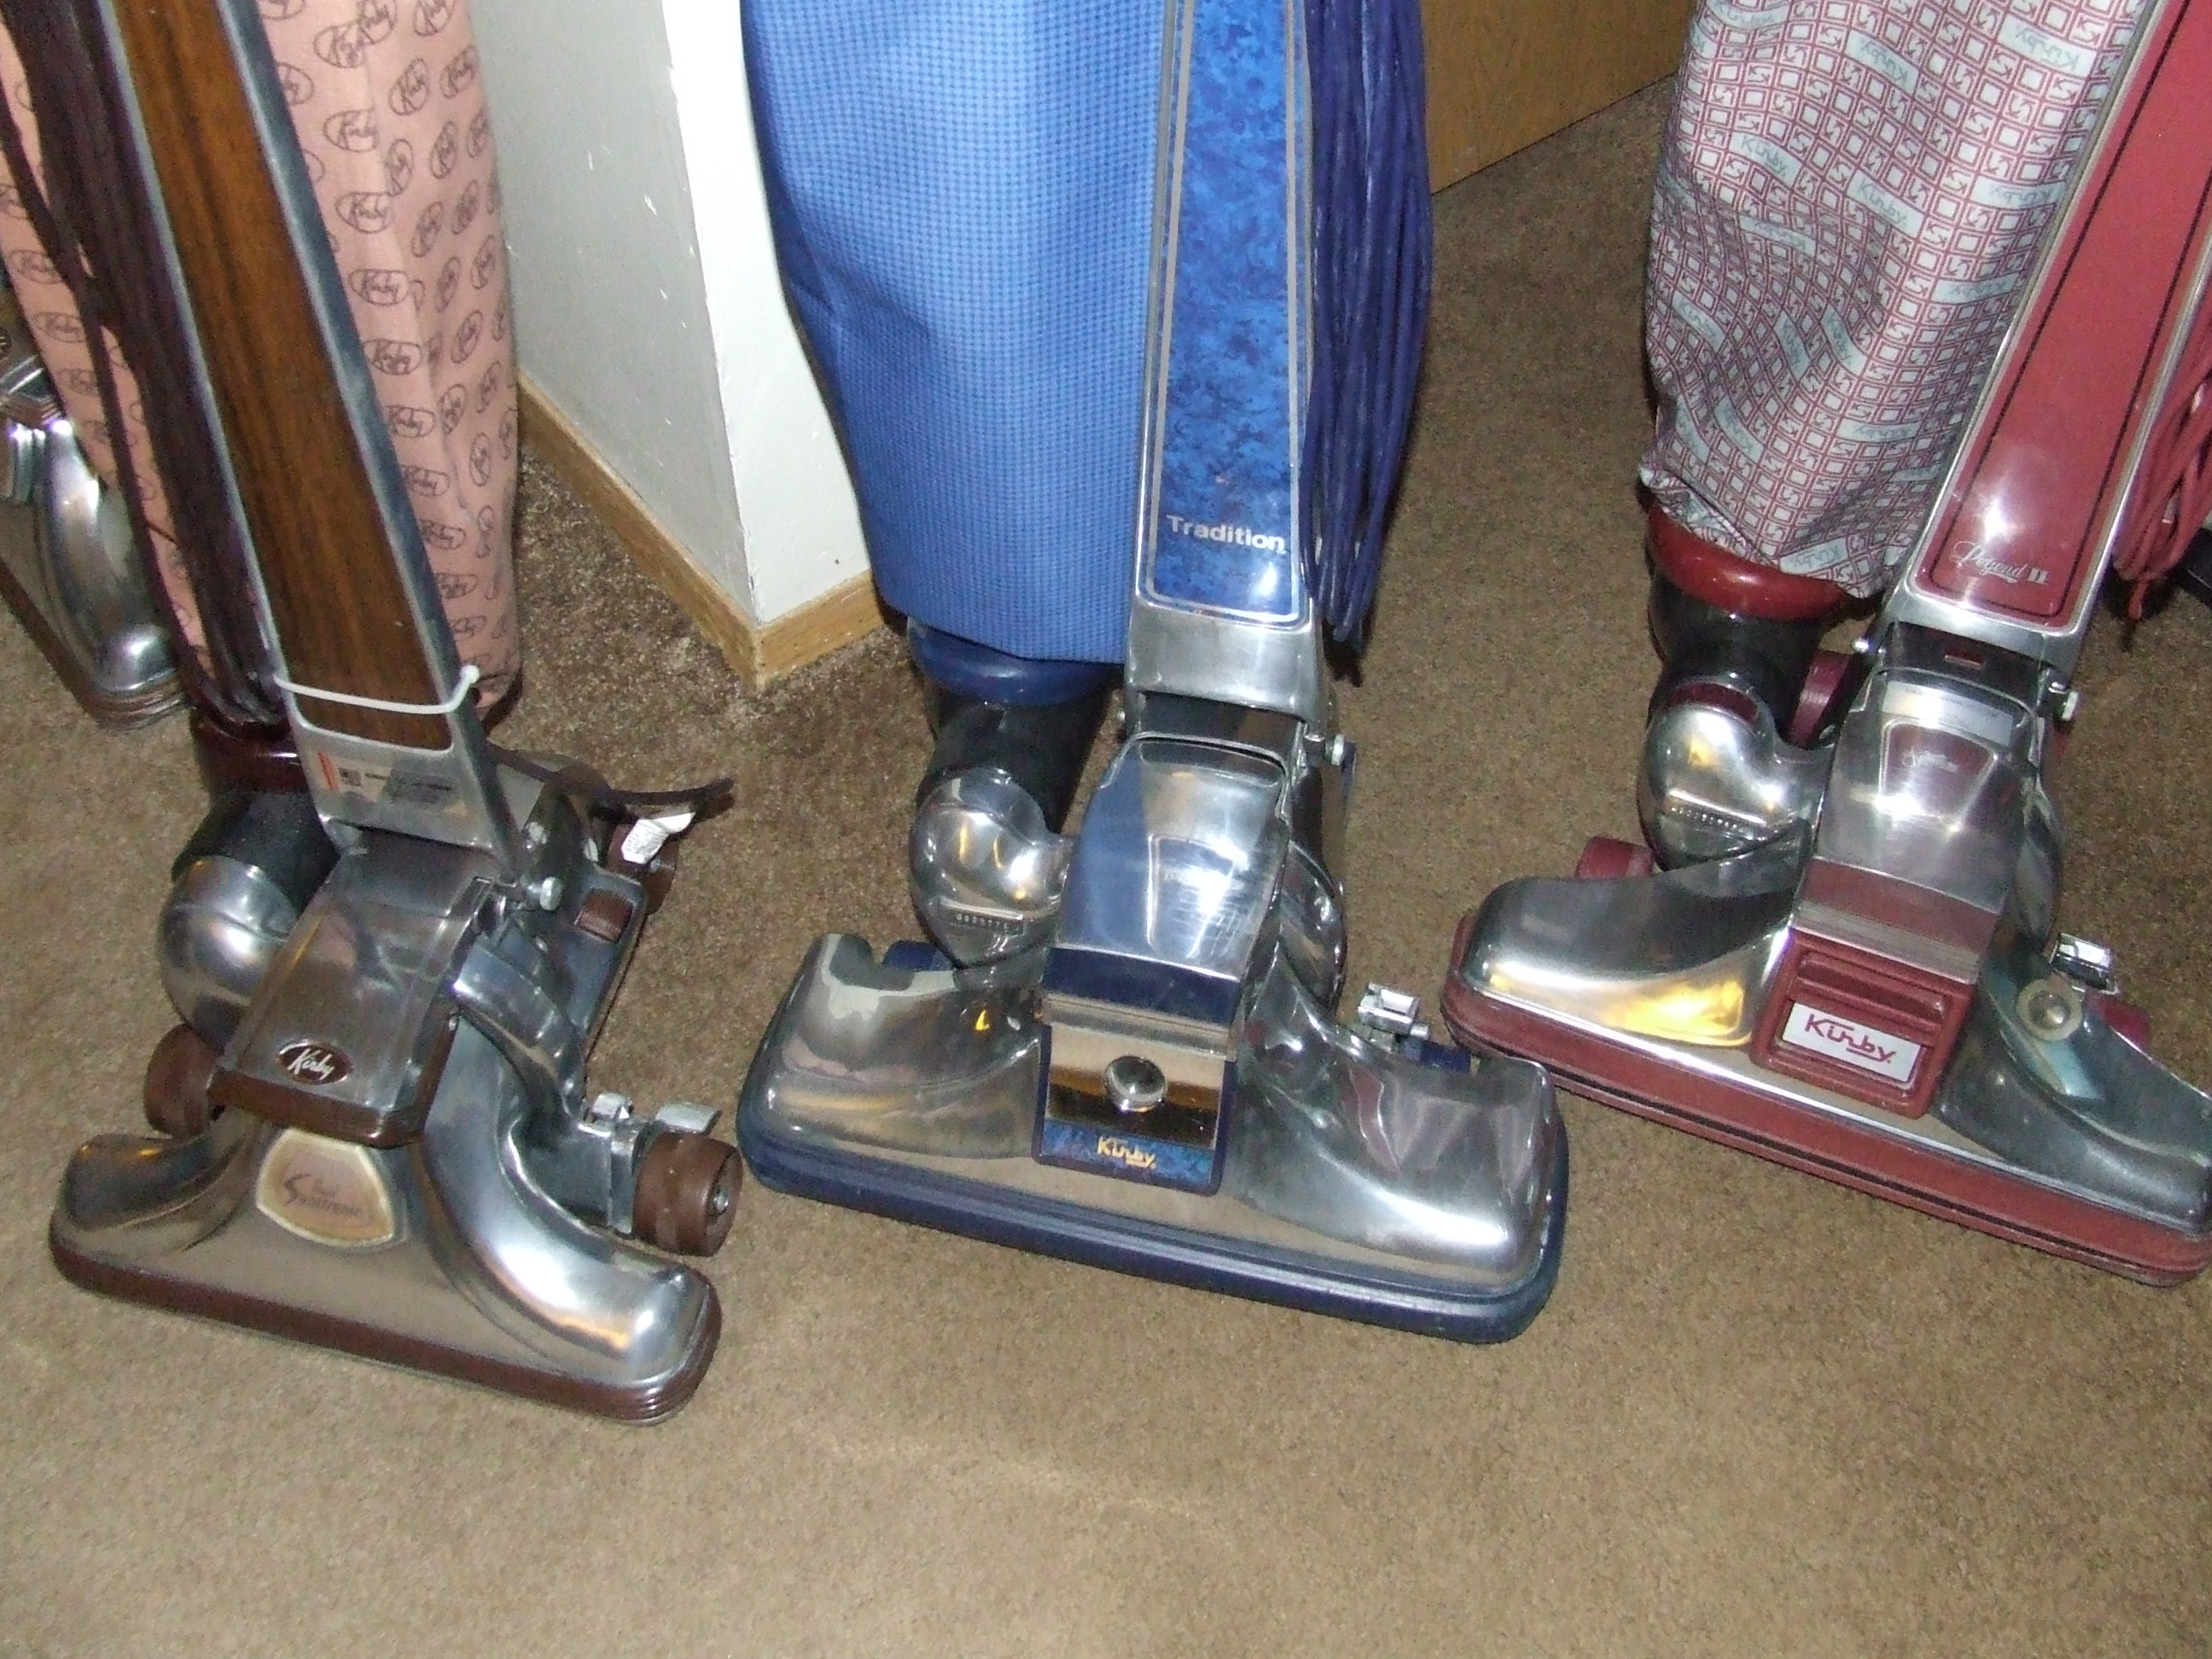
I had wonder about just this subject for many years and never really found a good way to convert the old, square Emtors. That is why I just put a strip of black electrical tape on the Exhaust Horn of the machine, covering the rivit heads slightly, and then put a Heritage II Mini-Emtor on the vacuum. That give the Mini-Emtor a tight fit so that it does not leak dirt. I also prefer to use the Open-Top style outer bag over the Heritage, Heritage II or Legend II outer bags, it just looks more original. I have been luck, so far, to have vintage Open-Top bags to use but the new black bags would look really smart on a shiny Kirby with either the Red trim or even the Tan or Green trim. Here is my 561 with a Legend II outer bag.


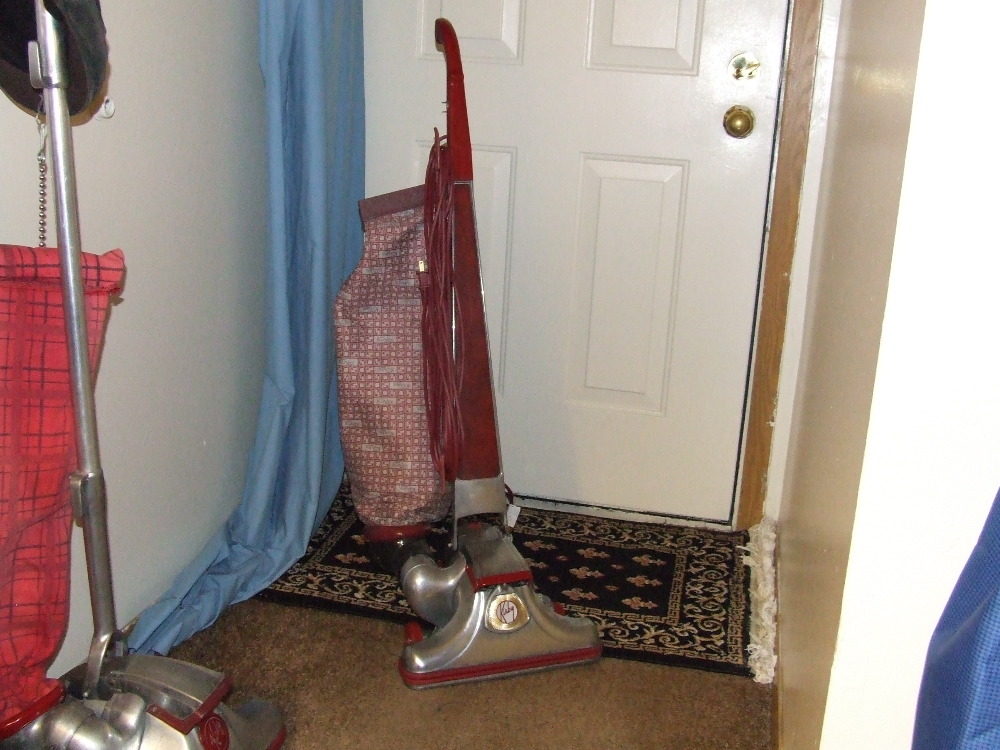
Post# 195283 , Reply# 2   8/15/2012 at 21:47 (4,271 days old) by djtaylor (Salt Lake City, Utah)        

djtaylor's profile picture
And here is my brown-trimmed D50 with the Tan Open-Top bag. This vacuum is my favorite vintage Kirby. This bag setup works really well and I can use the cloth-like HEPA bags, which I need since I have very nasty allergies. Let us know what you wind up doing.
Justin


Post# 195591 , Reply# 3   8/16/2012 at 18:12 (4,270 days old) by kirbykid (Horseheads,New York 14845)        

i think this will work, if you cut the spring out of the part that goes around the emptor, you can put an older spring in and if the hole in the bottom of the bag isnt big enough to fit around then... well you will have to sow more cloth into the bag so the bottom hole is bigger, then just put an old spring in it.
if you send me the bag and the old metal sani emtor and the new one, i could probably do it, but it will cost some money because i will need to have a piece of plastic cut out. you probably dont understand anything of what im saying. im being very confusing. i might be able to make a videa and post it on youtube. the plastic is what you atach the fill tube to. it is like a converter for the giant saniemptor hole and the small fill tube. god im even confusing myself. if you dont understand what im saying i will make a video


Post# 196986 , Reply# 4   8/23/2012 at 23:58 (4,263 days old) by Kirbyrama (Pennsylvania)        
A strip of black electrical tape---

Along with a Heritage II -type fan gasket really helped. The seal is perfect. I do not have to spend money on a new mini-emptor. Thanks so much for the advice.

Post# 197014 , Reply# 5   8/24/2012 at 04:28 (4,263 days old) by Blackheart (North Dakota)        
Well...

blackheart's profile picture
I've converted kirbys to a bag system before, but i used a tradition emptor i haven't done it with a square one. If this would interest you would need:
A Tradition Emptor
A Heritage Bag plate (the piece that screws into the emptor and holds the filltube
Fill tube and bag adaptor (i've always went for the round ones)
A Strong adhesive (locktite, Epoxy ect)

I would attach the tube to the plate then bring the plate up through the bottom of the emptor and then seal it to the emptor so that the lip of the emptor covers the edges of the plate the easiest way to keep them together is to hang it up then you just wait for it to try

In this old video you can see what it looks like when finished.

Hope it's of some help


CLICK HERE TO GO TO Blackheart's LINK


Forum Index:       Other Forums:                      


Comes to the Rescue!

Woops, Time to Check the Bag!!!
Either you need to change your vacuum bag or you forgot to LOG-IN?

Discuss-O-MAT Log-In


New Members
Click Here To Sign Up.


automaticwasher.org home
Discuss-o-Mat Forums
Vintage Brochures, Service and Owners Manuals
Fun Vintage Washer Ephemera
See It Wash!
Video Downloads
Audio Downloads
Picture of the Day
Patent of the Day
Photos of our Collections
The Old Aberdeen Farm
Vintage Service Manuals
Vintage washer/dryer/dishwasher to sell?
Technical/service questions?
Looking for Parts?
Website related questions?
Digital Millennium Copyright Act Policy
Our Privacy Policy