|
Thread Number: 12416
516 Resto Begins... Questions |
[Down to Last] |  |
| Post# 132820 , Reply# 1 4/17/2011 at 22:06 (4,849 days old) by vacumaniac () | ||
|
Also, any information on how to remove the headlight housing would be helpful :) 
| ||
| Post# 132831 , Reply# 3 4/17/2011 at 22:39 (4,849 days old) by eurekastar (Amarillo, Texas) | ||
|
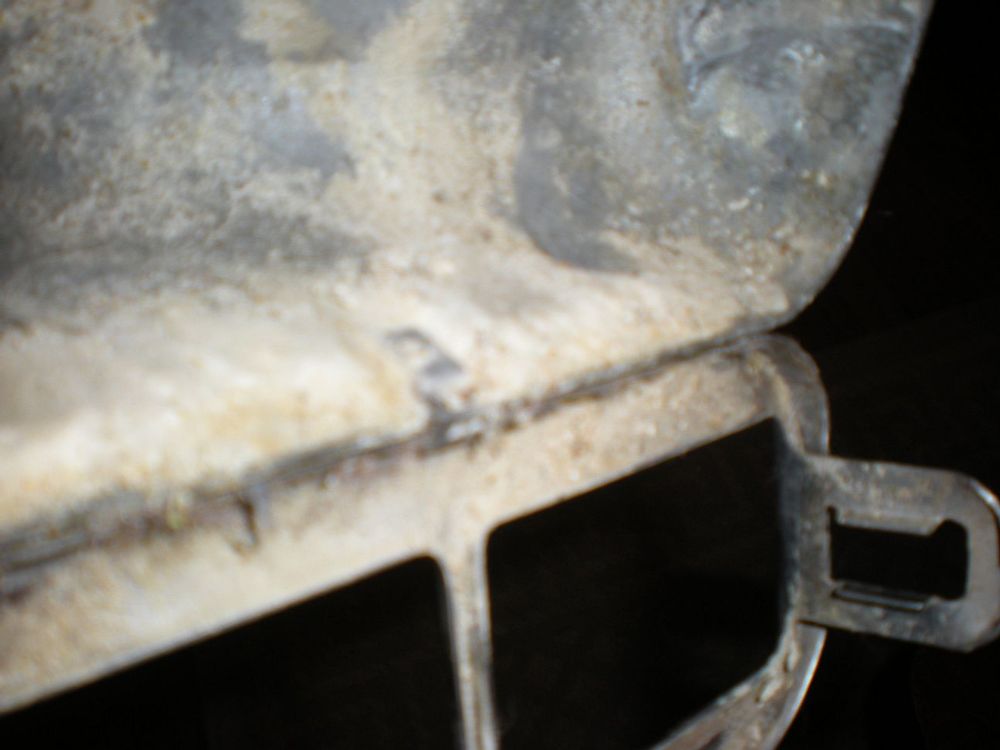
1) To remove the nozzle bumper, you'll need to drill the rivets out by using a 1/8" drill bit. Be sure to drill from the inside. Also, be sure to keep the bumper clamps. You'll need them to install the new bumper. When you install the new bumper, the easiest thing to do is to use 1/8 " pop rivets with washers. 2) The belt lifter on a 516 is easily removed by first removing the limit screw. It unscrews from the inside. With the screw out, you can then align the lugs on the belt lifter for easy removal. 3) To remove the headlight cap, you'll need to drive the hinge pin out with a long punch pin. If you don't have any long punch pins, you can buy them inexpensively at Harbor Freight Tools or you can buy better quality at Sears! Be very careful when you do that, lest you break the fan case.
Hope this helps! | ||
| Post# 132835 , Reply# 4 4/17/2011 at 22:43 (4,849 days old) by eurekastar (Amarillo, Texas) | ||
|
One more thing... | ||
| Post# 132840 , Reply# 5 4/17/2011 at 22:53 (4,849 days old) by vacumaniac () | ||
|
Thanks all! I shall try all this tomorrow and hope it goes well :) | ||
| Post# 132841 , Reply# 6 4/17/2011 at 22:55 (4,849 days old) by vacumaniac () | ||
|
Also.... is the same driiling process for the rivets on the beater bar cover area the same??? | ||
| Post# 132842 , Reply# 7 4/17/2011 at 22:59 (4,849 days old) by eurekastar (Amarillo, Texas) | ||
|
You really don't need to drill those out. They will bend enough for you to be able to remove the rug plate. Needle nose pliers are good for that or something thin so you can slide it inside and bend them up enough to slide the rug plate off. Have fun and let me know how it goes! You'll learn a lot just by doing it, so I know you can do it! | ||
| Post# 132885 , Reply# 8 4/18/2011 at 12:21 (4,848 days old) by vacumaniac () | ||
|
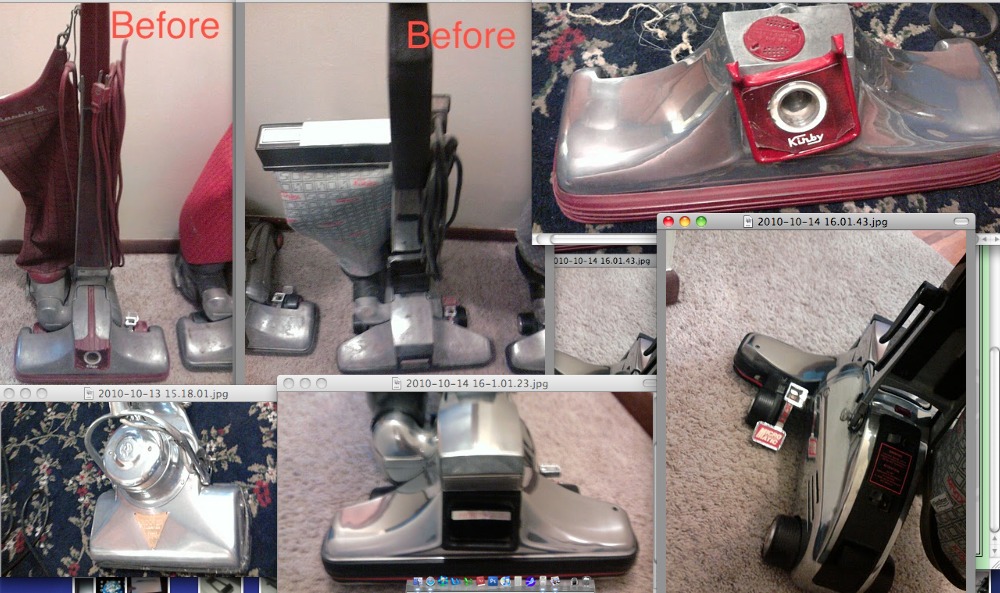
Metal restoration question: What is the best method for restoring the metal that you can do yourself? If anyone could give me a walkthrough of it that would be great! | ||
| Post# 132927 , Reply# 10 4/18/2011 at 16:51 (4,848 days old) by eurekastar (Amarillo, Texas) | ||
|
0000 steel wool works really well. I've used Mother's but I prefer a product called "Wenol Metal Polish". It's a German product that's a little thinner in consistency than toothpaste. But it seems to require less effort than Mother's. But the advantage of Mother's is that it's more readily available and does a good job too. Just be sure to follow up with a soft cotton cloth as you go along. Of course, if you have a bench polisher, that's the best way to go! CLICK HERE TO GO TO eurekastar's LINK | ||
| Post# 132940 , Reply# 11 4/18/2011 at 17:50 (4,848 days old) by vacumaniac () | ||
|
Thanks for the input. Now, I am trying to get the fan off and I would assume there may be a specical tool/trick to this? If there is a special tool, any alternatives? 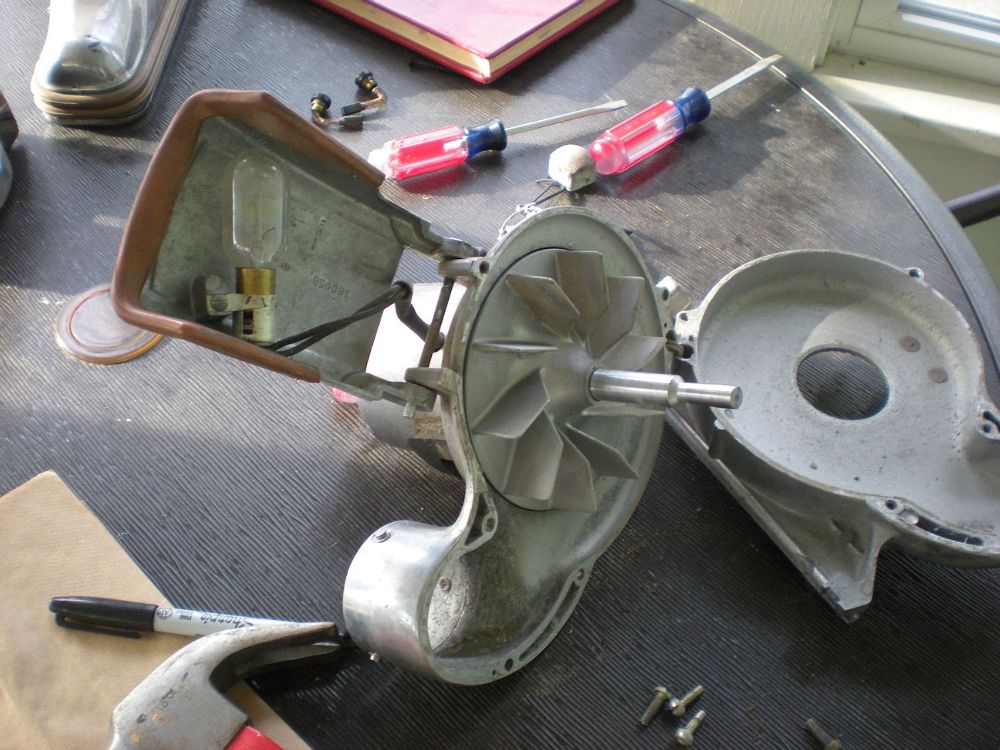
| ||
| Post# 132979 , Reply# 13 4/18/2011 at 20:16 (4,848 days old) by KirbyDS80 (California) | ||
|
Git er done! Git er done! :) -Jayson | ||
| Post# 132980 , Reply# 14 4/18/2011 at 20:19 (4,848 days old) by vacumaniac () | ||
|
Thanks Chad! That worked like a charm, however, now I am stuck with the cover unerneath the fan, I removed the 4 small screws andcannot get the plate that covers the bearing off | ||
| Post# 132988 , Reply# 16 4/18/2011 at 20:57 (4,848 days old) by eurekastar (Amarillo, Texas) | ||
|
Outstanding! Derek, I'm proud of you! You'll learn a lot by doing it yourself AND it will be very gratifying when you're done. The bearing plate can sometimes get frozen in place. I usually take a flat blade screw driver and slip it through that same access slot and tap it off from the back. Just make sure the screwdriver is butted up against the plate and not something else (like the armature fan!). | ||
| Post# 132990 , Reply# 17 4/18/2011 at 21:05 (4,848 days old) by vacumaniac () | ||
|
Thanks Bill!! I have successfully gotten the motor apart! Think I am done for now though, as I will need to pick up a bearing puller I assume to remove and replace the bearings. What type of bearing puller do you recommend? 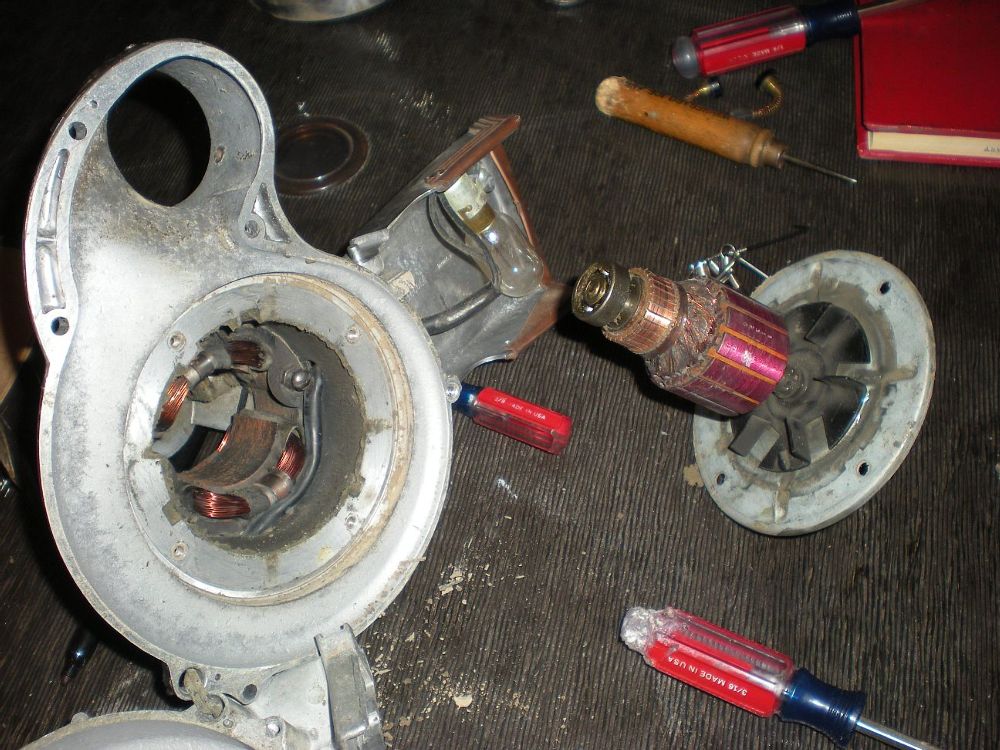
| ||
| Post# 132992 , Reply# 18 4/18/2011 at 21:22 (4,848 days old) by eurekastar (Amarillo, Texas) | ||
|
Excellent! Kirby makes a bearing puller for the rear bearing. You can order one from club member a007kirbyman. Look in the member profiles and shoot him an email. But the quickest way to get in touch with him is by phone. I'll email his # to you. He has an authorized Kirby service center and can supply you with any parts you need. That bearing puller is only around $15. With the front bearing, the simplest thing to order a new bearing plate with the bearing already in it. But $15 is cheap for a bearing puller and it will quickly pay for itself if you ever rebuild many machines. | ||
| Post# 133000 , Reply# 19 4/18/2011 at 21:44 (4,848 days old) by vacumaniac () | ||
|
Thanks for the info! Do you know if there is a special way to arrainge the wires when placing the field back in the housing? It appears that the wires will be pinched and orin the area where the armature will turn so there must be a trick to this haha 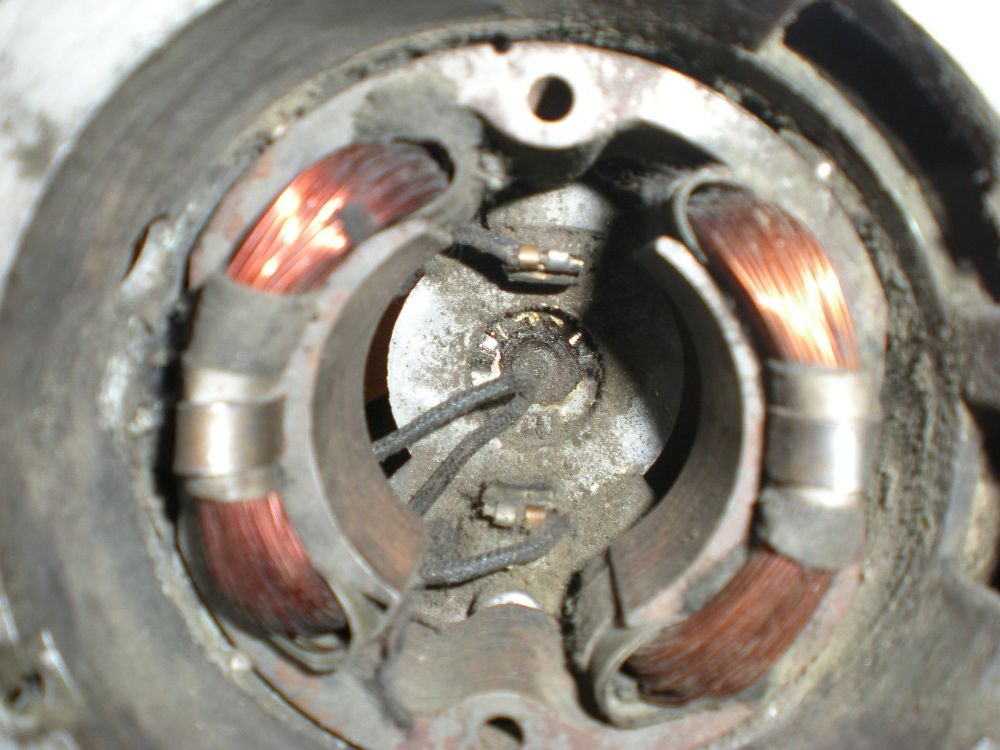
| ||
| Post# 133029 , Reply# 20 4/18/2011 at 23:16 (4,848 days old) by eurekastar (Amarillo, Texas) | ||
|
| ||
| Post# 133170 , Reply# 21 4/19/2011 at 19:02 (4,847 days old) by vacumaniac () | ||
|
Allright!!!! Complete disassembly and reassembly and it works!!! | ||
| Post# 133173 , Reply# 22 4/19/2011 at 19:10 (4,847 days old) by eurekastar (Amarillo, Texas) | ||
|
| ||
| Forum Index: | 
| Other Forums: |

|

|

|

|

|

 Comes to the Rescue!