|
Thread Number: 11279
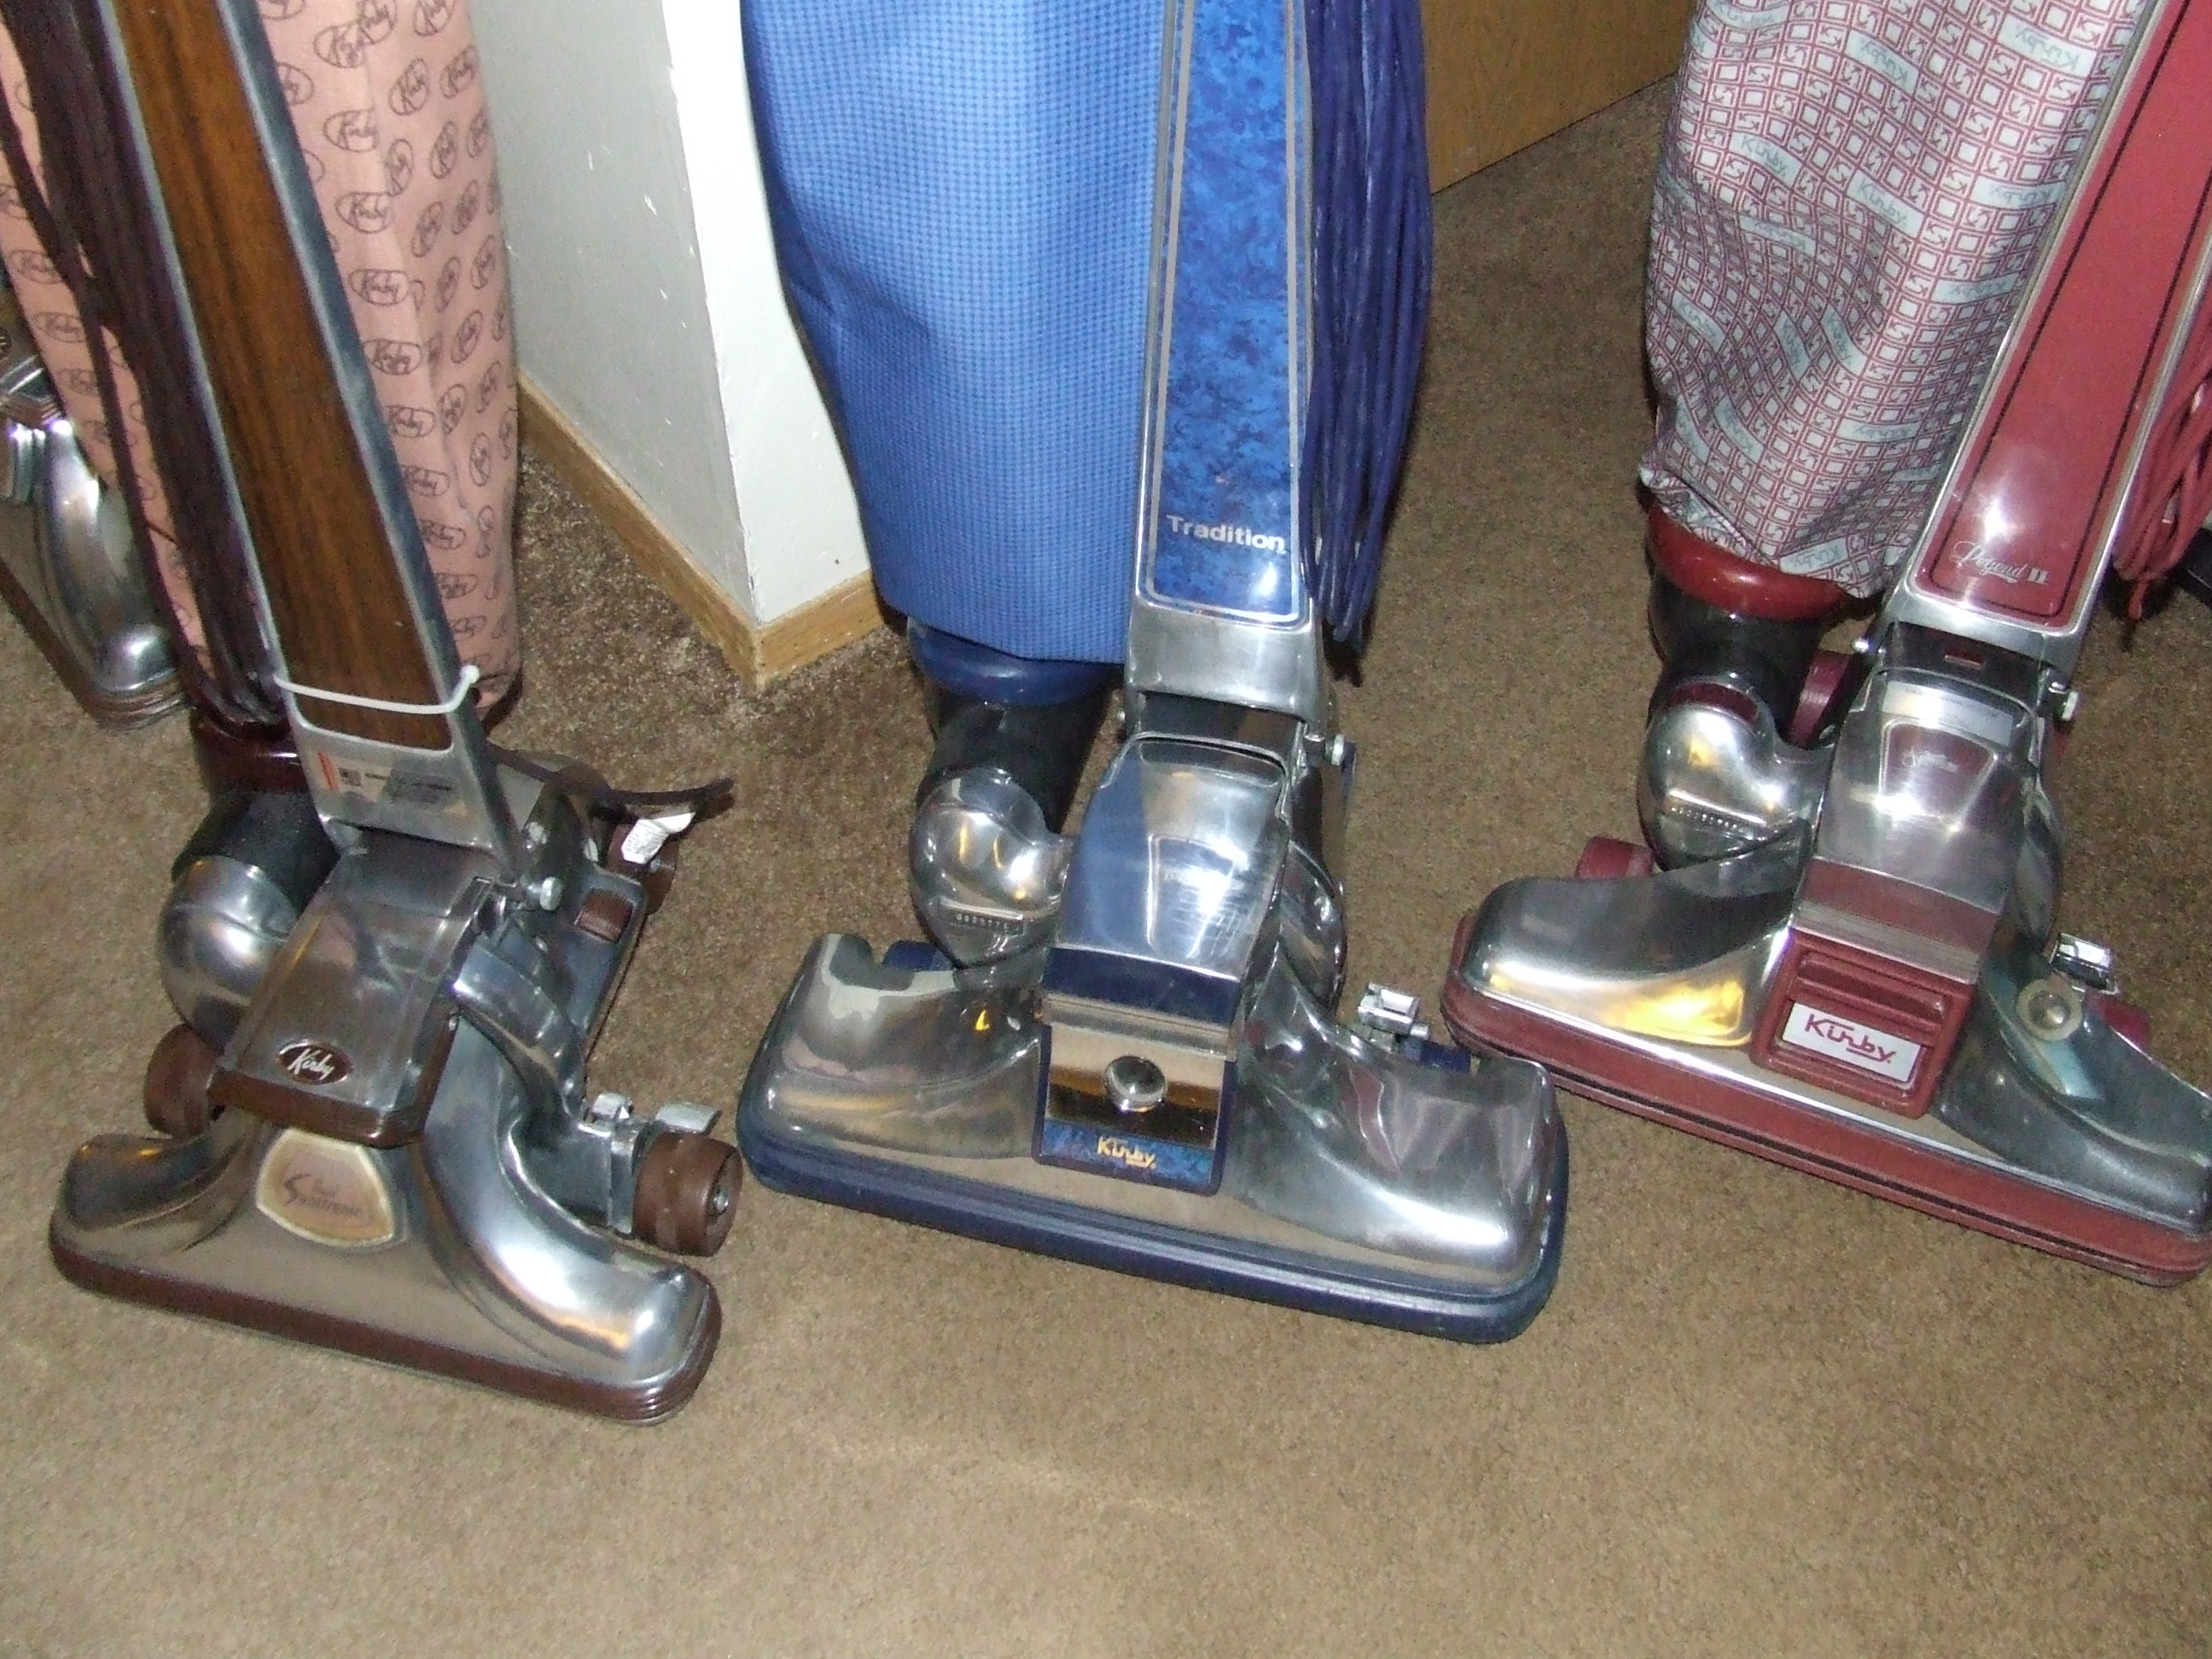
Kirby 510 won't run |
[Down to Last] |  |
| Post# 121922 1/17/2011 at 18:20 (4,939 days old) by djtaylor (Salt Lake City, Utah) | ||
Hi, I need advise from the members who have worked on the early 500 series Kirbys. My 510 won't power up. I have replaced the motor brushes and cord earlier this month, but the motor simply will not run. The light comes on when I flip the switch, but nothing more. What should I do? Any ideas what might be the problem.
Thanks in advance. Justin djustintaylor@gmail.com | ||
| Post# 121925 , Reply# 1 1/17/2011 at 18:22 (4,939 days old) by twocvbloke () | ||
|
Check that the field coil is not blown, same for the armature, and also check the wiring to the carbon brushes aswell as the brushes themselves... :) | ||
| Post# 121930 , Reply# 2 1/17/2011 at 18:35 (4,939 days old) by 1971ss15 () | ||
|
Sounds to me like it would DEFIANTLY be your safety switch. Check ti make sure that the wires are connected and that its not jammed and the internal contacts are clean.Hope this helps!! | ||
| Post# 121935 , Reply# 3 1/17/2011 at 18:41 (4,939 days old) by eurekastar (Amarillo, Texas) | ||
|
If the cord is new and the motor brushes are new, I would start with the safety switch. There's a slide rivet inside the switch. I've found it missing on vacuums I've acquired. When the rivet is gone, the safety switch button can get pushed down below the contacts. Also, the contacts may be too loose and therefore worn. And of course, a wire may be loose. That's where I would start, because the headlight will come on even if the safety switch is defective in some way. If you want, you can call me. I've worked on a bunch of early 500 machines. Just send me an email and I'll email my phone # to you.
| ||
Post# 122090 , Reply# 4 1/18/2011 at 10:27 (4,938 days old) by a007kirbyman  (--->> Originally My Mom <<--- (now Wisconsin)) (--->> Originally My Mom <<--- (now Wisconsin)) |
||
Justin & Kirby 510...
Hello Justin.
Did the machine run prior to replacing the carbons & cord? If not, was that why you replaced them? If it did, did it run at all since their replacement? If no to those questions about running, then what condition & length were the carbons in when you replaced them? If those are not the issues, then I agree with Bill on starting with the safety switch first. Next would be the armature & field as mentioned above. Feel free to give me a call as well. You have my number. I hope it's something simple. Cheers & hagd all, Bill | ||
| Post# 122176 , Reply# 6 1/18/2011 at 21:50 (4,937 days old) by djtaylor (Salt Lake City, Utah) | ||
|
Confession time...
Well, when I got the 510 in the late '90's I remember taking out the carbon brushes and tossing out the battered cord since I want to have the vacuum as a 'static' display. I don't remember how it ran back then, but I think it did run. I never thought much about it until I joined this forum and wanted to get the 'old girl' running again. I have checked the Safety Switch, and I think everything is there. If someone could take some pics of a working Safety Switch so I can check to see if everything that should be there is. Other wise, is there a replacement for something that old? If I can't get her running again, that's fine. But I'd really like to see her up and running again if possible.
Thanks for all the suggestions. Justin | ||
| Post# 122185 , Reply# 7 1/18/2011 at 22:29 (4,937 days old) by eurekastar (Amarillo, Texas) | ||
|
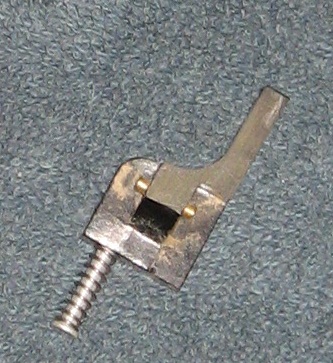
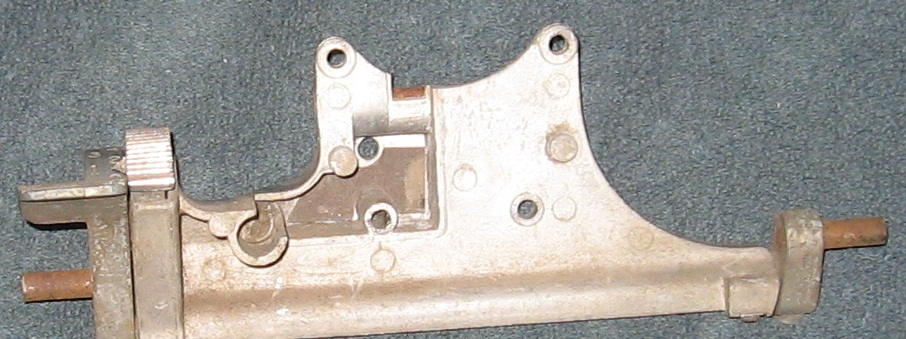
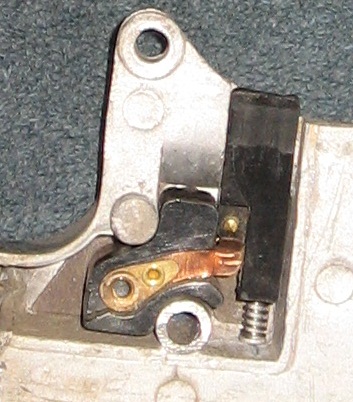
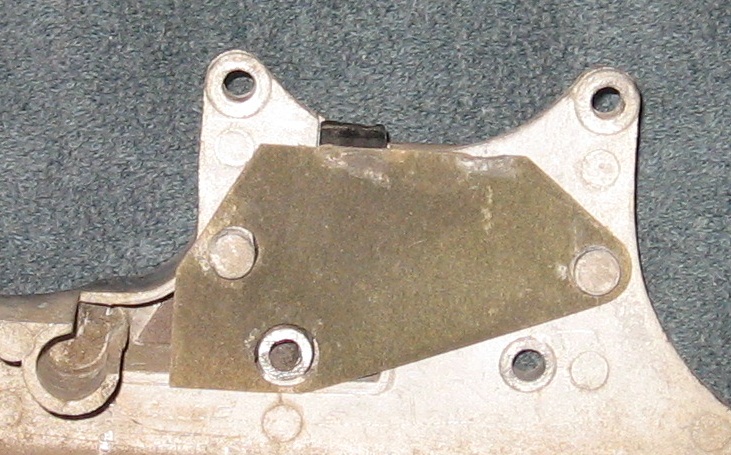
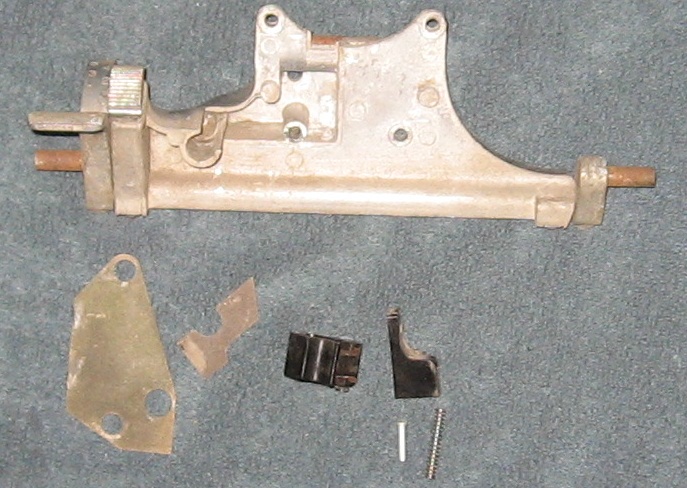
I'll try and get a photo tomorrow. However, besides the two cardboard insulators, there are four basic components to the safety switch: 1) the base (with two screws for the wiring); 2) the switch button itself; 3) the slide rivet (which supports the button); and 4) the slide spring (which causes the button to pop up when the nozzle is taken off). I think the primary thing that wears out in the switch assembly is the base. It has two contacts that get loose over time and will spread too far out. When the button is depressed, the little brass rivet in the button can't make contact in order to close the circuit that will then send electricity to the motor. So the switch base is the most likely culprit. Luckily, those parts are available from Kirby. If that doesn't work, then you'll need to get into the motor. The first thing I would check is to make certain the motor field clips are connected to the brush holders. If they are, then I would get a multimeter and test the continuity on the motor field. If that tests out OK, then I would test the continuity of each field on the armature. I think you know all that. But if you have a bad segment on the motor field OR the armature, then you'll need to replace the whole motor.
| ||
| Post# 122246 , Reply# 8 1/19/2011 at 17:45 (4,937 days old) by eurekastar (Amarillo, Texas) | ||
|
Safety Switch Parts
Here's a photo of all the safety switch parts. I forgot to put the brass screws into the safety switch base, but I know you can figure that out! LOL! The parts you should have are 1) the base; 2) the switch slide; 3) the slide rivet; 4) the spring; 5) the small insulator; and 6) the large insulator.
| ||
| Post# 122247 , Reply# 9 1/19/2011 at 17:46 (4,937 days old) by eurekastar (Amarillo, Texas) | ||
|
| ||
| Post# 122248 , Reply# 10 1/19/2011 at 17:47 (4,937 days old) by eurekastar (Amarillo, Texas) | ||
|
| ||
| Post# 122250 , Reply# 11 1/19/2011 at 17:49 (4,937 days old) by eurekastar (Amarillo, Texas) | ||
|
| ||
| Post# 122253 , Reply# 12 1/19/2011 at 17:51 (4,937 days old) by eurekastar (Amarillo, Texas) | ||
|
| ||
| Post# 122254 , Reply# 13 1/19/2011 at 17:52 (4,937 days old) by eurekastar (Amarillo, Texas) | ||
|
I know you know how all the parts go together. I just thought some others might want to see it all!
This post was last edited 01/19/2011 at 18:30 | ||
| Forum Index: | 
| Other Forums: |

|

|

|

|

|

 Comes to the Rescue!