|
Thread Number: 9377
Legend II All Done!!! |
[Down to Last] |  |
| Post# 102934 7/9/2010 at 23:03 (5,039 days old) by eurekastar (Amarillo, Texas) | ||
|
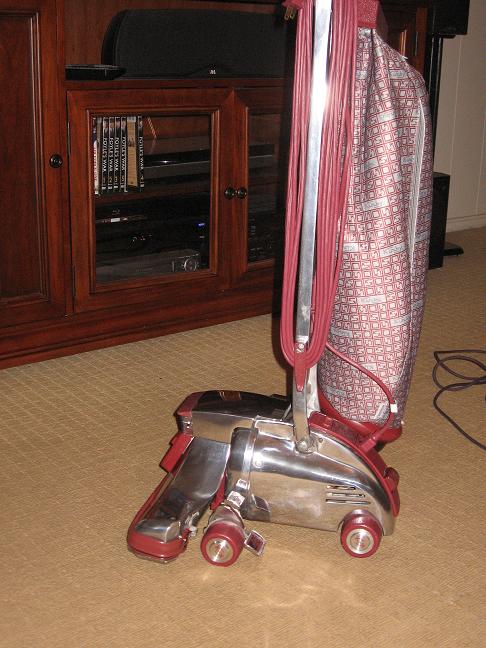
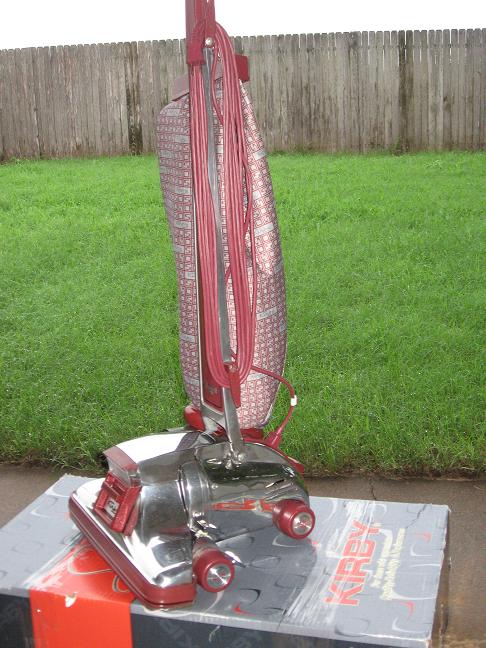
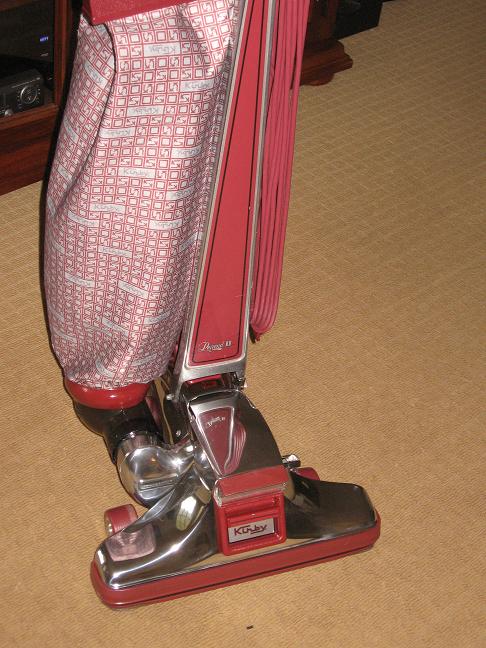
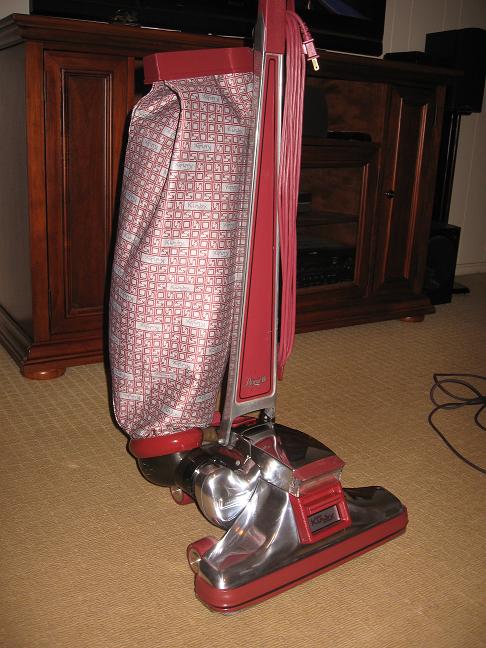
Here is the debut of my $10 Kirby Legend II after its spa treatment. 1) Freshly laundered bag and new fill tube; 2) New impeller (fan); 3) new front and rear bearings; 4) new carbon brushes; 5) new belt lifter assembly; 6) new bumper; 7) new cord; 8) new brush roll and belt; 9) thorough cleaning, which included buffing all the aluminum on a bench polisher. I purchased the green Kirby polishing rouge for the final color finish on the aluminum. It makes a HUGE difference too! It didn't arrive until today, so I was able to use it on all the castings except the rug nozzle. I'd already polished it with another compound and reassembled it. I'll take it apart again tomorrow and give it a nicer mirror finish with the Kirby Green rouge.
| ||
| Post# 102935 , Reply# 1 7/9/2010 at 23:05 (5,039 days old) by eurekastar (Amarillo, Texas) | ||
|
| ||
| Post# 102936 , Reply# 2 7/9/2010 at 23:08 (5,039 days old) by eurekastar (Amarillo, Texas) | ||
|
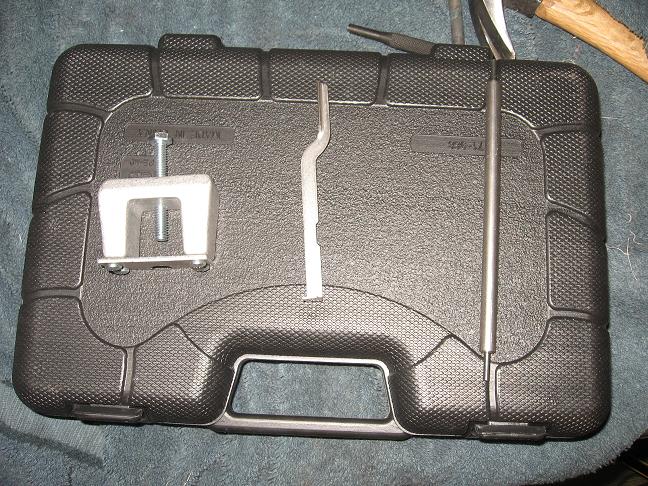
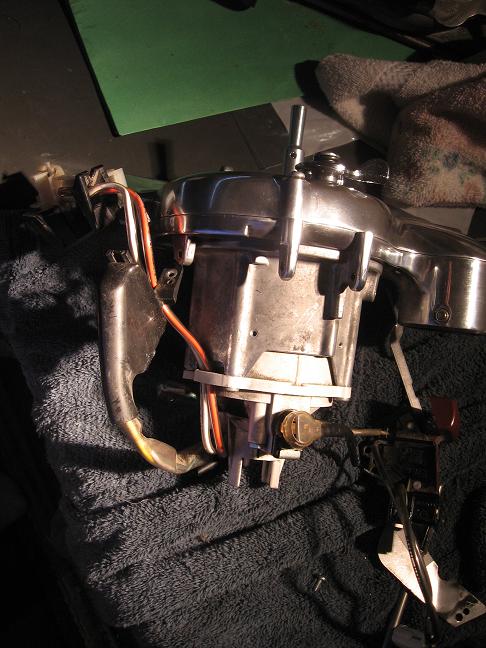
If you ever change a fan on this model Kirby, it requires a special "proprietary" tool from Kirby that slides up onto the armature in order to put it into a bind so the old fan can be removed and new fan installed. I'll try to remember to post a photo of it tomorrow. Also, a Kirby bearing puller comes in handy too.
| ||
| Post# 102941 , Reply# 4 7/10/2010 at 01:01 (5,039 days old) by joe22 () | ||
|
very well done, beautiful !!! | ||
| Post# 102942 , Reply# 5 7/10/2010 at 01:11 (5,039 days old) by gusherb (Chicagoland) | ||
|
That turned out gorgeous!! absolutely pristine, I love it! | ||
| Post# 102970 , Reply# 6 7/10/2010 at 07:44 (5,039 days old) by eurekastar (Amarillo, Texas) | ||
|
| ||
| Post# 102971 , Reply# 7 7/10/2010 at 07:47 (5,039 days old) by eurekastar (Amarillo, Texas) | ||
|
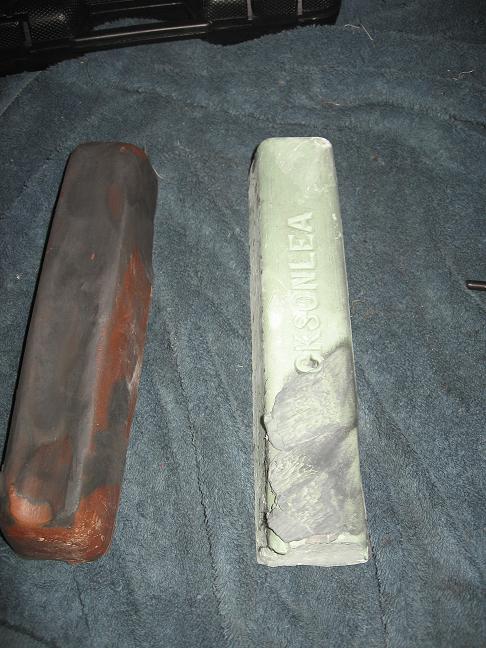
Polishing rouge that Kirby sells to its distributors. I first used some that I bought at Sears. The stuff that Kirby sells is far superior. The ingot on the left is for the first polish to remove oxidation, scratches, and discoloration. 2) the green ingot on the right is used to give a mirror finish.
| ||
| Post# 102972 , Reply# 8 7/10/2010 at 07:50 (5,039 days old) by eurekastar (Amarillo, Texas) | ||
|
| ||
| Post# 102973 , Reply# 9 7/10/2010 at 07:54 (5,039 days old) by eurekastar (Amarillo, Texas) | ||
|
I feel like a dork
The last rebuild that I did, I had someone else service the motor. I did all the rest. However, with this one, I did everything, including changing the bearings and motor brushes. Now that I have experience doing all that, I still can't figure out how to remove the light bulb! I know there's got to be a trick. But for the life of me, I can't figure it out!
| ||
| Post# 102975 , Reply# 10 7/10/2010 at 08:23 (5,039 days old) by eurekastar (Amarillo, Texas) | ||
|
I really am a DORK! | ||
| Post# 102976 , Reply# 11 7/10/2010 at 08:34 (5,039 days old) by luxg () | ||
|
Outstanding job Bill!! | ||
| Post# 102977 , Reply# 12 7/10/2010 at 08:45 (5,039 days old) by riccarlover () | ||
|
WOW... I am handy but not THAT handy! I take my Kirbys in but it is VERY expensive. It must feel good knowing you did all the work yourself and it's up to your standards. Very sharp looking! Clayton :) | ||
| Post# 102979 , Reply# 13 7/10/2010 at 10:22 (5,039 days old) by eurekastar (Amarillo, Texas) | ||
|
| ||
Post# 102980 , Reply# 14 7/10/2010 at 10:39 (5,039 days old) by a007kirbyman  (--->> Originally My Mom <<--- (now Wisconsin)) (--->> Originally My Mom <<--- (now Wisconsin)) |
||
Bill & L II... | ||
| Post# 102988 , Reply# 15 7/10/2010 at 13:05 (5,039 days old) by vac-o-matic (Saint Louis, Mo.) | ||
|
Outstanding.... You did a great job on that! I pay 50.00 to have my Kirby's buffed and yours look just as good if not better! Maybe you should start a mail-order buffing service for members. Rick | ||
| Post# 103022 , Reply# 16 7/10/2010 at 17:14 (5,039 days old) by eurekastar (Amarillo, Texas) | ||
|
Maybe you should start a mail-order buffing service for memb | ||
| Post# 103044 , Reply# 17 7/11/2010 at 01:32 (5,038 days old) by electrolux~137 () | ||
|
Hello, actually if folks only mailed you the disassembled parts they need polishing, shipping may not be too bad -- | ||
| Forum Index: | 
| Other Forums: |

|

|

|

|

|

 Comes to the Rescue!