|
Thread Number: 22902
Is the Kirby Dual Sanitronic 50 a good vacuum? |
[Down to Last] |  |
| Post# 256178 , Reply# 1 11/12/2013 at 22:20 (3,817 days old) by kirbyds50 () | ||
|
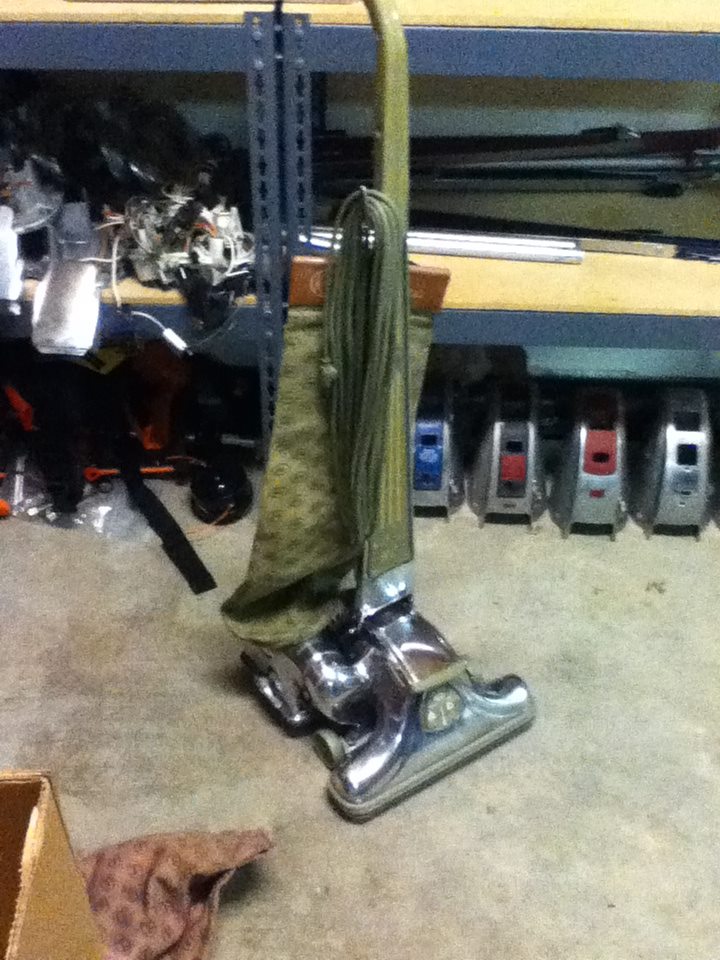
Guess my urls arent working so here are the pics 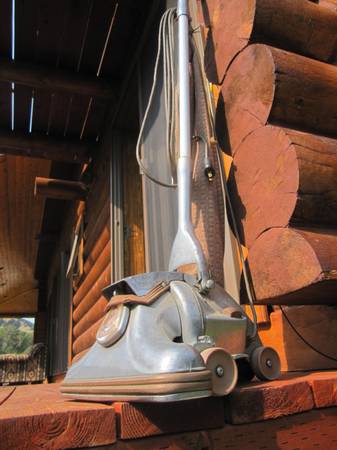
| ||
| Post# 256180 , Reply# 2 11/12/2013 at 22:21 (3,817 days old) by kirbyds50 () | ||
|
Another look 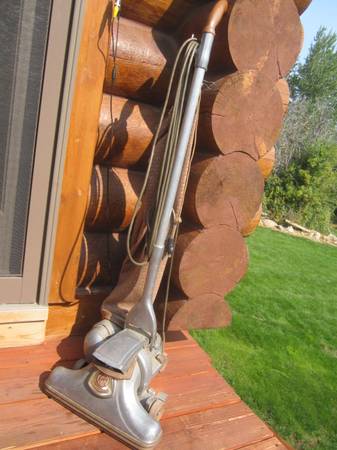
| ||
| Post# 256181 , Reply# 3 11/12/2013 at 22:22 (3,817 days old) by kirbyds50 () | ||
|
And another 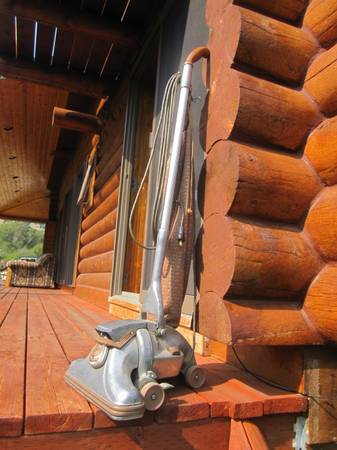
| ||
| Post# 256182 , Reply# 4 11/12/2013 at 22:23 (3,817 days old) by kirbyds50 () | ||
|
And lastly, a good frontal shot. 
| ||
| Post# 256185 , Reply# 5 11/12/2013 at 22:59 (3,817 days old) by kirbykid (Horseheads,New York 14845) | ||
|
Im pretty sure its actually a sanitronic 7. The model before the dual 50. The parts are available, but these kirbys are tanks and rarely need parts. And for 25 bucks, its a great deal. | ||
| Post# 256186 , Reply# 6 11/12/2013 at 23:17 (3,817 days old) by kirbyvertibles (Independence, KS) | ||
 | ||
| Post# 256208 , Reply# 8 11/13/2013 at 10:04 (3,817 days old) by rugsucker (Elizabethton TN) | ||
|
Kirby Sanatronic Agree with above that if it has good fan and motor with service and cleaning it should look and work great.If the sellers cabin is all wood inside it is wrong for a non carpet house.The cloth bag is not as clean as newer paper and hepa types but could be changed if you wanted. | ||
| Post# 256215 , Reply# 9 11/13/2013 at 12:28 (3,817 days old) by dysonman1 (the county) | ||
Keep in mind that it's a fifty year old vacuum. You have no idea how much wear the motor has already taken. Carbon brushes in the motor are good for about 700 hours before they're worn out. The brush could be down to nubs by now. The bearings will almost certainly have to be changed. It's rare to find a machine that old that doesn't need any work. While many people say a Kirby will last "forever" - I've fixed thousands of Kirby vacuums in my lifetime (owned my own vac shop) and they do indeed wear out and are somewhat expensive to fix. Your $25 bargain could wind up costing more than a new vacuum by the time you refurbish it. The filtration is terrible through that cloth bag and disposable bags are not available for it. Once rebuilt, the Kirby will indeed by beautiful.
| ||
| Post# 256272 , Reply# 12 11/14/2013 at 07:27 (3,816 days old) by kirbyds50 () | ||
|
Also, what polish would be best to shine it up? I've detailed cars and what we always used on chrome bumpers was turtle wax chrome polish, seems to work wonders. But, not sure if I should use this on the vac or not so I figure I'll leave it to the experts. | ||
| Post# 256274 , Reply# 13 11/14/2013 at 08:41 (3,816 days old) by dustin (Jackson, MI) | ||
 | ||
| Post# 256280 , Reply# 14 11/14/2013 at 10:53 (3,816 days old) by kirbyds50 () | ||
|
Yeah, mothers is good stuff. I use it on aluminum wheels and such and have some in my shop. Going to jump on it and get this thing shiny! | ||
| Post# 256326 , Reply# 15 11/15/2013 at 00:28 (3,815 days old) by kirbyds50 () | ||
|
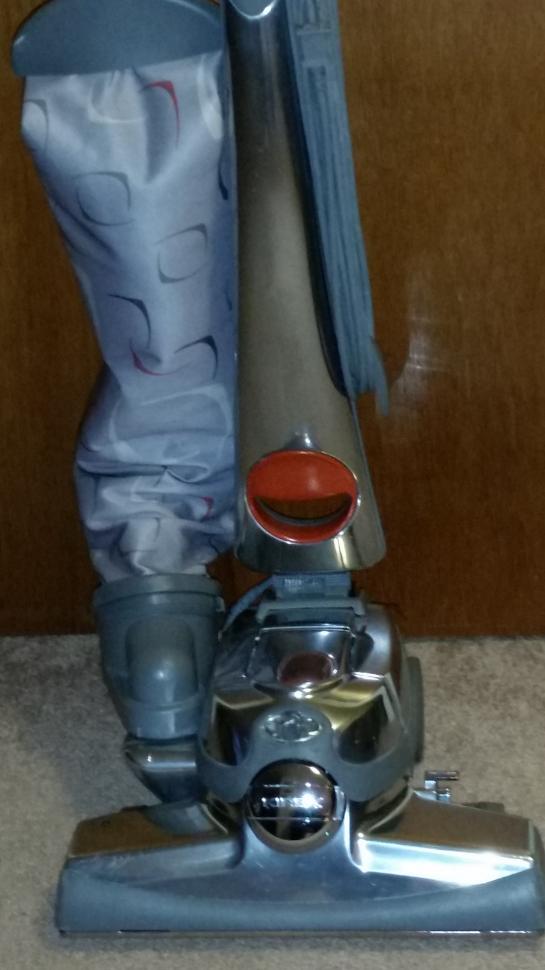
Some more pics of my Kirby, if anyone has ever watched the Brave Little Toaster, this vac looks just like the Kirby in that movie! The D80 looks even more like Kirby because of the green. 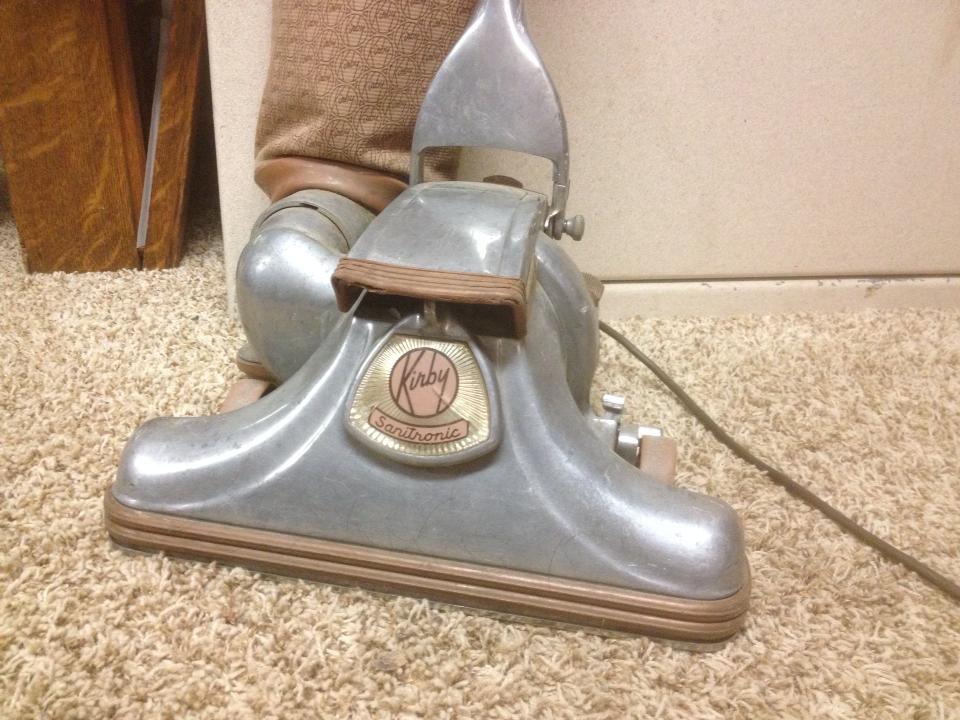
| ||
| Post# 256327 , Reply# 16 11/15/2013 at 00:30 (3,815 days old) by kirbyds50 () | ||
|
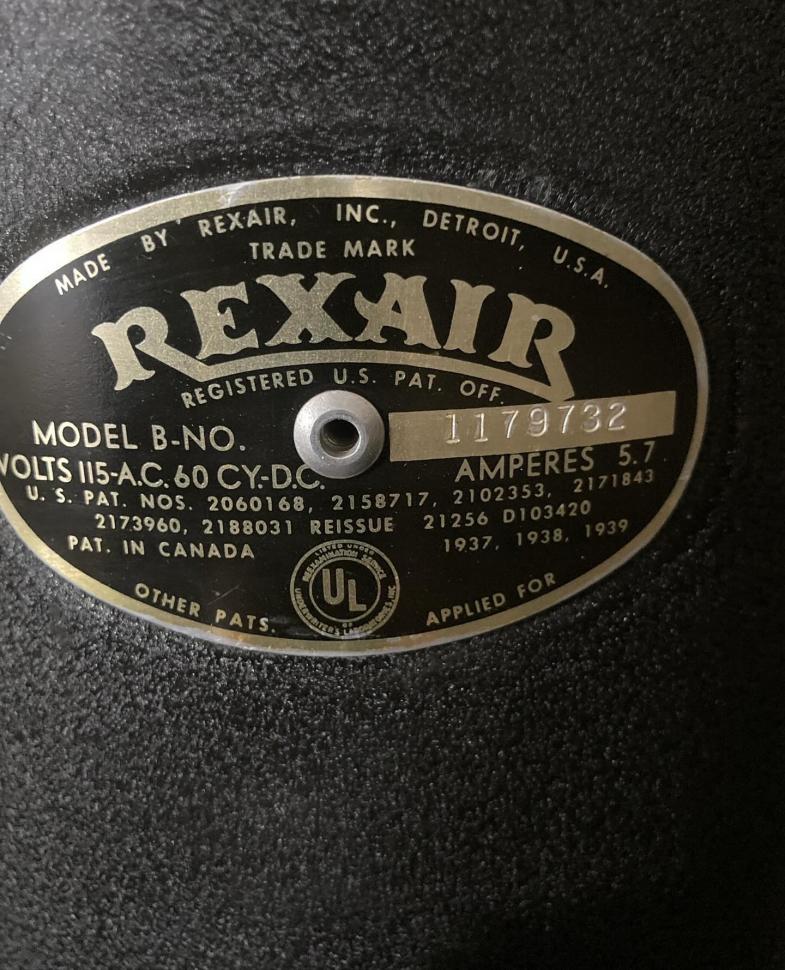
The plate on the bottom, is there a way to decipher how old this thing is by looking at those numbers, any of you Kirby experts? 
| ||
| Post# 256328 , Reply# 17 11/15/2013 at 00:35 (3,815 days old) by kirbyvertibles (Independence, KS) | ||
|
| ||
| Post# 256331 , Reply# 18 11/15/2013 at 01:12 (3,815 days old) by kirbyds50 () | ||
|
I think there may be something wrong with it. Does not seem to have much suction? It picks things up but not like I thought it would. Bag is empty, is there anything else I can try? | ||
Post# 256336 , Reply# 19 11/15/2013 at 02:18 (3,815 days old) by KirbyClassicIII  (Milwaukie, Oregon) (Milwaukie, Oregon) |
||

Jon,
Your problems may be one or more of the following: TROUBLE: Motor runs slow with little suction or power. PROBABLE CAUSE: (a) Defective armature; (b) Dirty or defective brushes REMEDY: (a) Replace armature; (b) Check brushes If a new armature is needed, procure part no. 114960 or 114967. If new carbon brushes are needed, procure part no. 118067. ~Ben | ||
| Post# 256342 , Reply# 21 11/15/2013 at 05:04 (3,815 days old) by kirbymodel2c (Nottingham, England) | ||
Hi, | ||
| Post# 256378 , Reply# 22 11/15/2013 at 17:47 (3,814 days old) by kirbyds50 () | ||
|
Does anyone know what kind of lighbulb I need? I sabotaged the old one getting it out, the glass was busted from the base so I had to use pliers to get the base out and there's no way to tell what it was and the bulb itself has no writing on it. | ||
| Post# 256381 , Reply# 23 11/15/2013 at 18:00 (3,814 days old) by super-sweeper (KSSRC Refurbishment Center) | ||
|
You'll need one like this, | ||
| Post# 256384 , Reply# 24 11/15/2013 at 18:08 (3,814 days old) by kirbyds50 () | ||
|
That's the problem, I live in a very small town and we don't have any vac stores, but I will go down to the auto parts store. Sure they have something like that. Thanks! | ||
|
Post# 256388 , Reply# 25 11/15/2013 at 18:56 (3,814 days old) by KirbyClassicIII (Milwaukie, Oregon) |
||
|
| ||
|
Post# 256389 , Reply# 26 11/15/2013 at 18:59 (3,814 days old) by KirbyClassicIII (Milwaukie, Oregon) |
||
|
Jon,
One credible eBay store to obtain rare Kirby parts from is called "Kirby Needs." http://www.ebay.com/itm/Kirby-110v-Vacuu... ~Ben | ||
| Post# 256398 , Reply# 28 11/15/2013 at 23:57 (3,814 days old) by super-sweeper (KSSRC Refurbishment Center) | ||
|
The internal spring may be loose, or worn. | ||
|
Post# 256400 , Reply# 29 11/16/2013 at 00:52 (3,814 days old) by KirbyClassicIII (Milwaukie, Oregon) |
||
|
Jon,
You will need at least one of the following parts to make your handle fork work like new: 1005 - handle fork pin spring clip 135860 - shell bushing (left hand), large 135960 - shell bushing (right hand), small 136373 - handle fork spring bushing clip 137067 - handle fork spring 137173 - handle fork spring shaft 137273 - handle fork spring bushing 137373 - handle fork spring bushing screw 137579 - handle fork spring yoke ~Ben | ||
|
Post# 256401 , Reply# 30 11/16/2013 at 01:09 (3,814 days old) by KirbyClassicIII (Milwaukie, Oregon) |
||
|
Jon,
One more thing about the handle spring: you will need to use a special tool to get it off. It is part no. SP123. These are the steps to replace it (applies to models 516 to D80): A. DISASSEMBLY (1) Remove the housing shell. (2) If the spring is not broken, it is first necessary to relieve the tension from the handle spring. Remove the spring bushing clip (136356, 136367 or 136373). Engage the pin of the spring tool (SP123) with one of the slots on the outer surface of the spring bushing (137256 or 137273). Hold tension on the spring tool and pry the bushing to the side far enough to allow the spring yoke (137556 or 137579) to be disengaged from the spring bushing; turn the spring tool to relieve the tension. (3) Remove the screw (137356 or 137373) from the spring bushing and remove the spring clip (1005) from the spring shaft. (4) Pull the spring bushing, spring yoke, fiber washer (137456), spring shaft (137156 or 137173) and handle spring (137056 or 137067) from the housing shell (135556S, 135562S or 135567S). (5) Remove the screw (137756) and the spring spreader (137656) from the housing shell. (These two parts may or may not be present on your machine.) (6) If the bushings (135860 or 135960) are damaged or excessively worn, press them from the housing shell. Be sure that the housing shell is properly supported to prevent cracking or breaking it. (7) If any of the handle lock parts require replacement, the handle lock should be disassembled at this time. B. INSPECT THE PARTS FOR CRACKS, DISTORTION, OR EXCESSIVE WEAR. REPLACE ALL NON-SERVICEABLE PARTS. C. REASSEMBLY (1) Position the spring spreader (137656) in the housing shell (135556S); secure with the screw (137756). (The spring spreader and its screw may or may not be present on your machine.) (2) If the bushings (135860 and 135960) were removed, press new bushings into place so that they are flush with the outside edge of the housing shell. (3) Slide the spring shaft (137156 or 137173) into the spring shaft bushing (137256 or 137273) so that the screw holes are aligned one over the other. (4) Position the spring yoke (137556 or 137579) and fiber washer (137456) on the assembled spring shaft and bushing. (5) Position the handle spring (137056 or 137067) in the housing shell so that it is aligned with the spring shaft bore and the straight end is on the side toward the small bushing; insert the spring shaft and assembled parts through the large bushing and through the spring. (6) Check that the screw holes of bushing and spring shaft are still in alignment; install the shouldered screw (137356 or 137373). Hook the looped end of the handle spring on the shouldered screw. (7) Engage the pin of the spring tool (SP123) with one of the slots on the outer surface of the bushing. Rotate the bushing until the lip of the spring yoke can be engaged in the second or third slot of the bushing. This is determined by the amount of tension desired. Push the bushing all the way in and lock in place by installing the spring bushing clip (136356, 136367 or 136373) inside the housing shell. (8) Install the spring clip (1005) on the spring shaft so that the flat side of the clip is in the slot of the spring shaft. (9) Install the housing shell and foot switch button. ~Ben | ||
| Post# 256600 , Reply# 32 11/17/2013 at 09:40 (3,813 days old) by kirbyds50 () | ||
|
What is the correct tool? | ||
|
Post# 256635 , Reply# 33 11/17/2013 at 12:42 (3,813 days old) by KirbyClassicIII (Milwaukie, Oregon) |
||
|
| ||
| Post# 256973 , Reply# 34 11/19/2013 at 20:03 (3,810 days old) by kirbyds50 () | ||
|
Started polishing a few minutes ago. It's definitely gonna take some love to get Kirby to shine like new, as you can see, I already destroyed one rag just polishing the cap. 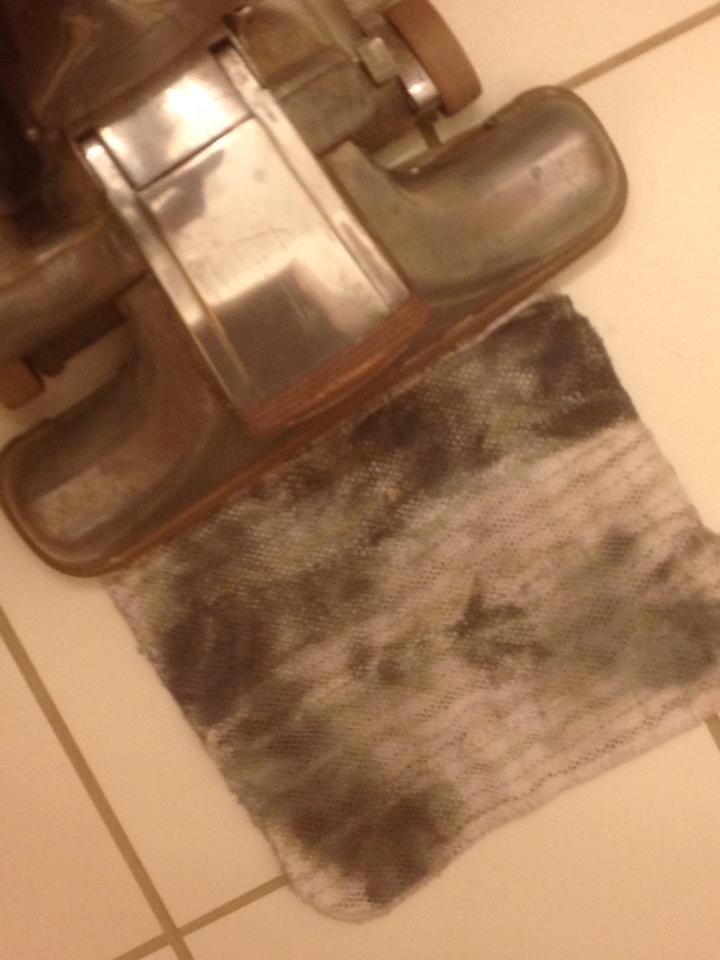
| ||
| Post# 257094 , Reply# 36 11/20/2013 at 22:40 (3,809 days old) by kirbyds50 () | ||
|
So I got a new belt for this thing, but how the heck do I put it on? I figured out how to get the roller off and everything, but the new belt is being stubborn or I am just an idiot. Can anyone direct me to a video tutorial or pictorial writeup? | ||
|
Post# 257097 , Reply# 37 11/20/2013 at 22:55 (3,809 days old) by KirbyClassicIII (Milwaukie, Oregon) |
||
|
Jon,
This is how you remove/install a belt on a Kirby: TO REMOVE BRUSH ROLL FROM RUG NOZZLE (assuming belt lifter is in "OFF" position before you perform the first step) 1. Remove nozzle from motor unit. 2. Turn belt lifter to "ON" position. 3. Swing Rug Guard from nozzle on hinges. 4. Spread support brackets by bending slightly away from Brush Roll. The brush may then be removed for cleaning. 5. Use scissors to cut string, thread or hair which may be wrapped around the brush roll. An old comb is also useful in removing foreign matter embedded in brush tufts. REPLACEMENT OF BRUSH ROLL 1. Place ends of Brush Roll into support brackets - one end is wider than the other so it can be replaced only the correct way. 2. Bend the support brackets back into place. 3. Make sure belt is positioned in center of Brush Roll. 4. Swing Rug Guard back into the nozzle - it will snap into place. It will be necessary to depress the belt slightly as this is done. A new belt will be stiff and some resistance will be felt as you pick it up with the Belt Lifter hook. ~Ben | ||
|
Post# 257098 , Reply# 38 11/20/2013 at 22:58 (3,809 days old) by KirbyClassicIII (Milwaukie, Oregon) |
||
|
| ||
| Post# 257105 , Reply# 39 11/20/2013 at 23:41 (3,809 days old) by kirbyds50 () | ||
|
I am having a hard time getting it onto the shaft for some reason. | ||
|
Post# 257108 , Reply# 40 11/21/2013 at 00:03 (3,809 days old) by KirbyClassicIII (Milwaukie, Oregon) |
||
|
Jon,
The belt must be mounted onto the nozzle while off of the machine. You may need to center the belt a little after the rug guard is locked in place. Then carefully turn the lifter (to the "off" position) so it grabs the belt, and you may feel resistance doing so... this is where you must be real careful. ~Ben | ||
| Post# 257210 , Reply# 41 11/21/2013 at 23:29 (3,808 days old) by kirbyds50 () | ||
|
The polishing is coming right along, still a good couple more hours of work left before I'll be satisfied, but what little I've already done has scrubbed about 5 pounds of ugly off this thing. 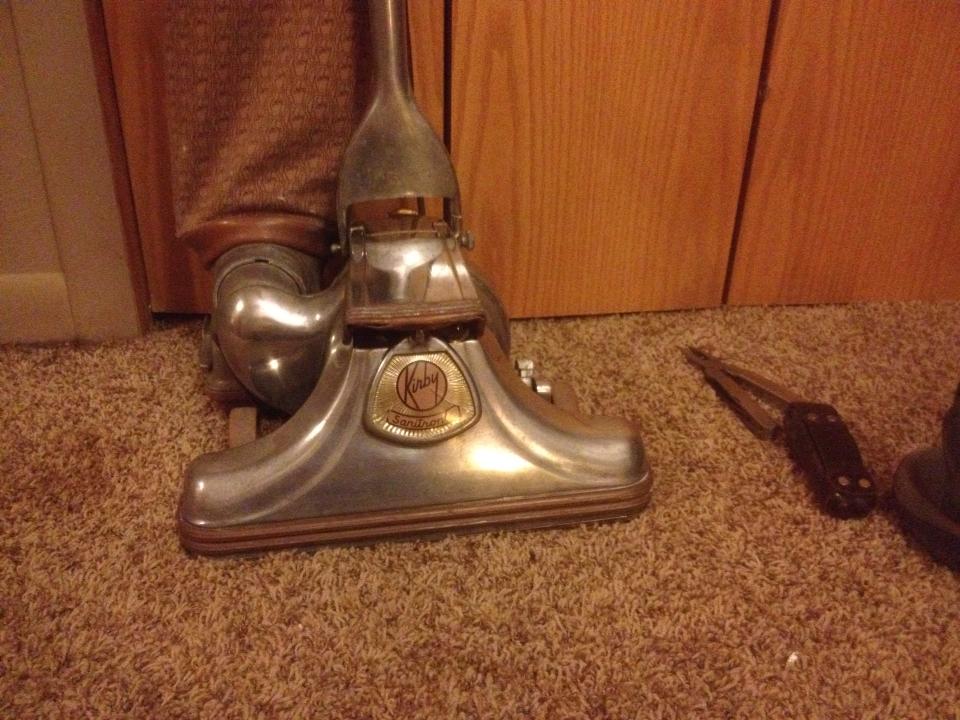
| ||
|
Post# 257215 , Reply# 43 11/22/2013 at 00:08 (3,808 days old) by KirbyClassicIII (Milwaukie, Oregon) |
||
|
Jon,
Kirby Sanitronic tan trim vacuum history: 562 = 1962-1963 Sanitronic VII = 1963-1965 Dual Sanitronic 50 = 1965-1967 Yours is from the 1963-1964 production season, because the Kirby logo on the nameplate is the circle logo, not the oval one (even though that logo was used in the instruction book and also was featured prominently on all packaging for this model). The 1964-1965 season models would have the oval Kirby logo on the nameplate. The Dual Sanitronic 50's bag had ovals but in the same closely-spaced pattern as the circles. The D50 also was the first Kirby with a two-speed motor (the higher speed reserved for the hose when connected to the front). ~Ben (KirbyClassicIII) | ||
| Post# 257370 , Reply# 44 11/23/2013 at 11:12 (3,807 days old) by kirbyds50 () | ||
|
Finally got the belt wrestled on there and wow, what a difference that made. | ||
|
Post# 263597 , Reply# 45 1/16/2014 at 15:49 (3,752 days old) by KirbyClassicIII (Milwaukie, Oregon) |
||
|
| ||
| Post# 263598 , Reply# 46 1/16/2014 at 16:04 (3,752 days old) by luxman107 (USA ) | ||
|
Love your log cabin. We have one in the north Ga mountains. Love it there | ||
| Post# 266523 , Reply# 47 2/6/2014 at 22:22 (3,731 days old) by kirbyds50 () | ||
|
A ds80 is my next project, I see them go on ebay in good condition very reasonable. Hoping to pick one up soon, but I think the sanitronic 7 will still outperform the 80 simply because of the metal fan. | ||
| Post# 266622 , Reply# 48 2/7/2014 at 19:48 (3,730 days old) by kirbyds50 () | ||
|
So today I tried to fire up the kirby to vac the living room and it came on briefly then shut off and wouldnt come back on again. Any idea what happened guys? | ||
|
Post# 266625 , Reply# 49 2/7/2014 at 21:21 (3,730 days old) by KirbyClassicIII (Milwaukie, Oregon) |
||
|
| ||
| Post# 266626 , Reply# 50 2/7/2014 at 21:22 (3,730 days old) by super-sweeper (KSSRC Refurbishment Center) | ||
|
Perhaps, | ||
| Post# 266633 , Reply# 51 2/8/2014 at 03:04 (3,730 days old) by kirbyds50 () | ||
|
I will look into those things, awfully suspicious of the cord. One design flaw of these things, you barely step on the cord while vacuuming and it pops out. Other than that, its a real good machine and I look forward to getting a 80! | ||
| Post# 334176 , Reply# 53 9/18/2015 at 07:54 (3,143 days old) by moderneezer (Gatineau, Quebec, Canada) | ||
|
| ||
| Post# 334203 , Reply# 54 9/18/2015 at 14:14 (3,143 days old) by sptyks (Skowhegan, Maine) | ||
 | ||
| Post# 334207 , Reply# 55 9/18/2015 at 14:47 (3,143 days old) by super-sweeper (KSSRC Refurbishment Center) | ||
|
| ||
| Forum Index: | 
| Other Forums: |

|

|

|

|

|

 Comes to the Rescue!