|
Thread Number: 17784
Rainbow D2 repair |
[Down to Last] |  |
Post# 193069 8/3/2012 at 14:55 (4,283 days old) by kloveland  (Tulsa) (Tulsa) |
||
|
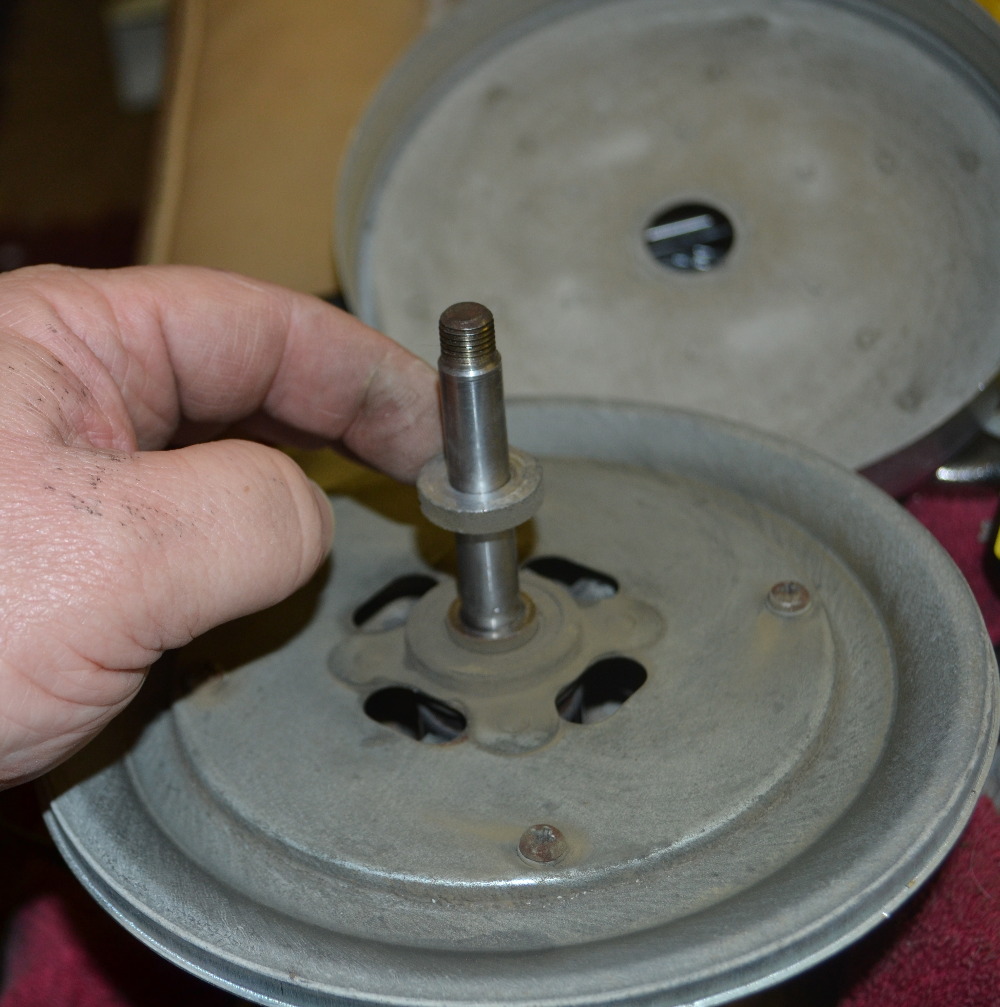
Last weekend I purchased a Rainbow D2 from an Estate Sale. It didn’t run and I only paid $6.00 for it. Took it home and checked the wiring and switch with a tester and it passed. Turned on the power and started spinning the separator after a couple of try’s the motor eventually started on its own. I’ve already checked the carbon brushes and they checked out fine. The problem has become progressively worse and the motor won’t start on its own after a cold start. Sometimes, I have to slam the motor on a hard surface a few times and it will start spinning. I’m thinking the bearings are probably bad since there is some resistance when I spin the separator or the armature is bad. I’ve already tried taking the nut off of the spider (under the separator) but it seems to be frozen. The motor unit is basically trash as it has some dents and rust in the chrome. I imagine the bearings will be hard to replace. Any suggestions? Eurekastar? | ||
| Post# 193082 , Reply# 1 8/3/2012 at 15:33 (4,283 days old) by eurekastar (Amarillo, Texas) | ||
|
Kenny, in the D2, both bearings are especially vulnerable to moisture corrosion because the motor is designed to suck air directly though the motor itself instead around the periphery. That leaves both bearings exposed to moisture if the motor unit is left on the water basin. Hot bearings will quickly draw moisture. It sounds like the bearings are seizing. If you can get that nut off the seperator, you should be able to open it up and take the armature out. I would then test the motor field for continuity. If that checks out OK, I would then test each segment on the armature with an ohm meter. It's a little tedious, but it doesn't take long. If each segment has strong continuity, then the armature is good. If the brushes are OK, then all you'd need are new bearings. That lower bearing is pretty cheap, but the bearing plate is pretty pricey. It will set you back $50 to $85, depending on where you buy it. If you buy one, be careful not to get the one for a D3. They are different! (see D2 bearing plate in photo) Once get that spider nut off, you should be able to remove the nut on top of the fan assembly. The stage housing for each fan on the D2 can be a bit challenging to remove. I just use a thin flat blade screw driver and gently tap all around the perimeter until each one loosens. Patience is the key! The spacers can get stuck on the armature shaft too. But again, patience, penetrating oil, and a good vice grip will help a lot! Be careful not to mess up the armature shaft, because that will make it harder to get the bearings and spacers on/off. Plus, I think gouges and nicks can make it run off balance and that's not good for the motor! Hope this helps! 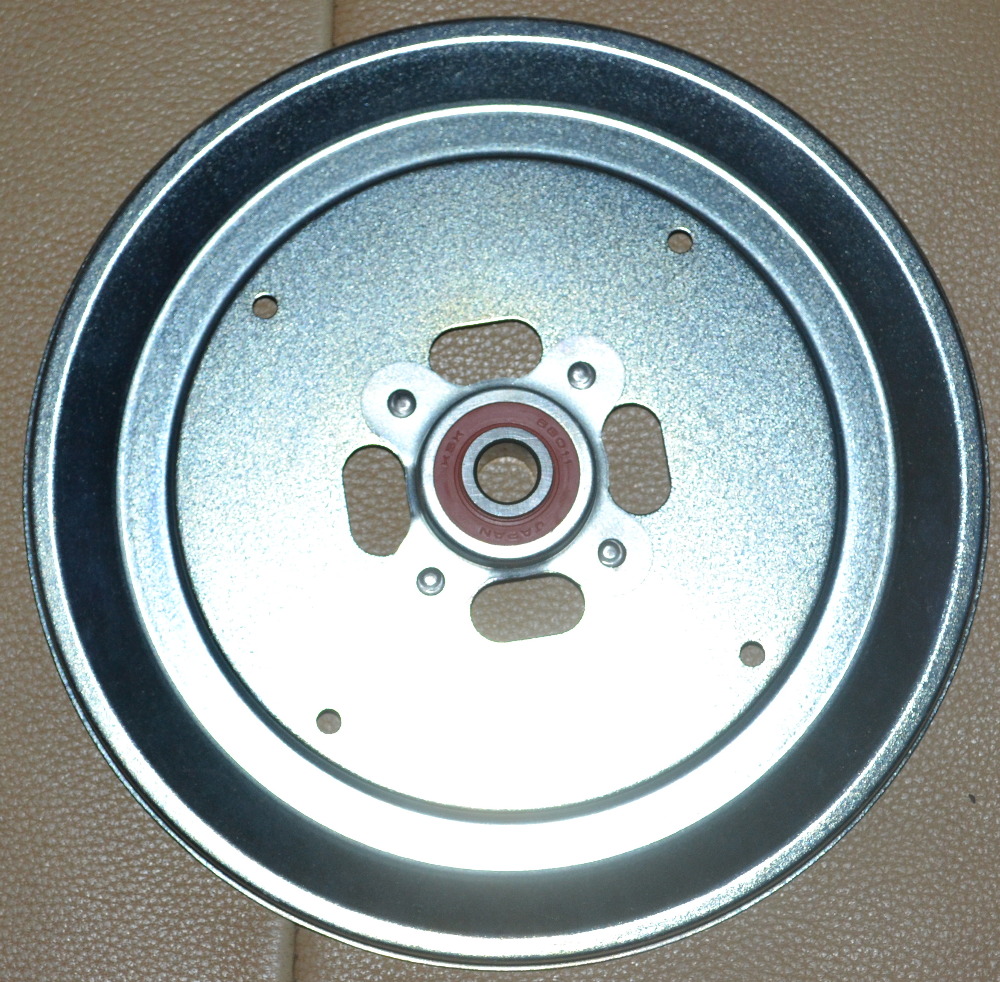
| ||
|
Post# 193090 , Reply# 2 8/3/2012 at 16:11 (4,283 days old) by kloveland (Tulsa) |
||
|
Thanks Bill, So after I remove the separator I should be able to remove the spider, which looks like a large flat head screw driver should be able to fit into it. Hopefully I can replace the bottom bearing without having to remove the fan assembly. If not, I may just wait until I find another motor unit.
Removing the fans sounds like a real pain! Thanks Bill. | ||
| Post# 193097 , Reply# 3 8/3/2012 at 16:47 (4,283 days old) by eurekastar (Amarillo, Texas) | ||
|
Yes, sir. Once you remove the spider, you'll find 4 screws. Remove those screws to remove the bearing shield. Once you've removed that, you can then remove the slinger ring and that will expose the bearing. However, I'm not sure you'll be able to remove the lower bearing then. In fact, on the D2 motor I rebuilt, the bearing was stuck to the shaft so I had the gently tap the armature off. Only then could I pop the bearing out from the inside. I'm trying to remember, but I think there are two identical bearing retainers -- one on the inside and one on the outside. 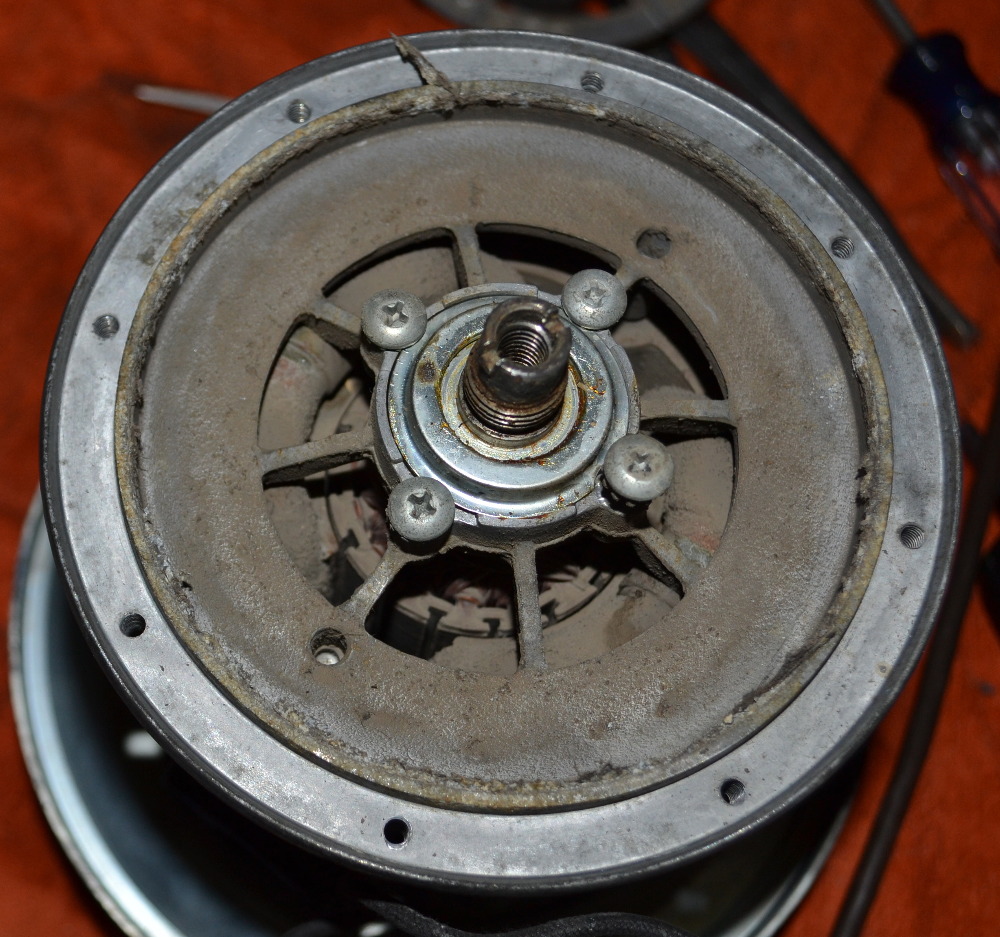
| ||
|
Post# 193100 , Reply# 4 8/3/2012 at 17:12 (4,283 days old) by kloveland (Tulsa) |
||
|
Thanks Bill, | ||
| Post# 193135 , Reply# 5 8/3/2012 at 21:06 (4,283 days old) by eurekastar (Amarillo, Texas) | ||
|
Kenny, You're welcome! | ||
| Post# 194233 , Reply# 6 8/10/2012 at 22:32 (4,276 days old) by eurekastar (Amarillo, Texas) | ||
|
Hey Kenny! Did you ever get a chance to get it all apart? Should you decide to service it by replacing the bearings, please note that the lower bearing is no longer available from Rainbow. However, I can point you toward a source for that bearing. It's not genuine Rainbow, but it is Japanese made and just as good if not better. Also, I found the rest of my photos of the tear down. There is another slinger ring and bearing shield on the back of the bearing too. You can see it in this photo. 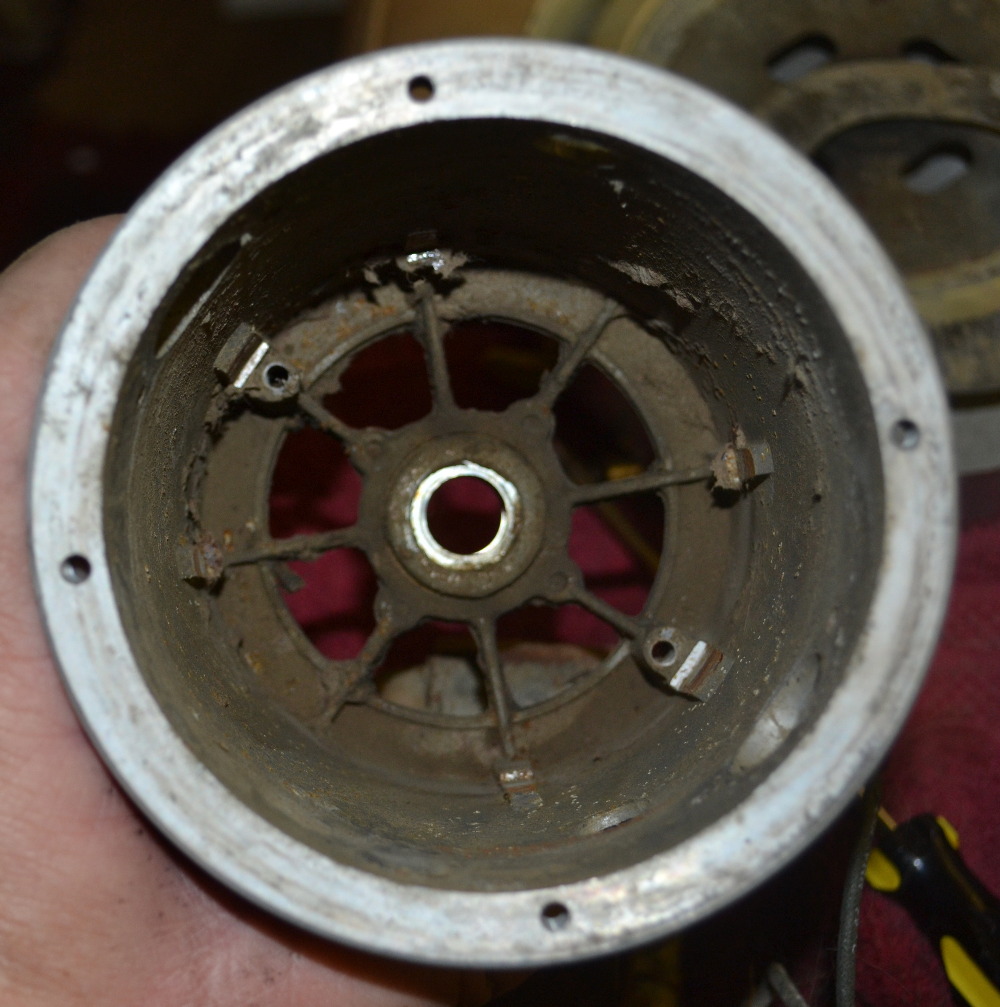
| ||
| Post# 194234 , Reply# 7 8/10/2012 at 22:35 (4,276 days old) by eurekastar (Amarillo, Texas) | ||
|
| ||
| Post# 194264 , Reply# 8 8/11/2012 at 03:21 (4,275 days old) by kirbyvertibles (Independence, KS) | ||
 | ||
| Post# 194274 , Reply# 9 8/11/2012 at 07:16 (4,275 days old) by eurekastar (Amarillo, Texas) | ||
|
Pentrating Oil and an Impact Driver Yes, sir! Those screws can get frozen. But penetrating oil and an impact driver, combined with patience, will work wonders. Fortunately, you can make direct impact, which makes it so much easier. I'm working on a D2 with a power nozzle right now, and I encountered that problem. Although, I think those housings are made of aluminum. Therefore, I would use care in the amount of impact to apply. I've worked on older 500 series Kirby vacuums with that problem. I ended up heating the screw and then letting it cool in order to break up the underlying rust. | ||
| Forum Index: | 
| Other Forums: |

|

|

|

|

|

 Comes to the Rescue!