|
Thread Number: 9496
Kirby Classic III -- All Finished!!! |
[Down to Last] |  |
| Post# 104131 7/23/2010 at 18:23 (5,022 days old) by eurekastar (Amarillo, Texas) | ||
|
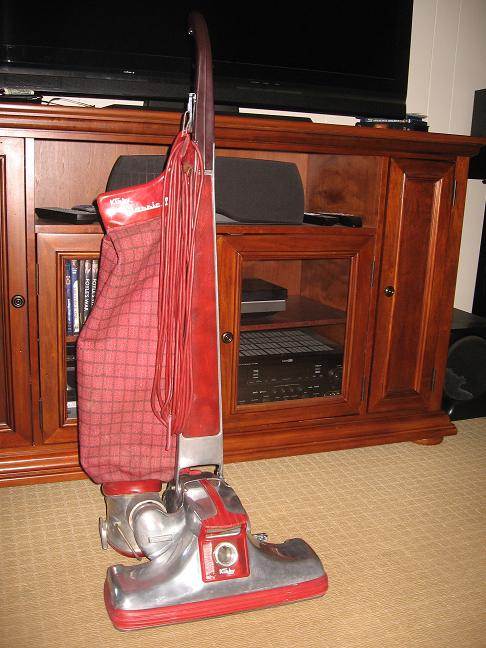
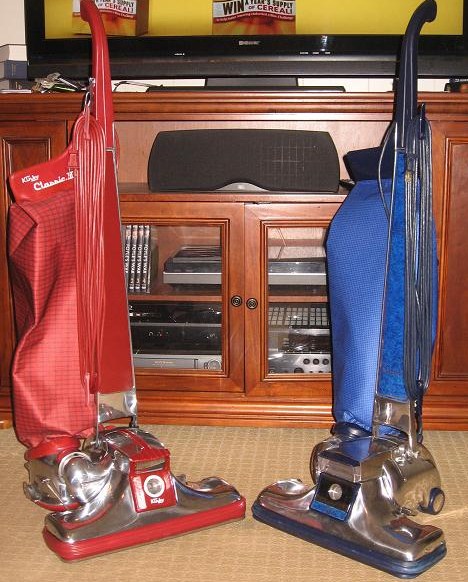
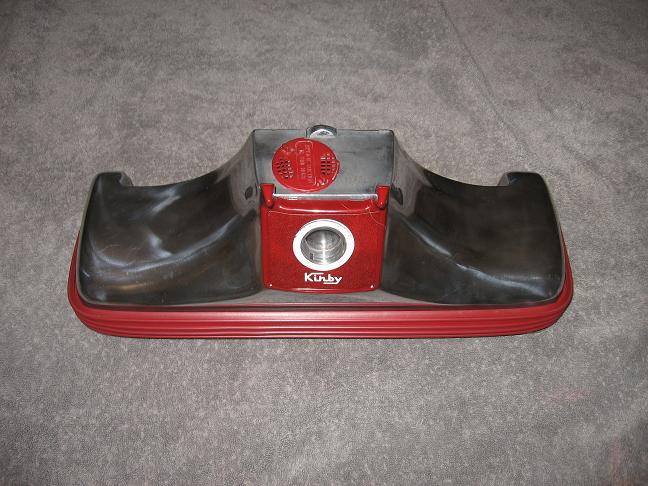
Well almost . . . I had the day off, so I spent the day disassembling the vacuum, thoroughly washing everything, and polishing the castings. I'll reassemble everything tomorrow and post a photo. I ended up using the original handle fork. I thought I would be clever and harvest one from a Heritage series vacuum so the cord winder would be on the left, opposite the bag. I cleaned and polished the handle and got ready to assemble it when I discovered that the screw hole for the handle back is in a different place. I thought about ordering a handle back for a Legend II since it's the same color, but I really don't want to wait for it! So I'll just keep it all original. The fan was a *&^%#%@&@* to get off! But nothing that a vice gripe and a little muscle can't handle! The rug plate needs a new gasket, so that's on order. I'll just use the rug plate from my Tradition until the new gasket arrives. 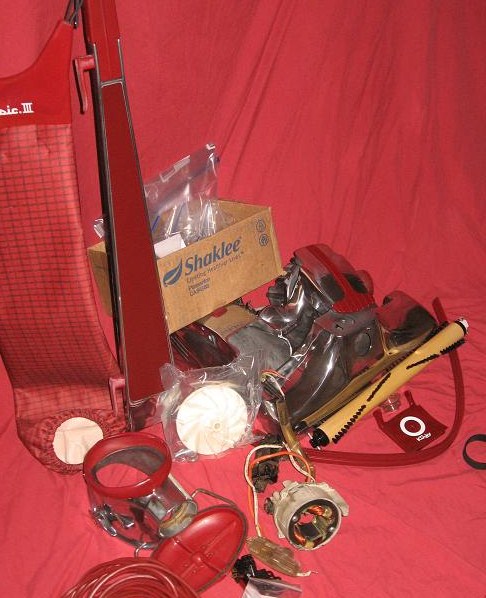
| ||
| Post# 104132 , Reply# 1 7/23/2010 at 18:26 (5,022 days old) by eurekastar (Amarillo, Texas) | ||
|
And for comparison . . . | ||
| Post# 104133 , Reply# 2 7/23/2010 at 18:29 (5,022 days old) by eurekastar (Amarillo, Texas) | ||
|
Bonus | ||
| Post# 104134 , Reply# 3 7/23/2010 at 18:32 (5,022 days old) by eurekastar (Amarillo, Texas) | ||
|
By the way | ||
| Post# 104144 , Reply# 4 7/23/2010 at 20:27 (5,022 days old) by kirbykid63 (Wilmington Delaware) | ||
|
Nice buffing I ordered some green and brown buffing compound from my kirby dealer to use with my 1hp sears bench buffer. I was impressed with the way my G5 came out it looks like new. | ||
| Post# 104153 , Reply# 5 7/23/2010 at 22:23 (5,022 days old) by eurekastar (Amarillo, Texas) | ||
|
With Satellite Service . . .
I decided to go ahead and assemble the belt lifter and put it on the nozzle. This belt lifter assembles in a completely different way than the Heritage and G series belt lifters. And like a dork, I put the hook on upside down and then assembled everything to the nozzle before I realized I had done it wrong. Luckily the adhesive on the label hadn't cured, so I was able to peel it off without messing it up. There are two retaining clips, one on the outside under the label, and the other one on the underside.
| ||
| Post# 104154 , Reply# 6 7/23/2010 at 22:24 (5,022 days old) by eurekastar (Amarillo, Texas) | ||
|
Oops! | ||
| Post# 104186 , Reply# 7 7/24/2010 at 14:32 (5,021 days old) by eurekastar (Amarillo, Texas) | ||
|
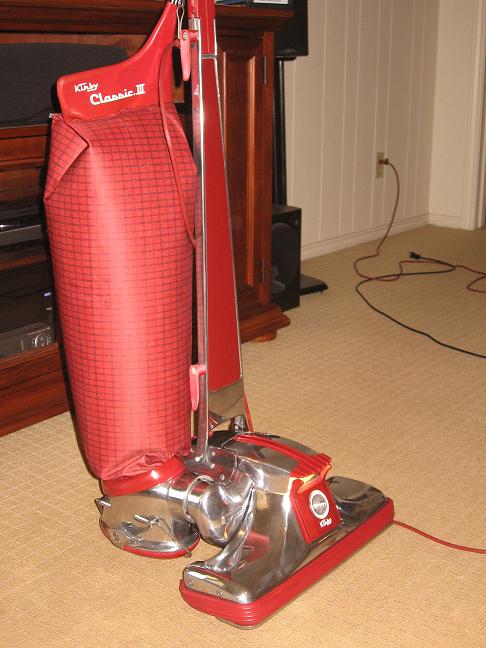
And here she is . . . | ||
| Post# 104187 , Reply# 8 7/24/2010 at 14:40 (5,021 days old) by eurekastar (Amarillo, Texas) | ||
|
Each machine I've rebuilt has been a learning experience. The one thing I can't quite figure out is how to install this little clip on the headlight hinge pin. It puts tension on the headlight assembly so it stays up. I got frustrated and quite fooling with it. This machine has a new bag, nozzle bumper, headlight trim, handle, handle label, four row brush roll, front and rear bearings, motor brushes, motor brush caps, impeller (fan), Sani-Emptor gasket, and fan case gasket. I had to order a new gasket for the rug plate too. But it's not here yet. So for now, this machine is borrowing the rug plate from my Kirby Tradition.

| ||
| Post# 104188 , Reply# 9 7/24/2010 at 14:42 (5,021 days old) by eurekastar (Amarillo, Texas) | ||
|
| ||
| Post# 104194 , Reply# 10 7/24/2010 at 15:41 (5,021 days old) by electroluxkirby () | ||
|
She sure is purdy! | ||
Post# 104219 , Reply# 11 7/24/2010 at 20:31 (5,021 days old) by compactelectra  (Palm Springs) (Palm Springs) |
||
Those Are Beautiful Machines | ||
|
Post# 104221 , Reply# 12 7/24/2010 at 20:51 (5,021 days old) by kloveland (Tulsa) |
||
|
Cool | ||
| Post# 104223 , Reply# 13 7/24/2010 at 21:03 (5,021 days old) by eurekastar (Amarillo, Texas) | ||
|
Sisters | ||
| Post# 104227 , Reply# 14 7/24/2010 at 21:41 (5,021 days old) by luxg () | ||
|
Beautiful job Bill, Looks like they have been to the factory for a rebuild! | ||
| Post# 104228 , Reply# 15 7/24/2010 at 21:42 (5,021 days old) by luxg () | ||
|
Beautiful job Bill!! Looks like they have been to Kirby for a complete rebuild! | ||
| Post# 104233 , Reply# 16 7/24/2010 at 23:31 (5,021 days old) by kirbykid63 (Wilmington Delaware) | ||
|
I am buffing to I am working on my buffing technique and hope to show off some of my work soon. Richard | ||
| Post# 104242 , Reply# 17 7/25/2010 at 06:56 (5,021 days old) by eurekastar (Amarillo, Texas) | ||
|
Richard | ||
| Post# 104257 , Reply# 19 7/25/2010 at 13:54 (5,020 days old) by eurekastar (Amarillo, Texas) | ||
|
Polishing a Kirby
I made a lot of mistakes learning to polish and still have a lot to learn. For instance, I had to learn that there is no substitute for the polish that Kirby sells to its distributors. Second, one my of early mistakes was not being careful about never mixing different compounds on the same wheel. I think that's especially true for the color finish. It makes complete sense to me now, but it didn't at first. Another thing I'm learning is to do the color finish one day and then inspecting it the next day. I think sometimes I've worked so long on something that I get a little "blind" to what it needs to look like. By looking at it the next day, I can easily see areas that need work. I've also used polishing wheels and bits for my drill, but the results haven't very good. So I will still resort the good old fashioned steel wool during the cutting polish in order to get to some awkward spots. A friend also shared a technique of using sand paper to sand out heavy scratches before going to the polishing wheel. I haven't done it yet, but he begins with a coarse grit, then wet sands with successively finer grits, until he ends up with a very fine grit. Then he takes it the wheel. But he warns about not sanding too much that the metal is compromised. | ||
| Post# 104265 , Reply# 20 7/25/2010 at 16:38 (5,020 days old) by eurekastar (Amarillo, Texas) | ||
|
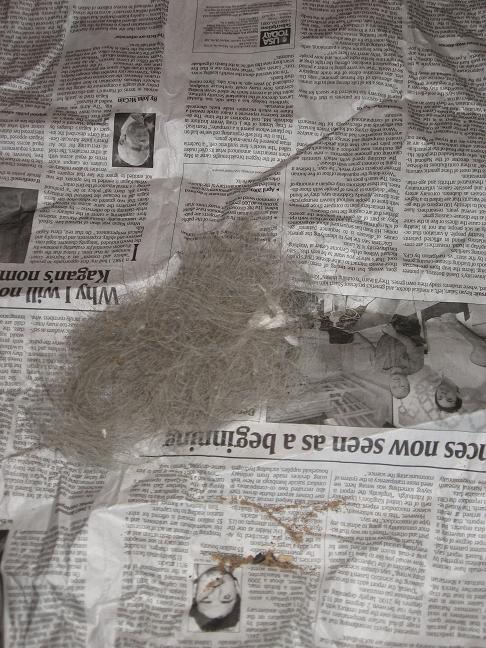
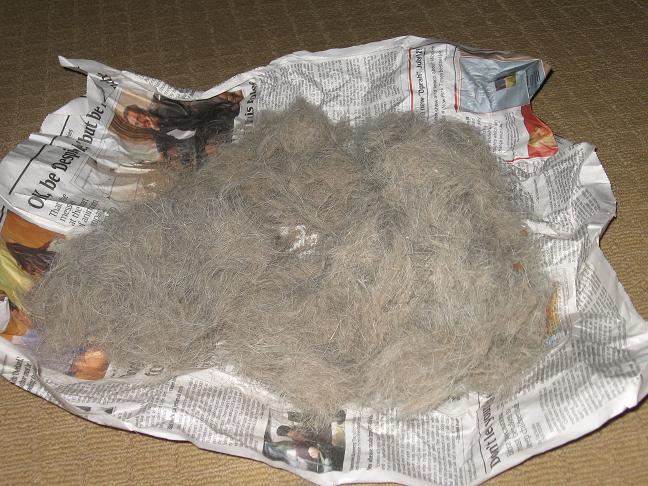
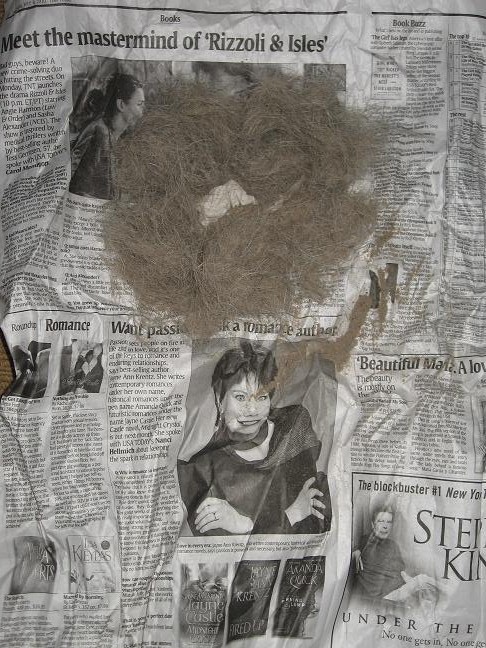
It's Official!
I think I really like the shakeout bag! Why? Well, I get this odd thrill out of examining the debris! Is that wrong? I think that's why I like my Compact/Tristar vacuums. Like a Kirby, the engineering is simple and straightforward AND they both allow you to easily examine what you just vacuumed. This is from a whirl around three rooms since using the Classic III for the first time yesterday. I really like this vacuum! DISCLAIMER: This photo is not a commentary on the literary section of USA Today.
| ||
| Post# 104386 , Reply# 21 7/27/2010 at 16:40 (5,018 days old) by eurekastar (Amarillo, Texas) | ||
|
More Results | ||
| Post# 104402 , Reply# 23 7/27/2010 at 19:16 (5,018 days old) by eurekastar (Amarillo, Texas) | ||
|
Emptying the Bag
I don't have an instruction manual for the Classic III, but my Tradition manual says to lower the nozzle all the down to the last notch, close the suction relief vent on the nozzle, unhook the bag, turn the vacuum on briefly to inflate the bag, then turn it off. As the bag deflates, shake it vigorously from the top. That loosens dust and debris, causing it to fall into the Sani-Emtor. It works well too.
| ||
| Forum Index: | 
| Other Forums: |

|

|

|

|

|

 Comes to the Rescue!