|
Thread Number: 42146
/ Tag: 80s/90s Vacuum Cleaners
$10 'Dirty Kirby' G3 |
[Down to Last] |  |
| Post# 444127 7/24/2021 at 15:35 (1,005 days old) by human (Pines of Carolina) | ||

Damn! Fell off the wagon again!
I was out running errands and stopped in at this thrift shop across town that I visit maybe three or four times a year and in the vacuum corner, I spotted a G series handle sticking up but I couldn't figure out what it was because it appeared to be a pale caramel or butterscotch color. When I got up to it, I realized it was an exceedingly dirty Kirby G3; thus its new nickname, the 'Dirty Kirby'. Despite its dingy appearance, it's actually in good shape�no missing parts, belt and brush roll intact, lightbulb works, recently replaced fill tube and no filthy full filter bag to throw out. Heck, the inside of the bag was actually cleaner than the outside and it has no tears or worn spots. I found an electrical outlet and fired it up for about 20 seconds, verified that the Tech Drive works, and listened to the motor, which sounded sweet. And for only $10, I couldn't just leave it there. I'm such a sucker. I'm not going to do anything with it right away; I just stuck it in the barn where it can wait on cooler weather for it to become a clean-n-shine project, right behind the Sentria I got last April. The nice thing is I don't believe I'll need to buy any parts for it. Just shine it up, slap in a bag and it'll be good to go. Being that I am so overrun with vacuums, I've resolved to donate at least two to my church's upcoming rummage sale. The Filter Queen is going for sure and possibly my Douglas ATV shop vac or maybe my Oreck...or both...or all three. Something's gotta give! Oh well, time to find that Vacuholics Anonymous meeting and pick up yet another white chip... | ||
| Post# 444128 , Reply# 1 7/24/2021 at 16:02 (1,005 days old) by suckolux (Yuba City, CA) | ||
 | ||
| Post# 444134 , Reply# 3 7/24/2021 at 18:10 (1,005 days old) by human (Pines of Carolina) | ||
|
Lou,
I honestly haven't thought that far into the process but thanks for the heads-up about the G3's unique bag design. I will definitely proceed with caution. Hand washing does sound like a prudent choice. I decided to take a closer look at the brush roll and it will need replacing. The bristles are great but the bearings are totally locked up. It's apparently been like that for awhile because the belt has worn a groove in the wood on the brush roll. Oh well, that's usually the way it goes. The brush roll was also stuck in the nozzle but good. I had to pry it out with a big screwdriver and managed to break a little piece off of the nozzle about the size of a nickel where I was prying. Fortunately, it's completely covered by the rubber bumper so I'm choosing not to worry about it; in fact, I'm choosing not to worry about any of it until the temperatures cool down to highs in the 70s so I can stand to be outside working on it. | ||
| Post# 444136 , Reply# 4 7/24/2021 at 20:48 (1,005 days old) by Lesinutah (Utah) | ||
Nice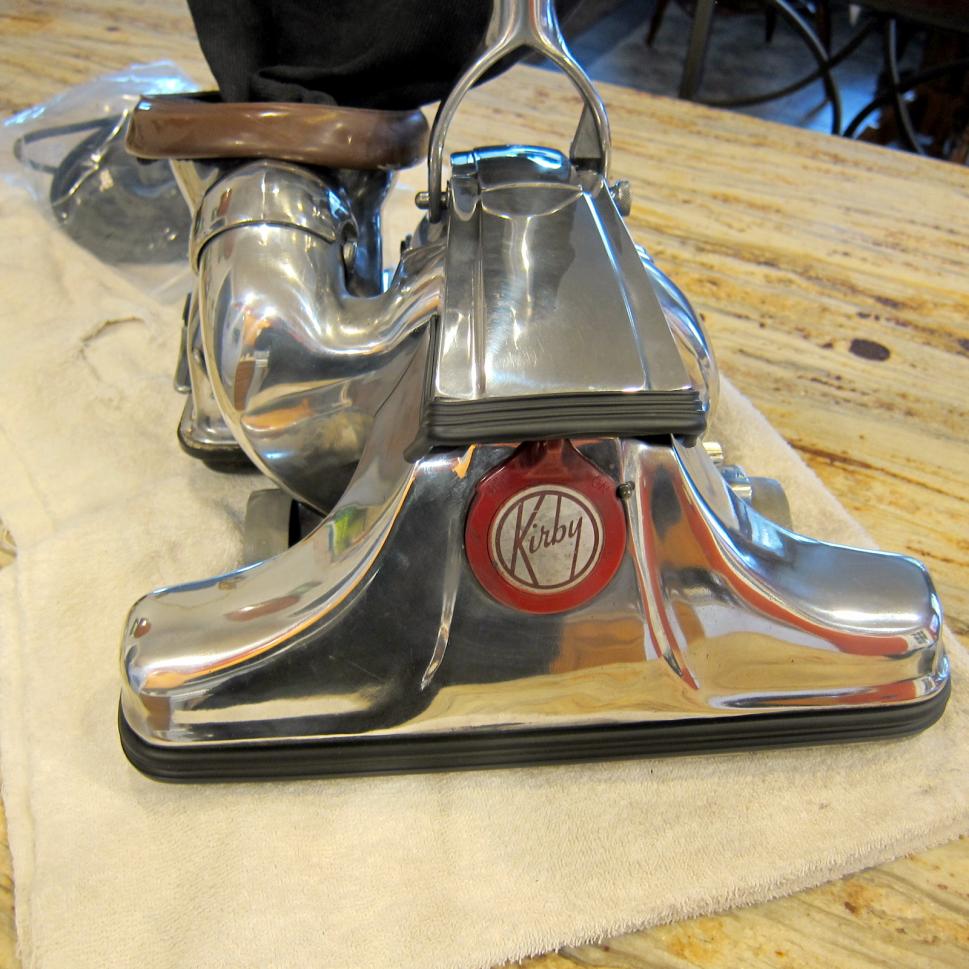
G3's are good vacuums. They have a kit to put in changing the gear ratio. The drive system is not violent but pushy and sticks. The upgrade smooths it out.
The bag just unclips from the bag hanger. I believe the rings are reusable. I've only done one restore on a g3. I have donated vacuums before. I figure there not getting used and a good vacuum is sometimes hard to come by. | ||
| Post# 444139 , Reply# 5 7/24/2021 at 22:33 (1,005 days old) by human (Pines of Carolina) | ||
|
I've never met a Kirby I didn't like...
Yeah, I've refurbished a couple of G series Kirbys, most recently an Ultimate G Diamond, but I've never had a G3 before. This is a later one with a white bottom on the mini emptor instead of clear. It looks as if it may have sat unused for a while but I think it'll clean up nicely. Thankfully, there are no odors to speak of.
| ||
| Post# 444145 , Reply# 7 7/25/2021 at 17:02 (1,004 days old) by Lesinutah (Utah) | ||
|
I
Thinking your talking about the part that clips to the handle and the lower part connects to top of bag dock. It stays on I pull it to outside of bag tie it in a loop and wash the bag inside our.
Its been a few years since I messed with a g3. If it's enclosed in the top of the bag similar to royals just leave it if you take it out it will snap. If I didn't get it yet take a picture and I can be assured I'm giving you correct info. | ||
| Post# 444146 , Reply# 8 7/25/2021 at 17:03 (1,004 days old) by human (Pines of Carolina) | ||
|
I didn't have that emotional of a reaction, just a brief moment of disgust at myself for not being more careful. But then I put the rubber bumper back on and realized the missing chunk was completely covered, I just sighed a deep breath, shrugged my shoulders and continued with my assessment of the machine's condition. upon reflection, I've been wondering if I would have been better off leaving the bumper in place when I applied the screwdriver.
I agree about polishing. Not wanting to take too much metal off, I've come up with a pretty effective minimalist method using a cheap, a combination of Nevr-Dull wadding, Mothers, and a relatively soft knockoff of a Scotch Brite pad, sold in ten-packs for a buck at the Dollar Tree. The pads aren't aggressive enough to etch the metal but they'll knock off most of the oxidation fairly easily with light, brisk rubbing. Doing this way, I can get a Kirby polished up in an afternoon. | ||
| Post# 444150 , Reply# 9 7/25/2021 at 17:24 (1,004 days old) by human (Pines of Carolina) | ||
|
| ||
| Post# 444174 , Reply# 10 7/27/2021 at 12:55 (1,002 days old) by human (Pines of Carolina) | ||
|
"Before" photos
As promised, I'm posting a few "before" photos, as in before I've really done anything to this machine beyond removing the brush roll and slightly damaging the nozzle in the process. Yeah, I've included photos of that carnage, with a penny for scale, as well. The old brush roll went out with the trash yesterday and a replacement is due to arrive on Friday although it won't be installed until I can clean the crud out of the inside of the nozzle.
Looking at the photos, the obvious conclusion is that it is, well, very dirty. There's some surface rust on the steel parts like the motor spindle, which will clean up with a little penetrating oil and sandpaper or maybe a Scotch-Brite pad. The handle lock lever (G3 exclusive?) is frozen in place. Hopefully, a heavy dose of penetrating oil will loosen it. Silicone spray worked wonders on the release levers for the sole plate on the nozzle but now the black plastic cushions won't stay on. Very minor worry. The greenish caste to the cord makes me think heavy cigarette smoke was in the air where it was used but there's no tobacco smoke odor to substantiate that. We'll see what a little Simple Green can do for that. I'm thankful the little chunk I took out of the nozzle is only about the size of a penny and is completely covered by the bumper. Speaking of the bumper, I'm not sure if the red striping tape will survive the heavy cleaning it's going to need. If it does, it does. If not, oh well. I can always get some automotive pinstripe tape if it really bothers me. This will be a good project once fall-like weather arrives. It's in the 90s here today and it was all I could do to stand outside and take these photos. I'll be excited to see how it turns out. Enjoy! | ||
| Post# 444195 , Reply# 12 7/28/2021 at 19:55 (1,001 days old) by human (Pines of Carolina) | ||
|
Brush roll is here...
Sometimes USPS actually manages to surprise me in a good way and today was one of those days. The brush roll arrived two days ahead of schedule! I've tucked it inside the nozzle for safekeeping but said nozzle still needs some heavy cleaning. It got up to 93 degrees today so too hot for me to work on it as I have a pretty low tolerance for heat. The yard also needs mowing right now but that's not going to happen immediately for the same reason. I need to wait for cooler weather or plan on getting up early to take care of such physically strenuous tasks.
Lou, Good tips on the fan I'll look into that. I did notice it has the old style gray (lexan?) fan rather than the newer style white amodel fan version. I wasn't planning on replacing the belt lifter assembly on this one like I had to do on my Ultimate G Diamond last spring as it's in pretty nice shape. That said, it will definitely get a spritz of silicone spray, which I prefer to WD-40 for most applications. There are chemicals in some plastics that cause them to discolor over time as they break down with exposure to UV light. Old electronics from the '80s and '90s are notorious for this. I think the white plastics on the G3 fall into this category as well. I noticed that the exposed plastic on the headlight assembly is yellowed but that underneath, which would have been protected from UV light, is still bright. There's a method to correct this using a hydrogen peroxide-based creme called Style Care 40 (see video linked below). It's an activator for hair dyes and is sold at beauty supply stores like Sally. I'm not totally sure if it would work on the cord as I've only seen it done on harder plastics. Other than the discoloration, the cord is in good shape with no splits or tears in the jacket so I see no real reason to replace it just for aesthetics. CLICK HERE TO GO TO human's LINK | ||
| Post# 444353 , Reply# 13 8/2/2021 at 11:35 (997 days old) by human (Pines of Carolina) | ||
|
The cleanup begins...
So I took advantage of cooler morning temperatures to begin work on the G3's nozzle. As I mentioned earlier, I had put the new brush roll into the nozzle for safekeeping but I later found it had become just as stuck as the original. Fortunately, I had a better idea this time for getting it unstuck without causing any further damage. After spraying the two ends liberally with silicone spray (I generally prefer that over WD-40), I was able to pop it back out with minimal effort. Wish I'd thought of that trick before I damaged the nozzle. I decided this situation needed to be addressed so I got out my cordless drill and put a wire brush on the end, which has the bristles facing forward and is just wide enough to fit inside the nozzle's narrow confines, then I had a good go at both ends. This thing was incredibly encrusted and although I got most of the crud out with the drill. there was still some stubborn stuff that needed to be chiseled out with a flat screwdriver. After about 10 or 15 minutes of work, I got the channels where the ends of the brush roll go cleaned out sufficiently where it now seats and unseats like it should.
I've got the nozzle and its rubber bumper soaking in a bucket with a strong Pine-Sol solution and I'll give it a good scrubbing after lunch. This is just to get it clean; no polishing today. Once it's clean and dry, I'll give all the moving parts another liberal dousing with silicone and put it back together. Maybe this evening, once it cools down and while I still have some daylight, I'll pull the rest of the machine out of the barn and give it a good wipe-down with Tub-o-Towels before I re-mount the nozzle onto the machine. At least then I'd be comfortable bringing it into the house for a little test run. More comprehensive cleaning and polishing will have to wait for cooler weather when I can stand to be outside for most of the day break down the rest of it for a thorough going over. | ||
| Post# 444363 , Reply# 15 8/2/2021 at 15:28 (996 days old) by human (Pines of Carolina) | ||
|
Getting cleaner...
The Dirty Kirby is a little less dirty now. After I finished scrubbing, lubricating and reassembling the nozzle, I couldn't help myself. Even though it was getting hot outside, I found a spot in the shade and worked on the rest of the machine. A few things I discovered along the way include: evidence of black mold on the bottom of the emptor and between the emptor and the body of the machine as well as mold or mildew stains at the bottom of the bag; and breaks in the cord jacket on either side of the anchor that attaches to the back of the handle just below the top cord hook. Also, despite a generous dousing with silicone spray, the handle lock lever is still immovable.
Because of the mold issue, the machine is not coming in the house anytime soon. I'll let it sit in the barn a while and if it reappears, I'll take more decisive measures. Either way, the bag is definitely going to be my next project. It'll get a thorough washing in the near future. I have no idea how to take the little zip tie like band off to remove the emptor and fill tube assembly from the bag so I'm just going to leave it all together when I wash it. The cord is now wrapped with black electrical tape just above and below the anchor. Guess should be looking for a replacement cord at some point. So the Dirty Kirby is relatively clean at this point and it's waiting for a good polishing. I don't know that it'll ever look brand new but it'll be presentable once it's shined up. At that point, I'll probably have to think of a new nickname for it. | ||
| Post# 444370 , Reply# 16 8/2/2021 at 18:28 (996 days old) by Lesinutah (Utah) | ||
|
Zip
Ties if you pop a flathead screw driver right where the zip tie attached to itself pry the zip tie basically loosening it. If all else fails cut off the zip ties and you can heat up the fill tube if it's glued. You could also cut a small portion basically how you fixed a hole in the hose on a vacuum video you did recently.
| ||
| Post# 444373 , Reply# 17 8/2/2021 at 19:59 (996 days old) by human (Pines of Carolina) | ||
|
| ||
| Post# 444383 , Reply# 18 8/3/2021 at 05:08 (996 days old) by fantomfan57 (Central Texas) | ||
|
Question about the nozzle damage, Would it be possible/worth it to JB Weld the chip back into place? | ||
| Post# 444384 , Reply# 19 8/3/2021 at 08:55 (996 days old) by human (Pines of Carolina) | ||
|
I suppose it would be possible to JB Weld it, although my track record with that stuff is pretty poor. Fortunately, the damaged spot is on the back side of the nozzle and is completely hidden by the rubber bumper. Structural integrity is in no way compromised, so I don't know really what would be gained by gluing that chip back into place. My inclination is just to leave it be and call it a lesson learned.
| ||
| Post# 444431 , Reply# 22 8/4/2021 at 19:28 (994 days old) by Louvac (A) | ||
|
Thanks Bill! Yes. We do share the same birthday! Hope yours was a great one! | ||
| Post# 444434 , Reply# 23 8/4/2021 at 21:39 (994 days old) by human (Pines of Carolina) | ||
|
Attacking the bag...
I'm going to see if I can get that zip tie off with breaking it and if not, I'll just wash the bag with the emptor and fill tube in place. The header is definitely staying put. I've got some Arm & Hammer liquid laundry detergent with OxyClean in it that should work pretty well. There's what looks like a water stain at the top and the aforementioned mildew marks at the bottom. We'll see how clean it gets. One thing's for sure. No doubt it'll be better than it is now.
| ||
| Post# 444453 , Reply# 24 8/5/2021 at 22:43 (993 days old) by Lesinutah (Utah) | ||
|
The | ||
| Post# 444488 , Reply# 26 8/6/2021 at 22:40 (992 days old) by Lesinutah (Utah) | ||
|
No | ||
| Post# 444715 , Reply# 27 8/14/2021 at 13:41 (984 days old) by human (Pines of Carolina) | ||
|
Washing the bag...
I took a look at the 'Dirty Kirby' today and found the black mold is not coming back so I'm proceeding with the next phase, which is to hand wash the bag in Arm & Hammer liquid laundry detergent. Following the lines of least resistance, I didn't bother to take the bag and fill tube assembly apart; I just manually agitated it, scrubbing the fabric against itself. I then let it soak for a little bit before rinsing it in clear water and hanging it up to dry on the clothesline. It looks as though at least some of the water stains may have come out but I think the mold/mildew stains at the bottom are likely there to stay. We'll see the net result for sure once it dries thoroughly before I put it back on the G3. At any rate, it'll have a nice, fresh scent.
| ||
| Post# 444721 , Reply# 28 8/14/2021 at 22:19 (984 days old) by human (Pines of Carolina) | ||
|
Nature's Rinse Cycle...
So the bag was drying quite nicely outside in sunny, 95-degree weather this afternoon, but sometime after I headed over to a friend's for dinner, it ended up getting an unintended extra rinse, courtesy of Mother Nature, who sent us a much needed rain shower while I was gone. It was quite damp when I got home, so I now have it hanging on a nail in my tool shed, which also houses the gas water heater and thus stays toasty warm. I'm hoping that will accelerate the drying process while protecting it from further overnight showers. I'll check on it in the morning and put it back out in the sun until it's completely dry. Photos will follow.
| ||
| Post# 444736 , Reply# 29 8/15/2021 at 12:28 (983 days old) by human (Pines of Carolina) | ||
|
Back together...
The hot, dry shed turned out to be just the place to get that bag dry out. The sun finally came out a little after noon and I went out to the shed, fully expecting to have to set the bag out in the sun but there was no need; it was bone dry, except for a tiny bit of almost black water in the emptor, which I was able to wipe out with a paper towel.
Once I got everything back together, I let the vacuum run for a minute or so without a filter bag and the fill tube hanging out, just to blow out any more water that might remain, but there was none. The bag looks about as good as I could expect, given its age. There is some minor discoloration, which is most obvious down near the bottom, where it stayed folded up and protected from light (see second photo). The rest of the bag has a very slightly pinkish caste to it. Other than that, just some minor wear. I've seen worse on newer machines, so I'm not complaining. The next part of the project will be to polish the metal but I'll need cooler weather to tackle that. I've also noticed the rubber 'tires' on the rear wheels are wearing kind of thin. I've got another set on a spare Tech Drive that may find their way onto the machine later on, probably after the polishing. The funny thing is in the three weeks I've had this G3, I've been far more obsessed with fixing it up than I've been with the Sentria I bought last spring, which has been sitting untouched in the barn for almost five months. All it really needs is a good polishing, which would be an easy afternoon's work. The now not-so-dirty G3 is at the same point, more or less, but my gut tells me it will require a bit more elbow grease to put a shine on it. Right now, the G3 is sitting out on the deck I'm considering whether to bring in for a test run or just carry it back to the barn to continue slumbering and waiting for a crisp, fall day�or at least one that's not so dang muggy. | ||
| Post# 444746 , Reply# 30 8/15/2021 at 15:22 (983 days old) by human (Pines of Carolina) | ||
|
I just gave the G3 a little test drive on the Persian rug in the dining room. It performed pretty much as I expected it would. The Tech Drive doesn't feel as powerful as it does on my later machines but seems to kick in a little stronger pulling it back than pushing it forward. Not sure what's up with that. Perhaps it has to do with the worn rear wheels. Maybe I need to do a wheel swap sooner rather than later. The height adjustment is also not as smooth as it should be. I'll give it a dab of grease and see if that helps. All in all, this little project is coming along.
| ||
| Post# 444749 , Reply# 31 8/15/2021 at 16:21 (983 days old) by human (Pines of Carolina) | ||
|
Stuck in REVERSE!!!
So I swapped the new wheels onto the G3 and they get a whole lot better traction than the old ones but there's just one little problem. The Tech Drive transmission is stuck in REVERSE! It's also quite powerful so I'm totally fighting the thing when I try to push it forward. I guess a tear-down is in its near future but I'm not exactly sure what I'll find or how to fix it when I do that. I have an extra Tech Drive unit from a newer Kirby. Perhaps I should just swap that in and see if it works any better.
| ||
| Post# 444754 , Reply# 32 8/15/2021 at 22:34 (983 days old) by Lesinutah (Utah) | ||
|
Id | ||
| Post# 444775 , Reply# 33 8/16/2021 at 16:29 (982 days old) by human (Pines of Carolina) | ||
|
Tech Drive is fixed!
I just fixed the Tech Drive and I didn't even have to remove it; in fact, just replacing it would not have solved the problem. I watched the YouTube video linked below and it was 37 minutes well spent. Although I did not follow the video tutorial to the letter, it gave me a better idea of what to look for once I got it opened up and to formulate a plan to fix it.
I took the cover off and the inside was just furry and gross so I took it out to my shed, where my air compressor lives, and thoroughly blew it out, which was an oddly satisfying experience, even though I decided to wear a mask to do it. Once I could see the mechanism under all that gunk, I realized the sliding direction control block, located just forward of where the handle connects, was frozen up. So, based on knowledge gained from watching that video, I employed a time-honored caveman strategy and gave it a couple of light taps with a hammer to break it free, then sprayed it liberally with silicone until it was moving back and forth smoothly and easily. Once I was satisfied I had it moving like it should, I brought the motor unit back inside, put the cover back in place without screwing it down, reattached the nozzle and bag so it would run, and gave it a quick test drive. It now goes forward and backward just fine. It's not jerky as some have described the G3 transmissions but it's definitely more aggressive than its counterpart in other models I own. The last step will be to shine up the aluminum to make it look somewhat close to as good as it now runs. CLICK HERE TO GO TO human's LINK | ||
| Post# 445438 , Reply# 35 8/31/2021 at 21:36 (967 days old) by human (Pines of Carolina) | ||
|
| ||
| Post# 445468 , Reply# 36 9/1/2021 at 18:02 (966 days old) by Louvac (A) | ||
|
Hey Ed! What is the best way to contact you? | ||
| Post# 445508 , Reply# 37 9/2/2021 at 13:51 (965 days old) by human (Pines of Carolina) | ||
|
| ||
| Post# 445524 , Reply# 38 9/2/2021 at 18:33 (965 days old) by Louvac (A) | ||
|
You don't show one in your profile. I don't have an upgraded membership so I can't delete posts. But if you do, you can add it to your profile and then go back and delete it. OR, we can ask Robert to email person B person A's email address. | ||
| Post# 445692 , Reply# 39 9/6/2021 at 16:18 (961 days old) by human (Pines of Carolina) | ||
|
Started polishing...
So I began the polishing process today with the handle and the nozzle. The handle came out great and the nozzle came out okay but it could probably use a bit more attention. One thing's for sure. There's now a marked contrast between the nozzle and the rest of the machine, which shows its potential.
I had to stop because the shady spot, where I was working in the back yard, went away and it got too hot to be out there. I'll just have to wait for the next convergence of comfortable weather and free time so I can continue the project. I don't think this machine is ever going to be a showpiece but I'm pretty sure I can get it looking decent. I haven't decided whether I'm going to keep it or donate it to my church's rummage sale next year. If I decide to keep it, I'll most likely spring for a replacement fan kit. If not, I'll just let it go with what it's got. But I've got a year to play with it and make my decision. I'll post some 'after' photos once I get the polishing done to where I'm happy with it. | ||
| Post# 446492 , Reply# 41 9/25/2021 at 13:24 (942 days old) by human (Pines of Carolina) | ||
|
'Dirty Kirby' no more...
So I took advantage of cooler weather today, tore down the 'Dirty Kirby' and gave her a polishing. It is by no means perfect but it's a helluva lot better than it was. It's no longer the derelict looking machine it was when I first spotted it at Goodwill. One thing's for certain. The G3 is a lot more trouble to take a part and reassemble than its later siblings. Simplification of the design in later models was definitely effort well spent on the part of Kirby's engineers.
| ||
| Forum Index: | 
| Other Forums: |

|

|

|

|

|

 Comes to the Rescue!


;)
;)
;)
;)
;)
;)