|
Thread Number: 41821
/ Tag: Pre-1950 Vacuum Cleaners
Sanding out scratches on aluminum. |
[Down to Last] |  |
Post# 441900 5/17/2021 at 13:36 (1,068 days old) by Vacmadman  (Pueblo Co.) (Pueblo Co.) |
||

I have this Kirby 505 nozzle that looks like it took quite a beating. This is very common with a lot of these old Kirby's. I will start out by just sanding the deep scratches starting with 600 or 800 grit sandpaper. I will post more pictures as I go so....stay tuned.
Side note: I'm posting this for anyone who has never, done or attempted this before. There are a number of ways to accomplish this, and this is just one. | ||
| Post# 441901 , Reply# 1 5/17/2021 at 14:26 (1,068 days old) by human (Pines of Carolina) | ||
 | ||
| Post# 441903 , Reply# 2 5/17/2021 at 15:37 (1,068 days old) by huskyvacs (Gnaw Bone, Indiana) | ||
 | ||
|
Post# 441905 , Reply# 3 5/17/2021 at 16:05 (1,068 days old) by Vacmadman (Pueblo Co.) |
||
|
Husky | ||
| Post# 441918 , Reply# 4 5/17/2021 at 20:30 (1,068 days old) by Lesinutah (Utah) | ||
Suggestions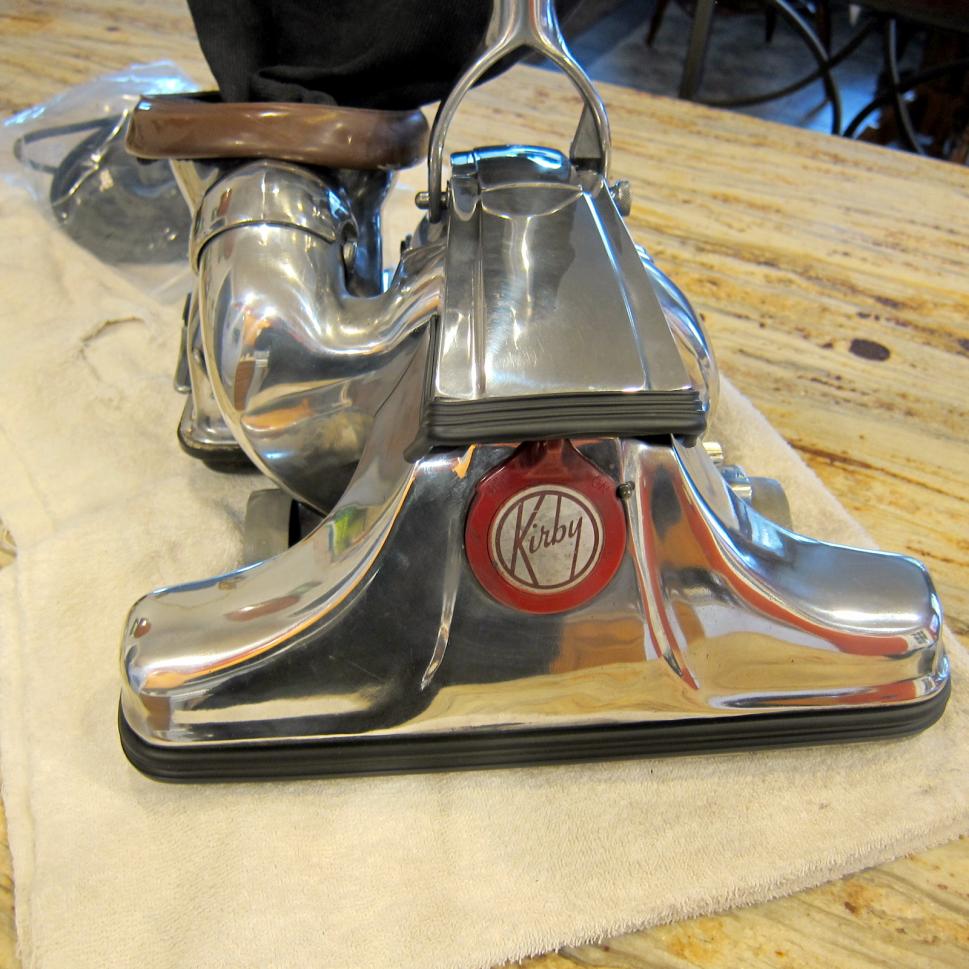 | ||
| Post# 441926 , Reply# 5 5/17/2021 at 22:57 (1,067 days old) by MadMan (Chicago, IL, USA) | ||
 | ||
|
Post# 441932 , Reply# 6 5/18/2021 at 07:59 (1,067 days old) by Vacmadman (Pueblo Co.) |
||
|
Floats my boat | ||
| Post# 441963 , Reply# 7 5/19/2021 at 03:14 (1,066 days old) by vacuumdevil (Vacuum Hell ) | ||
|
| ||
|
Post# 441966 , Reply# 8 5/19/2021 at 07:22 (1,066 days old) by myvacsrock (USA) |
||
|
Like James I also do everything by hand. Removing all scratches/gouges and buffing to a factory new shine. Always comes out lovely. Takes possibly a little longer, but controlling is all in my hands ;) | ||
|
Post# 441972 , Reply# 9 5/19/2021 at 09:15 (1,066 days old) by Vacmadman (Pueblo Co.) |
||
|
Wow! | ||
|
Post# 441973 , Reply# 10 5/19/2021 at 09:36 (1,066 days old) by Vacmadman (Pueblo Co.) |
||
|
I did need to start out with 220 grit to remove the deep scratches. Pic #1 is after I wet sanded with 220 just on the badly scratched area. Then work my way up pic #2 is 400, pic#3 is 600, pic #4, is 1000, pic #5 is 1500, at that point I start sanding the hole piece. pic #6 is 2000, Pic #7 is 3000,
| ||
|
Post# 441983 , Reply# 11 5/19/2021 at 13:12 (1,066 days old) by Vacmadman (Pueblo Co.) |
||
|
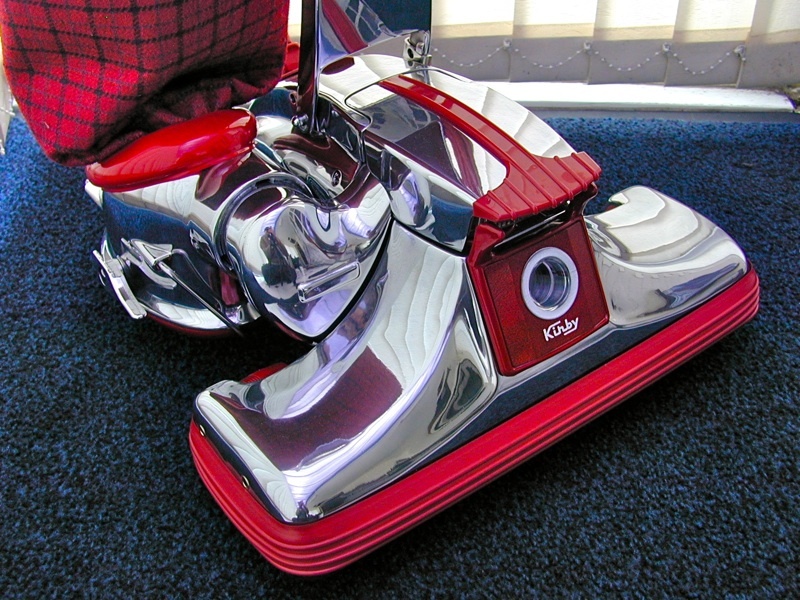
After polishing
Well it didn't turn out to bad after polishing. Could it be better?...yes, but not bad at all. Maybe some day I'll buy myself one of those big puffing and polishing motors for my shop.
| ||
| Post# 441991 , Reply# 12 5/19/2021 at 18:49 (1,066 days old) by scudo (uk) | ||
|
I reckon if you have a bench grinder then get some buffer attachments which are relatively cheap, would take you finish up another level. | ||
| Post# 441993 , Reply# 13 5/19/2021 at 19:14 (1,066 days old) by Brando_husky (Las Vegas Nevada) | ||
|
Sadly my hands are weak and get very cramped when I work at the metal. It's been a hard time polishing up my sanitronic 562 | ||
|
Post# 442020 , Reply# 14 5/20/2021 at 10:01 (1,065 days old) by Vacmadman (Pueblo Co.) |
||
|
505's
My next 505 is coming along little by little bit by bit. I have two 505 completed and two waiting in the wings. I also have two more 505 emptors that need work.
| ||
|
Post# 442054 , Reply# 16 5/21/2021 at 09:19 (1,064 days old) by Vacmadman (Pueblo Co.) |
||
|
Sanding
Bill,
I do sand in one direction, and not in a circular motion. I only use steel wool now when I wash and clean the parts before sanding. I sand the light cap the same way. Pictured is the before and after of the light cap on my 508. Jim | ||
| Post# 442086 , Reply# 17 5/22/2021 at 05:31 (1,063 days old) by kirbyklekter (Concord,Ca.) | ||
|
Jim Wow that's amazing. After you've finished with the polishing, do you use a final product like Blue Chrome Metal Polish or other to slow down the oxidation that comes with time? Car Wax? Bill | ||
|
Post# 442087 , Reply# 18 5/22/2021 at 08:41 (1,063 days old) by Vacmadman (Pueblo Co.) |
||
|
Flitz
Bill,
I use Flitz polish this will protect the finish for up to 6 months. Jim
View Full Size
| ||
| Post# 442109 , Reply# 19 5/22/2021 at 16:25 (1,063 days old) by scudo (uk) | ||
|
This is 2 I have renovated (before and after pics), I hand polish for deep scratches and then polish on bench grinder wheel. Images 1 & 2 are an earlier model and Images 3, 4 & 5 are a G5 that was in a heck of a state. | ||
|
Post# 442128 , Reply# 20 5/23/2021 at 09:12 (1,062 days old) by Vacmadman (Pueblo Co.) |
||
|
| ||
| Post# 442751 , Reply# 21 6/8/2021 at 21:02 (1,046 days old) by Rowdy141 (United Kingdom) | ||
One solution to bring up that blue rubber trim is to use
Silvo� Silver Cutlery Polish (less aggressive than Brasso�) or Abro� Headlight Restoration Polish to remove fine scratches and smooth-out imperfections. Follow that with Kiwi� Blue (Scuff) Shoe Polish, or blue Leather Furniture Renovation Cream, or add a few drops of blue Leather Dye to Caranuba Car Wax. The dyes will seep into scuffs and blend blemishes. The wax hardens to give a smooth, polished, durable surface. | ||
| Forum Index: | 
| Other Forums: |

|

|

|

|

|

 Comes to the Rescue!


;)
;)
;)
;)
;)
;)
;)
;)
;)
;)
;)
;)
;)
;)