|
Thread Number: 38017
/ Tag: 50s/60s/70s Vacuum Cleaners
AP-100 motor bearing , how to replace? |
[Down to Last] |  |
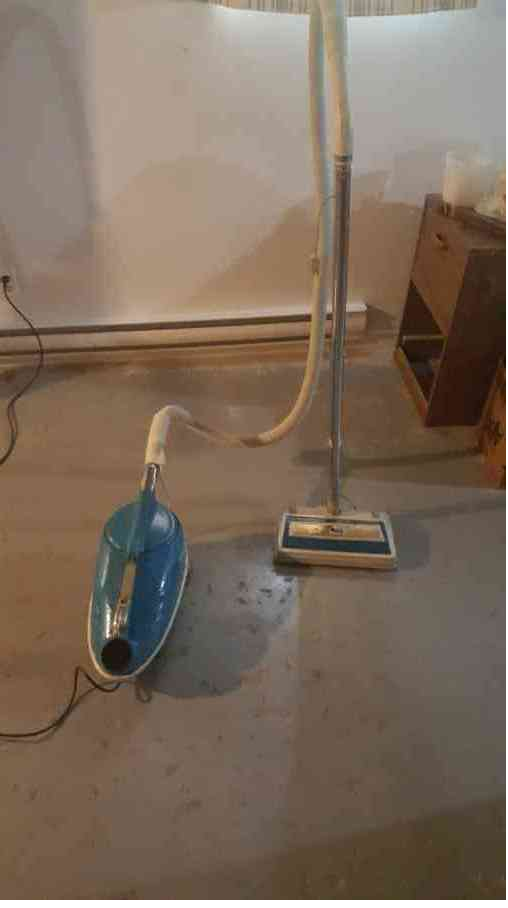
| Post# 405121 , Reply# 1 2/5/2019 at 19:34 (1,899 days old) by compactc9guy (Bathurst NB) | ||
 | ||
| Post# 405122 , Reply# 2 2/5/2019 at 20:51 (1,899 days old) by quebecois (Waterloo, Canada) | ||
|
Well, this is not what I experienced, the attached picture shows the type of bearing I found in the AP-200s, the type that is easy to remove simply by tapping it out with a ratchet socket. The type that gives me trouble was probably machine pressed or sort of.
View Full Size
| ||
| Post# 405126 , Reply# 3 2/5/2019 at 23:13 (1,899 days old) by MadMan (Chicago, IL, USA) | ||

https://www.ebay.com/itm/4pc-3-Jaw-Gear-... https://www.ebay.com/itm/Black-Armature-... If a bearing needs to be pressed off/on, there are certain rules, but the general 'how' of it is totally up to you, and depends on the situation. One tool might work on one armature, and not on another. Also, these are only removal tools, you'll need something else to install them. Either an actual hydraulic press (small ones can be had for under $100 usd), or a sturdy steel pipe with the inside diameter about the same as the armature shaft (you might be able to get away with a deep socket), and a hammer or a big bench vise. The most important rule of pressing ball bearings is not to exert the pressing/pulling force on the balls. For example, if you're pressing a bearing's inner race onto the armature shaft, you press from the inner race. If you press from the outer race, it'll press the outer race against the balls, and the balls will press the inner race. This might damage the races, but of course it depends on how much force is applied. Because of this, it's generally very hard to remove a bearing from an armature by gripping the inner race, so you typically pull against the outer race, and then you consider the bearing destroyed (which it probably was anyway if you were replacing it). | ||
| Post# 405149 , Reply# 4 2/6/2019 at 16:56 (1,898 days old) by Collector2 (Moose Jaw, Sk) | ||
 | ||
| Post# 405163 , Reply# 7 2/6/2019 at 21:48 (1,898 days old) by vaclab (Pickerington, Ohio) | ||
I Repack Bearings Regularly And...
"Re-seating" them can be as simple as using a socket that matches the outer diameter of the bearing. Getting rusted bearings off might require an inexpensive bearing puller. I paid $7 for mine a few months ago.
Check out this video around the 7 minute mark to see a repacked bearing installation on a Kirby D80. | ||
| Post# 405173 , Reply# 8 2/7/2019 at 00:11 (1,898 days old) by MadMan (Chicago, IL, USA) | ||
|
| ||
| Post# 405185 , Reply# 9 2/7/2019 at 08:55 (1,898 days old) by quebecois (Waterloo, Canada) | ||
|
Here are two pictures of where I'm stuck in the process. I don't even know how to remove the last part of the casing the bearing is fitted in. I don't want to break anything (except the old bearing itself) just because I don't know what to do. | ||
| Post# 405204 , Reply# 10 2/7/2019 at 16:48 (1,897 days old) by vaclab (Pickerington, Ohio) | ||
|
MadMan, You Are 100% Wrong
And I have all the tests to prove it! Namely, before and after motor RPM (loaded and unloaded), motor current draw and of course nozzle CFM.
It's plain Physics dude. Think about it. If I can remove a bearing with a bearing puller placing all the force on ONLY the outer race (actually just the sides), why wouldn't I be able to use a socket that PERFECTLY distributes the re-installation hammering force on the outer race? The fact that it made you cringe is unimportant. Did you see how gently I re-installed it? How many times did the hammer strike the socket to move new bearing a very short distance? Work through the calculations and you'll see it's a very safe and gentle process. This method (when reasonably performed) is completely acceptable and widely used on many YouTube videos. Bill | ||
| Post# 405226 , Reply# 12 2/7/2019 at 20:05 (1,897 days old) by quebecois (Waterloo, Canada) | ||
|
Thanks Rob, I stacked three shipping tape rolls, put the casing on it and a few light taps were enough to remove the bearing and shaft from the plate. Now I am at the point I have to use a bearing puller to remove the bearing from the shaft, or is there another way to do it? | ||
| Post# 405242 , Reply# 13 2/7/2019 at 22:00 (1,897 days old) by MadMan (Chicago, IL, USA) | ||
|
Quebecois - A bearing puller would be ideal, but if you have a couple of angle irons, you can put two next to each other, across two pieces of wood, and put the bearing between the irons, so the armature is hanging in air, suspended by the angle irons under the bearing. Now the tricky part. You want to hammer the shaft straight down, without damaging the threaded end of the shaft. Ideally, you'd use a center punch with a flat end to strike it. It may not even take enough force to start damaging the threads. I'm assuming there was a nut holding the fan blade on? Screw the nut onto the shaft so the top of the nut is exactly flush with the end of the shaft. This is a crude method of protecting the threaded end of the shaft, but it should work fine in this case.
--- Bill - You know, calling me wrong and citing youtube videos (of all things) as evidence of the right way of doing something is really weak evidence. I'm a certified automotive mechanic who does mechanical repairs for a living. I have personally made the mistake of pressing on wheel bearings the wrong way, and though they may look fine and feel fine in your hand afterwards, once installed on the car and driven at some speed, you'll hear a loud bearing noise. Because the races have dents in them from the balls being pressed against the races. Granted, we're talking about bearings and pressing force on a much smaller scale here, but the same principles apply. You cite plain physics, yet you're not understanding my explanation of the basic physics behind it. Bearing balls are EXTREMELY hard metal. The races are hard, but not AS hard. What happens when you hammer a hard piece of metal against a soft piece of metal? The soft metal gets deformed. Plain physics, as you say. In this case, might not be much, maybe not even a thousandth of an inch, but because of the way ball bearings work, the surfaces involved need to be perfectly smooth. What you're doing, if it doesn't have any immediate effect, is still lessening the life of the bearing... for no reason. Anyhow, I'm sorry if I offended you. | ||
| Post# 405247 , Reply# 14 2/7/2019 at 23:00 (1,897 days old) by quebecois (Waterloo, Canada) | ||
|
Madman, well it sounds like a good idea, I may have a couple of these angled irons in my scrap baskets. | ||
| Post# 405271 , Reply# 16 2/8/2019 at 19:10 (1,896 days old) by texaskirbyguy (Plano, TX) | ||
|
Quebecois, Check out this picture of my homemade bearing puller to get an idea on how to make one. Mine survived 5 uses, one a very tight one.
View Full Size
| ||
| Post# 405311 , Reply# 18 2/9/2019 at 19:49 (1,895 days old) by vaclab (Pickerington, Ohio) | ||
|
MadMan
After reading your comment, I simply cannot let your false claims and faulty reasoning stand.
Since you probably have never taken a college level "statics and strengths of materials" class or something similar, you seriously have no idea what you are talking about. For good measure, take a Calculus class as well in order to properly digest distributive loads, graphs and charts. What you completely missed which floors me is that you fundamentally do not understand at what point metals begin to deform and maintain that deformity (forces/loads/vectors). Think about this my mechanic friend: That bearing I repacked and re-installed was 29 years old. It spins near 10K RPM (roughly), withstands 100's of degrees in addition to centrifugal forces and other forces. It is NOT a wimpy bearing. I probably struck it with a properly distributed total force of 2 lbs. And the other end of the shaft was hitting the soft wood of a 2x4. Guess what? No dents (deviations) in the 2x4 at all. None. The process of removing the bearing with a imperfectly distributed force (bearing puller) will do MUCH MORE damage than I would ever come close to doing during the re-installation process. Because you don't understand how the forces are being distributed on the outer race, you don't understand that the potential for bearing damage is dramatically LESS during installation than removal. Feel free to believe whatever you like considering you have zero measurements or evidence and I will continue to fully recommend my procedure with great success over many years. Bill | ||
| Post# 405318 , Reply# 19 2/10/2019 at 01:44 (1,895 days old) by MadMan (Chicago, IL, USA) | ||
|
| ||
| Post# 405833 , Reply# 21 2/22/2019 at 20:05 (1,882 days old) by texaskirbyguy (Plano, TX) | ||
|
That was my bit of southern engineering... :o) See the picture below on how I put the new one on. I used a 5/16 or 3/8 socket over the bearing inner race and tapped on with mallet. Make sure motor shaft is on wood to prevent mushrooming it.
View Full Size
| ||
| Post# 405834 , Reply# 22 2/22/2019 at 20:10 (1,882 days old) by texaskirbyguy (Plano, TX) | ||
|
If you do not have a socket deep enough for your shaft, a small diameter piece of pipe will work, too. You just want to hit the inner race. | ||
| Post# 405843 , Reply# 23 2/22/2019 at 23:25 (1,882 days old) by MadMan (Chicago, IL, USA) | ||
|
Hey, I like the homemade bearing puller! It's literally exactly what I had pictured in my head when I described it. I suppose you could use it 'upside down' to install the bearing, but I'd definitely do like texaskirbyguy says, use a deep socket or a pipe. A 6 inch 3/8" pipe nipple should be easily had at any hardware store for a couple bucks. Would probably be about the right diameter.
| ||
| Post# 405901 , Reply# 25 2/23/2019 at 22:47 (1,881 days old) by MadMan (Chicago, IL, USA) | ||
|
| ||
| Post# 406025 , Reply# 27 2/26/2019 at 14:56 (1,878 days old) by compactc9guy (Bathurst NB) | ||
|
| ||
| Post# 406037 , Reply# 28 2/26/2019 at 22:21 (1,878 days old) by quebecois (Waterloo, Canada) | ||
|
I'm confident it'll work, I swapped wires with good connections from a donor AP-100 with a dead motor and a cracked body, it's just a question of time. | ||
| Post# 406062 , Reply# 29 2/27/2019 at 21:16 (1,877 days old) by compactc9guy (Bathurst NB) | ||
|
| ||
| Forum Index: | 
| Other Forums: |

|

|

|

|

|

 Comes to the Rescue!


;)
;)
;)
;)