|
Thread Number: 37520
/ Tag: 50s/60s/70s Vacuum Cleaners
New to forum, Kirby vacuum questions |
[Down to Last] |  |
Post# 400189 , Reply# 1 10/30/2018 at 22:06 (2,002 days old) by KirbyClassicIII  (Milwaukie, Oregon) (Milwaukie, Oregon) |
||
seanoliver77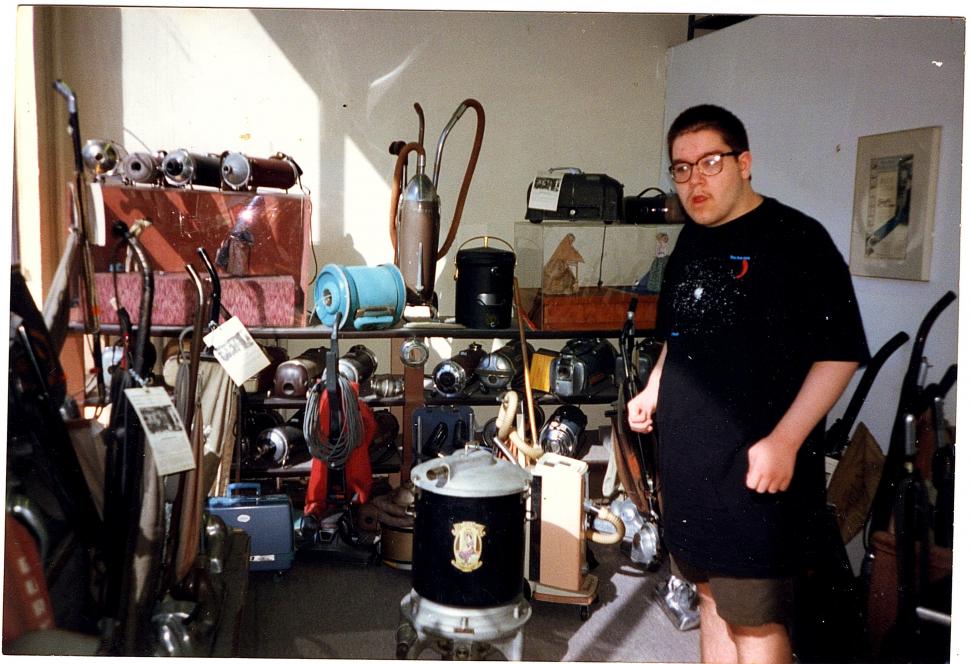
Sean,
The Kirby Tradition 3CB was produced from 1979 to 1981. Since you say your machine has a plastic fan and the Classic Omega/III-type speed switch (134374), then I assume yours is a 1980 or early '81... or perhaps a '79 if the plastic fan replaced the metal fan, and if the speed switch you describe had replaced the one originally mounted to the headlight cap (on serial nos. F000001-F399999). There were also versions of the Tradition with the speed switch you describe AND the metal fan. Those ran between serial nos. F400001-F499999 with the additional headlight cap lock button (also on the early Traditions with the speed switch inside the light cap), and serial nos. F500001-F999999 on those machines with the conventional headlight cap. Thus, I ask: what is the serial number on your machine, please? A link to the Tradition owner's manual here: www.kirby.com/Manuals/Old... ~Ben | ||
|
Post# 400196 , Reply# 2 10/31/2018 at 12:17 (2,001 days old) by Rivstg1 (colorado springs) |
||
also, | ||
|
Post# 400212 , Reply# 4 10/31/2018 at 18:15 (2,001 days old) by KirbyClassicIII (Milwaukie, Oregon) |
||
|
seanoliver77
Sean,
Your Tradition was built in the fall of 1980, so the plastic fan would be the correct one. The belts you'll want will depend on the construction of the brush roll assembly: 1 - if your brush roll assembly is painted silver and has the transparent plastic sleeves on both ends, order the 159056 belt (159056G for 3 belts; 159056A for 25 belts) 2 - or, if the brush roll assembly has a bare wood finish and has the removable end caps, then it will have ball bearings inside. Order belt part no. 301291G. ~Ben | ||
|
Post# 400215 , Reply# 6 10/31/2018 at 19:27 (2,001 days old) by KirbyClassicIII (Milwaukie, Oregon) |
||
|
seanoliver77
Sean,
I believe your brush roll will have to be replaced if the two adjustment screws are rusted out (that is usually the reason why you can't turn them). These adjustment screws will have to be turned gradually (and both must also be adjusted equally) to keep the bristles sticking out at least 1/8" beyond the rug plate opening, in order to ensure effective cleaning. It must also be replaced if the bristles are worn down so much you can no longer turn the two screws to get more bristles. If indeed all else fails with your original brush roll, then buy a new brush roll no. 152575, which will have ball bearings and which will also allow you to use the knurled belts. ~Ben | ||
| Post# 400218 , Reply# 7 10/31/2018 at 20:49 (2,001 days old) by seanoliver77 (KALISPELL) | ||
|
Thanks. I will order a new brushroll and install it when I get the chance. I think between the bristles being worn down and the screws being full of dirt the brushroll should be replaced. I also see that I need a new nozzle seal. Does it require glue to hold it in place? Thanks. -Sean | ||
|
Post# 400219 , Reply# 8 10/31/2018 at 20:53 (2,001 days old) by KirbyClassicIII (Milwaukie, Oregon) |
||
|
seanoliver77 | ||
| Post# 400224 , Reply# 9 10/31/2018 at 22:05 (2,001 days old) by seanoliver77 (KALISPELL) | ||
|
Yep that is what I need. Where would I find Pliobond? Is that something I have to special order or would a hardware store carry it? Is it similar to gasket maker? Is the seal directional? Thanks. -Sean | ||
|
Post# 400232 , Reply# 10 10/31/2018 at 23:35 (2,000 days old) by KirbyClassicIII (Milwaukie, Oregon) |
||
|
seanoliver77 | ||
| Post# 400235 , Reply# 11 11/1/2018 at 00:59 (2,000 days old) by huskyvacs (Gnaw Bone, Indiana) | ||

If the Kirby will not turn on, check the safety switch and the connection where the lower power cord plugs into the vacuum. Spray the safety switch with electrical contact cleaner really well, and work it up and down with a screwdriver a dozen or so times. I have gotten 2 Kirbys for cheap advertised as having a dead motor only to find out the safety switches were rusty from sitting in basements and had frozen up.
But if you say it was in a barn and had mice get to it, be aware they might have crawled into the motor housing and chewed wires to make a nest inside it. Also when you are talking to Kirby about parts, they are going to quote you OEM prices. Look on eBay or in mom & pop vacuum shops, I am sure they will have a nozzle for under $50. | ||
|
Post# 400293 , Reply# 15 11/1/2018 at 23:45 (1,999 days old) by KirbyClassicIII (Milwaukie, Oregon) |
||
|
seanoliver77 | ||
|
Post# 400296 , Reply# 16 11/2/2018 at 01:25 (1,999 days old) by KirbyClassicIII (Milwaukie, Oregon) |
||
|
seanoliver77
Sean,
I forgot to show you some pictures of my Kirby Tradition: it is a 1979 model. Unlike yours, my Tradition has the metal fan. The last 3 pictures show it with the shake out bag I got a month ago. That one is in better shape than the bag you see in the first 4 pictures. ~Ben | ||
|
Post# 400311 , Reply# 18 11/2/2018 at 19:57 (1,999 days old) by KirbyClassicIII (Milwaukie, Oregon) |
||
|
seanoliver77
Sean,
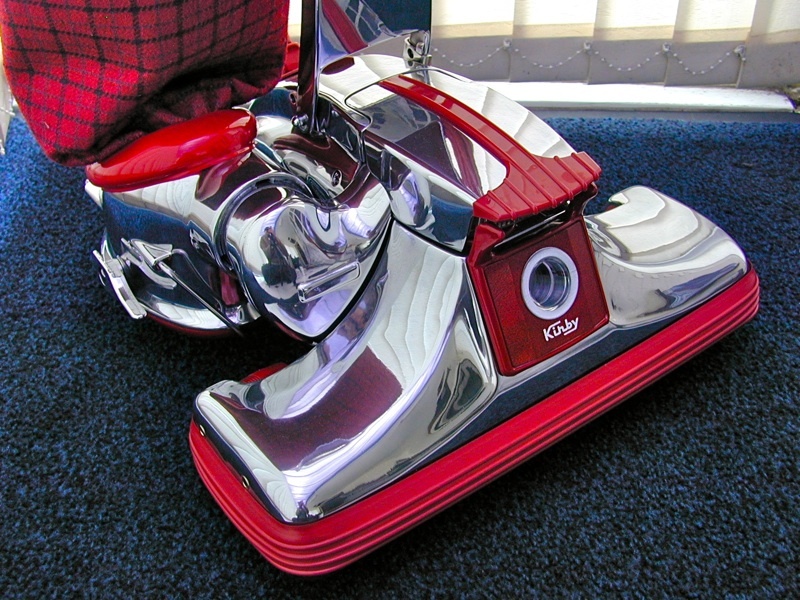
It still has the locking headlight cap, but no longer does it have the original speed switch (134379) that you mount to the cap... it was since converted to the one below the fan case, like many of these early Traditions had since 1980. The 134379 speed switch had two buttons (low and high speed; only the hose uses the latter). While the cap lock mechanism seemed fine, it was the speed switch (134379) that seemed to be misunderstood among many Kirby owners when they first bought these in 1979-80. What the intent of the switch was, it was to ensure that the machine would not run until the cap was firmly down toward the accessory that was currently attached (rug nozzle, hose, Crystalator, power polisher, Handi-Butler or Rug Renovator) and then locked into place. Thus, if someone tried to unlock and then open the cap while the machine was running, it would shut off. It was also supposed to keep moisture out of the motor when the Rug Renovator was being used. Each of the front-mounted accessories had a metal pin attached to them to jibe with one of the two buttons of the speed switch. The problem with the 134379 speed switch was so much that Kirby advised owners to bring in their affected units for conversion to the 134374 speed switch (the one that is mounted to the fan case). Some of the later units, with the older style speed switch so mentioned, also had a blue rubber cover placed over it... this was, again, to keep moisture out of the motor while the Rug Renovator was being used. The blue cover also caused problems (notably, the speed switch selector arm being stuck in the down or "high speed" position) and Kirby also told owners to remove it when affected. I also have an NOS headlight lock button (162079S), which I intend to use when I get around to doing more work on my Tradition. ~Ben
View Full Size
This post was last edited 11/02/2018 at 20:53 | ||
|
Post# 400377 , Reply# 23 11/3/2018 at 19:51 (1,998 days old) by KirbyClassicIII (Milwaukie, Oregon) |
||
|
seanoliver77
Sean,
Here's the notorious blue plastic cover your Tradition's speed switch used to have placed over it. I even saw a red one for the Classic III (but not on the US 120V models, yet). Kirby did this (along with the short-lived design speed switch mounted to inside the headlight cap that was initially used on the very first Traditions) to satisfy the UL double insulated safety laws in order to continue selling the Rug Renovator component. The 2nd picture shows the symptom the speed switch cover had posed: the cleaner running even without anything attached to the front - which meant the speed switch selector arm was jammed in the down (high speed) position! ~Ben | ||
|
Post# 400383 , Reply# 25 11/3/2018 at 22:57 (1,997 days old) by KirbyClassicIII (Milwaukie, Oregon) |
||
|
seanoliver77
Sean,
They did redesign the speed switch again for the Heritage I. This time, the actual speed switch (134381 for Heritage I and 134384 for Heritage II/Legend II) was inside the motor unit (what you see on the fan case is just the mechanism that triggers it), so now nothing would go wrong with the motor as much when the Rug Renovator was being used. You are welcome. ~Ben | ||
|
Post# 400386 , Reply# 27 11/3/2018 at 23:53 (1,997 days old) by KirbyClassicIII (Milwaukie, Oregon) |
||
|
seanoliver77
Sean,
Sort of. The Tradition had one other hurdle: because it was the first Kirby ever to have a disposable bag system, obviously there were problems with it that first time around. The size of the fill tube was too narrow to work efficiently, and the top adapter had an oval shaped opening. The Heritage I's fill tube was improved, but still had the oval shaped opening on the top adapter; consequently, most users opted to replace that with the Style 3 top adapter (with the circle opening). Until 1983, the Heritage I's fill tube was made of cloth (an unusual trait), and also the rug plate was redesigned (no dividing bars, except the one where the belt is) to promote the cleaning effectiveness of the new double-bristle brush roll. But even the new rug plate proved problematic, since users complained it destroyed their power cords (when ran over with the machine - something you should never, ever do in the first place), and Kirby changed the design of the rug plate (with the missing dividers back in place) in response. You are right that the G5 hose does not work on anything up to the G4. The fan case gasket used on the G5 through the present Avalir II is much thicker, which eliminates one gasket from the hose coupling. ~Ben This post was last edited 11/04/2018 at 00:09 | ||
| Post# 400537 , Reply# 29 11/7/2018 at 21:54 (1,993 days old) by seanoliver77 (KALISPELL) | ||
|
I got my parts installed yesterday and they work well. Thanks for sharing those part numbers and tips with me. -Sean | ||
|
Post# 400545 , Reply# 30 11/8/2018 at 09:29 (1,993 days old) by KirbyClassicIII (Milwaukie, Oregon) |
||
|
seanoliver77 | ||
|
Post# 400745 , Reply# 32 11/12/2018 at 20:38 (1,989 days old) by KirbyClassicIII (Milwaukie, Oregon) |
||
|
seanoliver77
Sean,
You are right that the Tradition was the last machine to have the Shag King option. It was used for long shag rugs. And this was the link that you were talking about: https://www.ebay.com/itm/Kirby-Vacuum-Cl... ~Ben | ||
| Post# 401874 , Reply# 34 12/3/2018 at 20:18 (1,968 days old) by seanoliver77 (KALISPELL) | ||
|
Hello everyone, I figured I should let you know that I just purchased a Shag King attachment along with parts of a Rug Renovator off of ebay for the Kirby Tradition. It should be here in about two weeks. Thank you all for telling me to check often and wait for other parts. -Sean | ||
|
Post# 401875 , Reply# 35 12/3/2018 at 20:20 (1,968 days old) by KirbyClassicIII (Milwaukie, Oregon) |
||
|
seanoliver77 | ||
| Post# 402076 , Reply# 37 12/6/2018 at 16:13 (1,965 days old) by Rowdy141 (United Kingdom) | ||
I doubt you'll find a Tradition Shag-King Attachment for sale individually. that's why most of us buy another machine, or attachment set, just for the one or two parts we're missing.
I did try giving away my spare Tradition trim, parts, tools, cloth-bag, polisher... two large boxes of stuff; I mentioned �7.50 (USD 10) postage and never heard from him again! I guess for some people, Free is not cheap enough? | ||
|
Post# 402077 , Reply# 38 12/6/2018 at 16:17 (1,965 days old) by KirbyClassicIII (Milwaukie, Oregon) |
||
|
Rowdy141
Alan,
That is what I did recently to score a few attachments for my 1987 Heritage II: just buy the entire lot that included the 1984 Heritage II that they were for, which I did locally for just $15. ~Ben | ||
| Post# 402097 , Reply# 39 12/6/2018 at 21:43 (1,964 days old) by kirbyklekter (Concord,Ca.) | ||
|
Sean, It really does pay to shop around. The difference between what that seller wanted for the shag rake and a few other pieces at 29.00 and what Kirby Classic III got for half his price says it all. So are you going to work on the 508 when you go home for Christmas? | ||
|
Post# 402479 , Reply# 42 12/12/2018 at 18:32 (1,959 days old) by KirbyClassicIII (Milwaukie, Oregon) |
||
|
seanoliver77
Sean,
The Rug Protector Pads were designed to be placed under certain articles of furniture to avoid getting rust spots on them while the rug was being shampooed with the Kirby assembled with the Rug Renovator. ~Ben This post was last edited 12/12/2018 at 22:10 | ||
| Post# 402484 , Reply# 43 12/12/2018 at 21:40 (1,958 days old) by seanoliver77 (KALISPELL) | ||
|
Ok. That makes sense. I can see why such an accessory would be helpful. Yet another reason why Kirby is a pretty good company. They seem to think of just about every use and or option for their machines. If only the sales people were not so pushy and sometimes dishonest. -Sean | ||
| Post# 404193 , Reply# 47 1/17/2019 at 03:52 (1,923 days old) by scudo (uk) | ||
|
...."If you haven't already drilled that screw head off, try using an impact wrench"..... What has worked for me in the past with some screws is using my cordless drill (with screwdriver bit) on the `hammer` setting. | ||
|
Post# 405229 , Reply# 49 2/7/2019 at 20:16 (1,902 days old) by KirbyClassicIII (Milwaukie, Oregon) |
||
|
seanoliver77
Sean,
I also forgot to show you my Kirby Tradition attachments! I have most of them, but seven tools are still missing. ~Ben | ||
|
Post# 405360 , Reply# 51 2/11/2019 at 18:08 (1,898 days old) by KirbyClassicIII (Milwaukie, Oregon) |
||
|
seanoliver77
Sean,
Yes. On the Classic 1CR and Classic Omega 1CB, a special attachment was included with the Handi-Butler: the "Swedish Massager." The missing tools in my Tradition basic tool set are: 1 - long extension tube 2 - curved extension tube 3 - shoulder strap 4 - Suds-O-Gun cap 5 - utility air nozzle (black one currently filling in) 6 - dusting brush (gray one - for models 508 to 515 - was in this) 7 - swivel tube for surface nozzle ~Ben | ||
|
Post# 408734 , Reply# 54 4/27/2019 at 01:32 (1,823 days old) by KirbyClassicIII (Milwaukie, Oregon) |
||
|
seanoliver77 | ||
| Post# 408768 , Reply# 56 4/27/2019 at 14:54 (1,823 days old) by seanoliver77 (KALISPELL) | ||
|
Ben, I sent you an email to the first address. It did send. Hope to hear from you. Thanks, -Sean | ||
|
Post# 408785 , Reply# 57 4/27/2019 at 16:55 (1,823 days old) by KirbyClassicIII (Milwaukie, Oregon) |
||
|
seanoliver77 | ||
| Post# 408786 , Reply# 58 4/27/2019 at 17:01 (1,823 days old) by seanoliver77 (KALISPELL) | ||
|
Ben, Great. What do you think? -Sean | ||
| Post# 408788 , Reply# 59 4/27/2019 at 17:20 (1,823 days old) by kirbyklekter (Concord,Ca.) | ||
|
Sean, Looking forward to your updates on these machines throughout the summer, keep us posted! By the way, if you don't mind, what courses are you taking at college? Billy | ||
|
Post# 408789 , Reply# 60 4/27/2019 at 17:43 (1,823 days old) by KirbyClassicIII (Milwaukie, Oregon) |
||
|
seanoliver77 | ||
| Post# 408795 , Reply# 61 4/27/2019 at 18:56 (1,823 days old) by kirbyklekter (Concord,Ca.) | ||
|
Oooops! My bad, Sean, Ben, I landed right in the middle of your conversation and I just wanted to apologize for that. Mom was right, "look Both ways before crossing." | ||
| Post# 409226 , Reply# 64 5/8/2019 at 21:31 (1,812 days old) by Lesinutah (Utah) | ||
508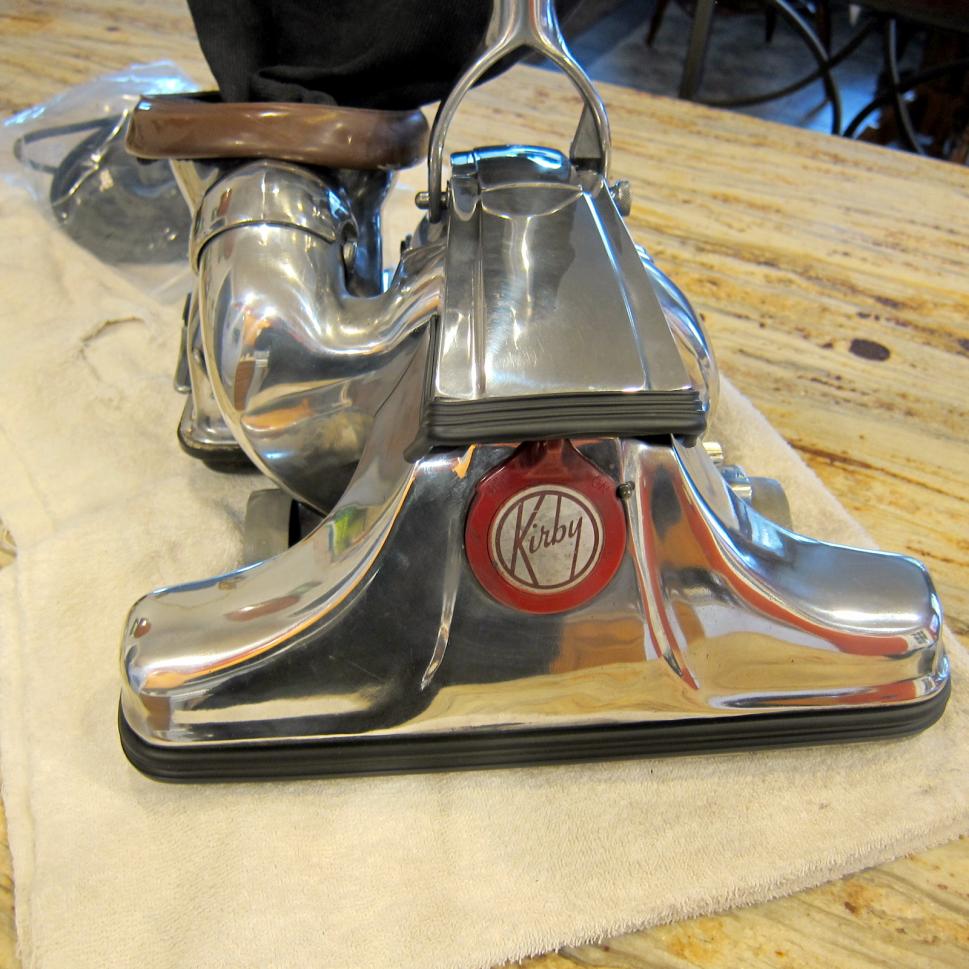
I imagine your talking about the power toggle switch. You wouldn't necessarily see posts. There is a black and white wire from headlight. There is black and white wire from field coil and black and white wire going under the body to nozzle safety switch. The blacks go together and whites go together. If say you have 4 screws on bottom of the toggle switch.
1 3 2 4 The 1 would be black. The 4 would be white wires and on the side of switch 1&3 2 green wires or ground wires are installed there. It's been a little bit since I did one but that's what I remember. Hope to see a 508 pic soon they are nice vacs. Les | ||
|
Post# 413227 , Reply# 66 8/29/2019 at 15:55 (1,699 days old) by KirbyClassicIII (Milwaukie, Oregon) |
||
|
seanoliver77
Sean,
Here's my Tradition's basic attachment set almost completed! ~Ben
View Full Size
| ||
| Post# 413230 , Reply# 67 8/29/2019 at 17:44 (1,699 days old) by Lesinutah (Utah) | ||
|
Nice | ||
|
Post# 418647 , Reply# 68 1/14/2020 at 02:02 (1,561 days old) by KirbyClassicIII (Milwaukie, Oregon) |
||
|
seanoliver77
Sean,
My Tradition's basic tool set, now 100 percent complete! ~Ben | ||
| Post# 443996 , Reply# 69 7/19/2021 at 23:27 (1,008 days old) by bbman9193 (Arkansas) | ||
|
New Kirby find Can anybody tell me what model Kirby this is it looks like a d50 possibly but I'm not sure. | ||
|
Post# 443997 , Reply# 70 7/20/2021 at 00:45 (1,008 days old) by KirbyClassicIII (Milwaukie, Oregon) |
||
|
bbman9193
From one Ben to another:
Let's see now... if that green trim for the nozzle bumper, headlight bumper, foot switch, handle lock button and wheels are all correct, you likely have a Dual Sanitronic 80. Otherwise, you might well have a Dual Sanitronic 50, in which all the original trim was a light copper. The first picture I attached is what it would have looked like when originally produced from 1965-67. The second picture is of a Dual Sanitronic 80, which was produced from 1967-69. ~Ben (KirbyClassicIII) | ||
| Post# 444029 , Reply# 71 7/21/2021 at 00:29 (1,007 days old) by hygiene903 (Galion, OH) | ||
bbman9193
Looks to me that you have a hybrid made of at least 3 different models, or as some would call it, a Frankenkirby! I see a D-50 power unit & handle with a D-80 nozzle and guards, Classic bag, not sure of the wheels or cord. Actually the nozzle could be a D-50 with a D-80 belt lifter on it. Either way, it's definitely a mixture, but what does the data plate say?
Jeff | ||
| Forum Index: | 
| Other Forums: |

|

|

|

|

|

 Comes to the Rescue!


;)
;)
;)
;)
;)
;)
;)
;)
;)
;)
;)
;)
;)
;)
;)
;)