Thread Number: 36022  /  Tag: 50s/60s/70s Vacuum Cleaners
Kirby Trim Removal & Instillation Help ?
[Down to Last]

Vacuumland's exclusive eBay Watch:
scroll >>> for more items --- [As an eBay Partner, eBay may compensate vacuumland.org if you make a purchase using any link to eBay on this page]
Post# 386380   2/19/2018 at 11:21 (2,256 days old) by jpsbgt (Oregon )        

I am going to attempt to replace the rubber trim on a D50 soon, lesinutah was kind enough to supply the parts. Can anyone explain proper technique for removing and reinstalling the trim on the hood and nozzle with out damage. Do you drill out the revits and replace ?

  View Full Size
Post# 386382 , Reply# 1   2/19/2018 at 12:28 (2,256 days old) by Lesinutah (Utah)        
Hey

lesinutah's profile picture
The rivets either grind off or use tin snips.
Install using rivet gun. Do you have a riveter? Do you need. E to send rivets?


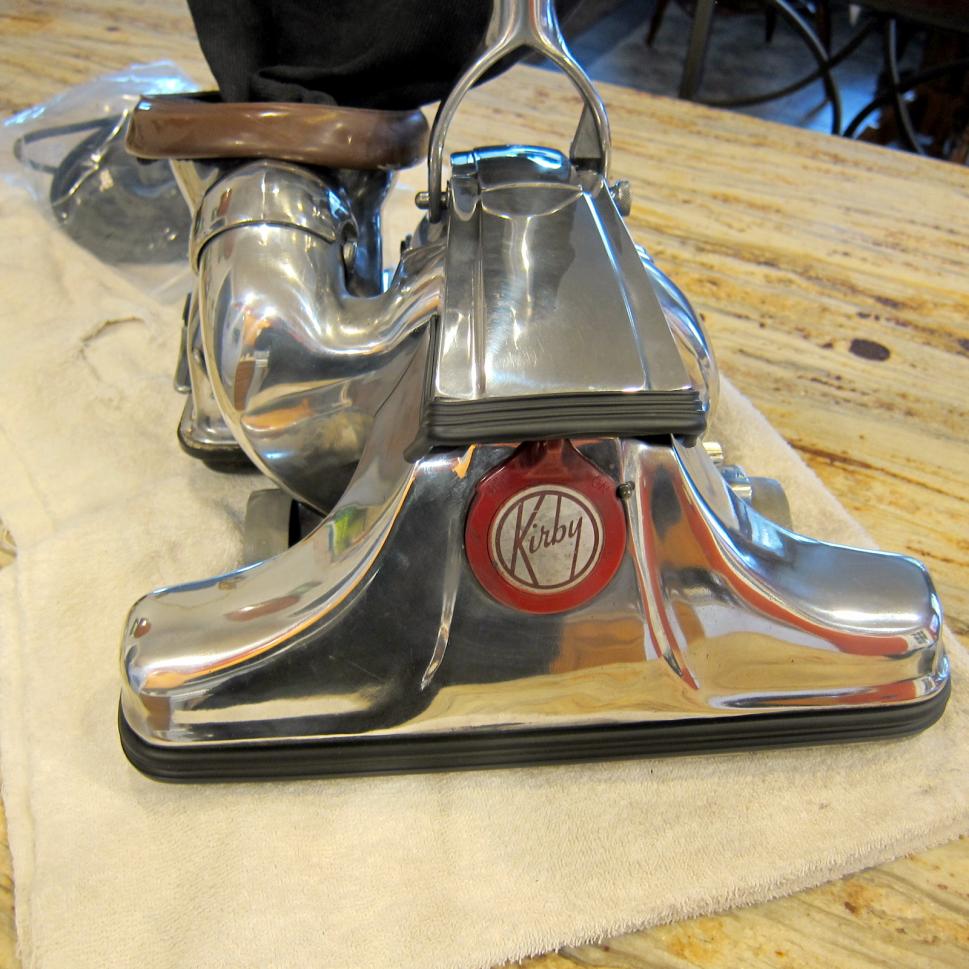
Post# 386384 , Reply# 2   2/19/2018 at 12:37 (2,256 days old) by Lesinutah (Utah)        

lesinutah's profile picture
If install rivets you drill out desired location. If you don't have a riveter gun home depot has a few but Stanley one is horrible. I have ASTRO pneumatic model 1426 from home depot. It rivets real easy and clean

Post# 386385 , Reply# 3   2/19/2018 at 12:52 (2,256 days old) by jpsbgt (Oregon )        

Yes Les I do need revits ! I do have a gun but unsure if I can gain access to the underside of nozzle ?

Post# 386386 , Reply# 4   2/19/2018 at 12:59 (2,256 days old) by Lesinutah (Utah)        
John

lesinutah's profile picture
I'll send rivets you rivet outside in. I'll send a photo.

Post# 386387 , Reply# 5   2/19/2018 at 13:06 (2,256 days old) by Lesinutah (Utah)        

lesinutah's profile picture
Do you have screws for the wheels and a spring for toe touch.

  Photos...       <              >      Photo 1 of 2         View Full Size
Post# 386392 , Reply# 6   2/19/2018 at 17:19 (2,256 days old) by eurekastar (Amarillo, Texas)        

eurekastar's profile picture
The trim can be stretched onto the existing rivets. Heat the trim up under some hot water to make it pliable. Take a very small flat head screwdriver and insert it through the hole on the trim. Next, brace the end of the screwdriver between the rivet and the headlight and slide the trim down the screwdriver and onto the rivet, using the screwdriver as a guide. Use the screwdriver to help fit the trim hole around the rivet.

Post# 386400 , Reply# 7   2/19/2018 at 18:39 (2,256 days old) by texaskirbyguy (Plano, TX)        
Eurekastar got it!

I have done this on several machines without damage. The key is heating the trim to make it pliable. Hot water, hairdryer or intense TX sun will work, just do not burn it. Be gentle and if it cools too soon, heat it again. This works for many bumper trims also.


Forum Index:       Other Forums:                      


Comes to the Rescue!

Woops, Time to Check the Bag!!!
Either you need to change your vacuum bag or you forgot to LOG-IN?

Discuss-O-MAT Log-In


New Members
Click Here To Sign Up.


automaticwasher.org home
Discuss-o-Mat Forums
Vintage Brochures, Service and Owners Manuals
Fun Vintage Washer Ephemera
See It Wash!
Video Downloads
Audio Downloads
Picture of the Day
Patent of the Day
Photos of our Collections
The Old Aberdeen Farm
Vintage Service Manuals
Vintage washer/dryer/dishwasher to sell?
Technical/service questions?
Looking for Parts?
Website related questions?
Digital Millennium Copyright Act Policy
Our Privacy Policy