|
Thread Number: 3508
Cordwinder mainspring refurb |
[Down to Last] |  |
| Post# 39457 5/4/2008 at 10:46 (5,829 days old) by aeoliandave (Stratford Ontario Canada) | ||

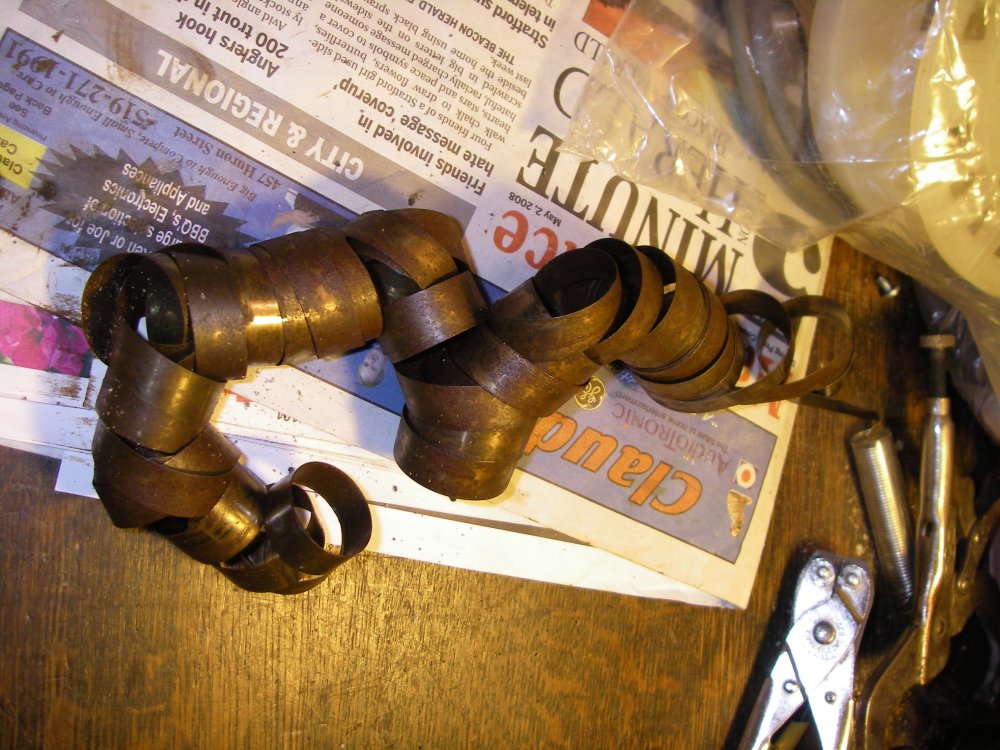
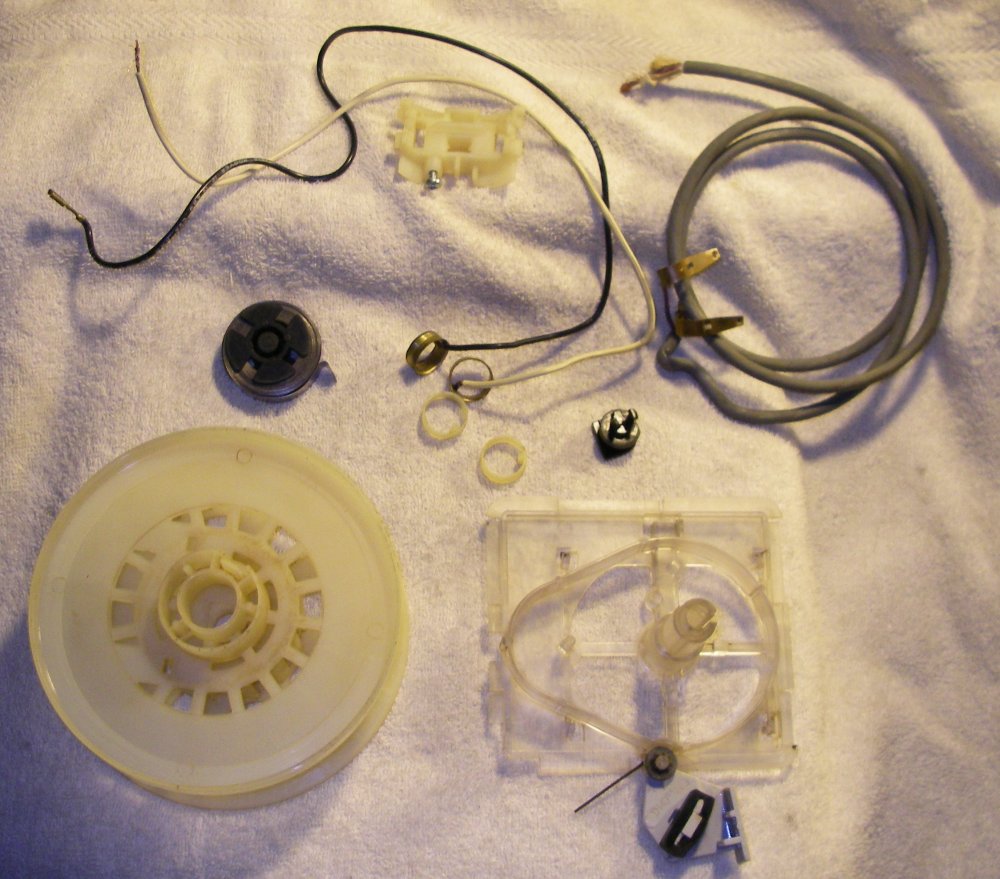
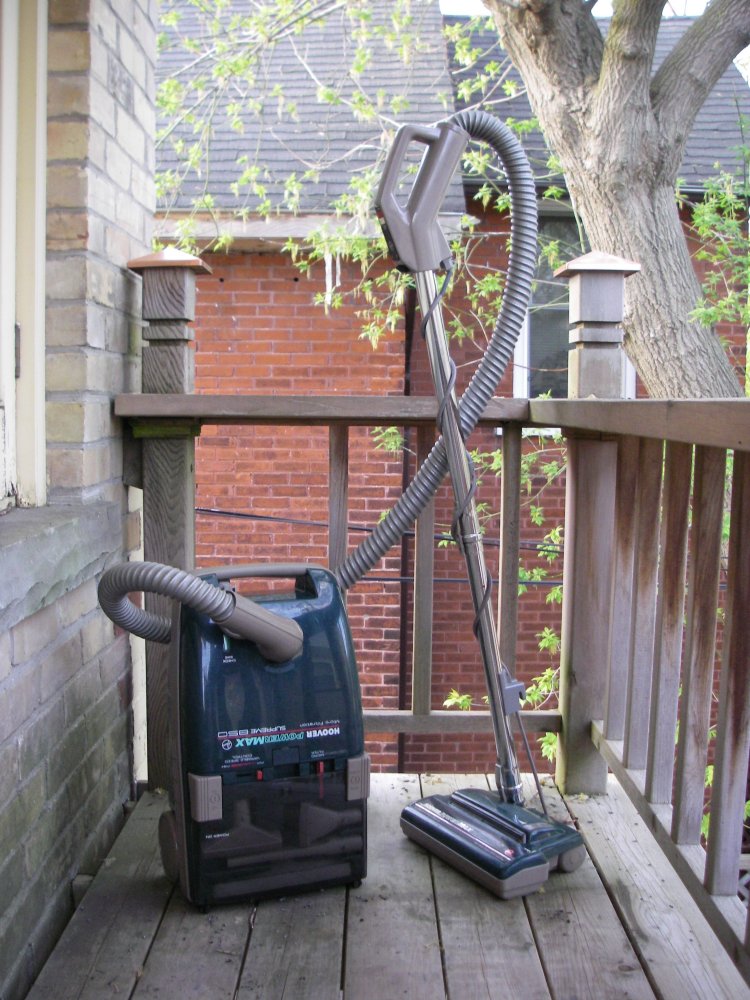
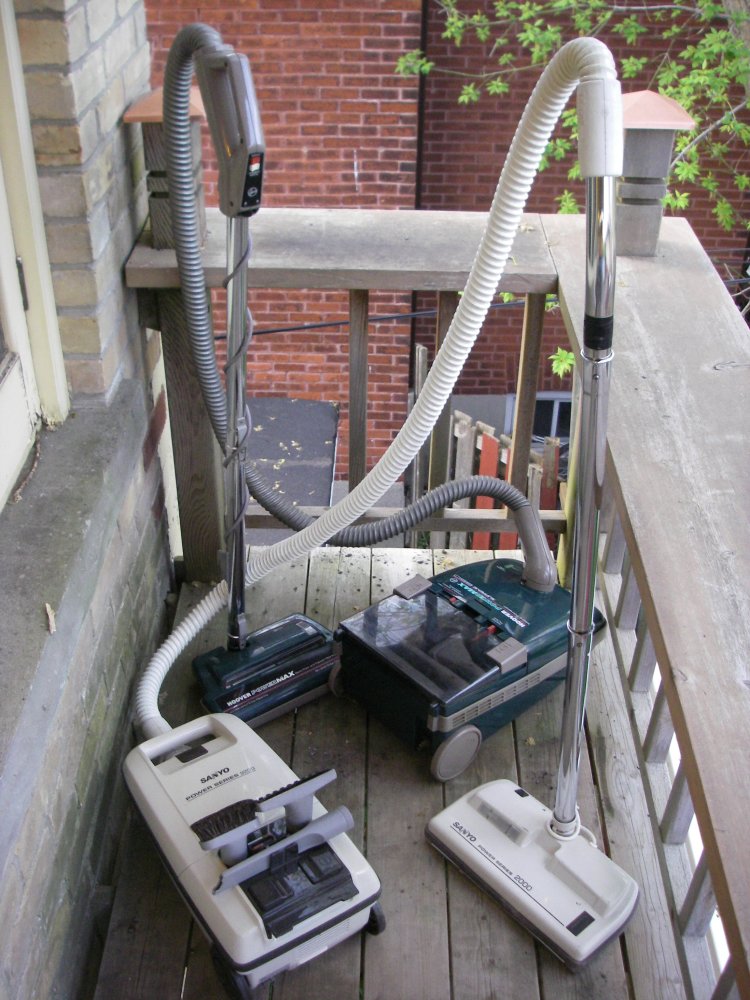
Remember this nice dark green Hoover PowerMax Supreme? Well, the cut powernozzle cord has been replaced with a gray 3 wire cord from a computer power cord with lots of slack and a strain relief down on the head, so the 3 pin functions work as intended. Final thing was to replace the cut cord on the cordwinder. Took the vacuum apart so the parts could be washed up, pretty darn clean inside all it needed was new filter media. But the cordwinder!!! Musta sat in a very damp enviroment as the mainspring was corroded and so rusty the spring couldn't slide along itself, rusty patches catching on each other fouling up the mechanism. I'd just cleaned up a cordwinder on the Sanyo and since this Hoover is otherwise in fine shape I wasn't going to give up on it. 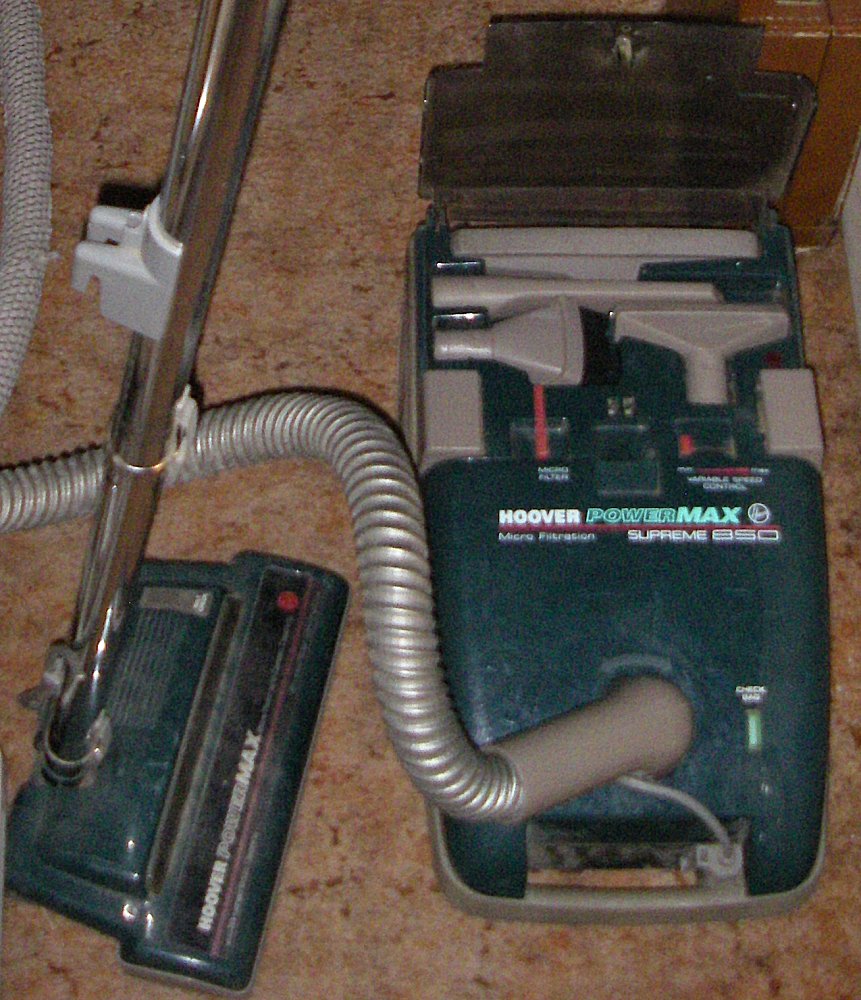
| ||
| Post# 39458 , Reply# 1 5/4/2008 at 10:51 (5,829 days old) by aeoliandave (Stratford Ontario Canada) | ||
|
Solution? Soak entire cordwinder overnight in a vat of DUNK degreaser. Dissassemble cordwinder electrical bits to the point of separating the halves, place inside burlap bag, manipulate and pull halves apart to free the reels and let the mainspring sproing! Lots of cleaning up to do here. Wear rubber gloves. 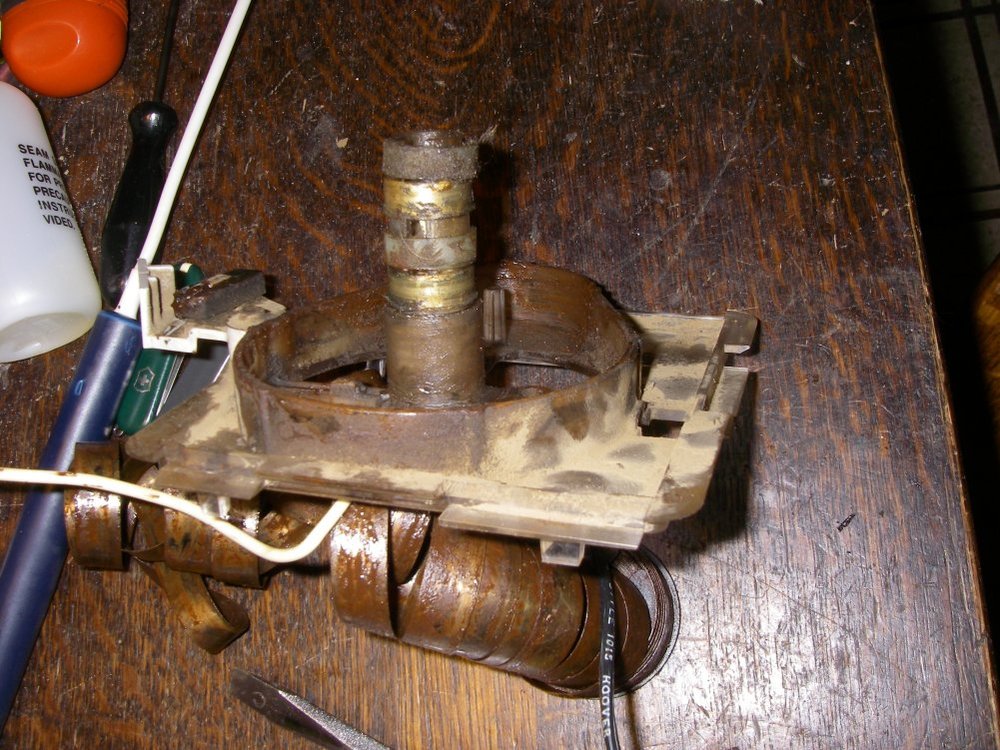
| ||
| Post# 39459 , Reply# 2 5/4/2008 at 10:53 (5,829 days old) by aeoliandave (Stratford Ontario Canada) | ||
|
| ||
| Post# 39461 , Reply# 3 5/4/2008 at 11:01 (5,829 days old) by aeoliandave (Stratford Ontario Canada) | ||
|
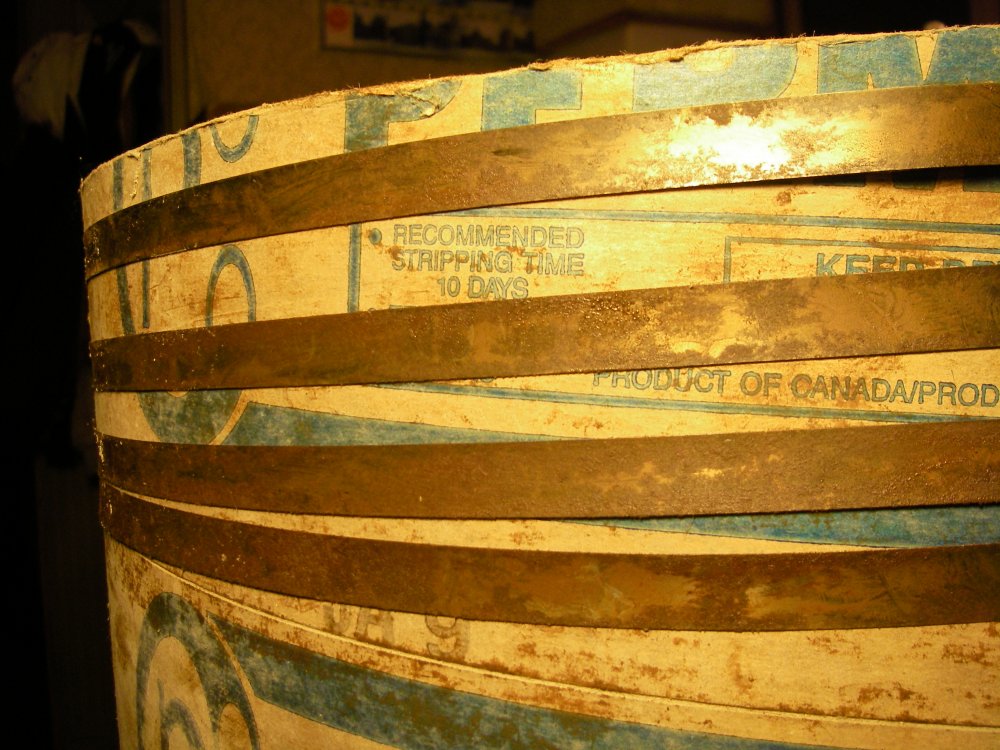
Both sides of the coiled spring must be sandpapered and steel wooled shiny again and thoroughly dry. Should allow spring to work as intended. Solution? First wrap mainspring inside out around large diameter Sonotube, commence scraping off the rust deposits with penknife, sandpaper the bejeezus the surface rust tarnish, finish up with elbowgrease steel wooling. That's 16 feet of highly sprung high tensile steel banding folks - wear eye protection and gloves in case the visegrips let go. :-) 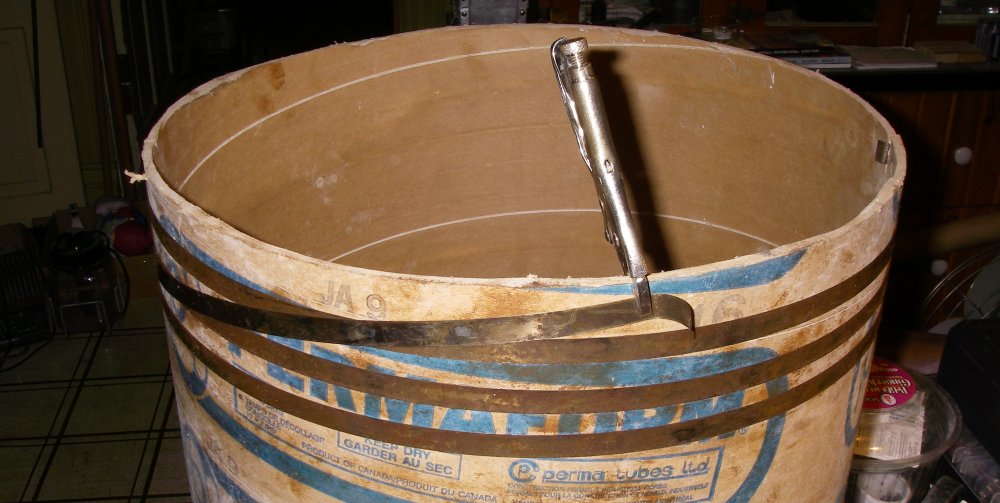
| ||
| Post# 39462 , Reply# 4 5/4/2008 at 11:05 (5,829 days old) by aeoliandave (Stratford Ontario Canada) | ||
|
| ||
| Post# 39463 , Reply# 5 5/4/2008 at 11:06 (5,829 days old) by aeoliandave (Stratford Ontario Canada) | ||
|
| ||
| Post# 39464 , Reply# 6 5/4/2008 at 11:13 (5,829 days old) by aeoliandave (Stratford Ontario Canada) | ||
|
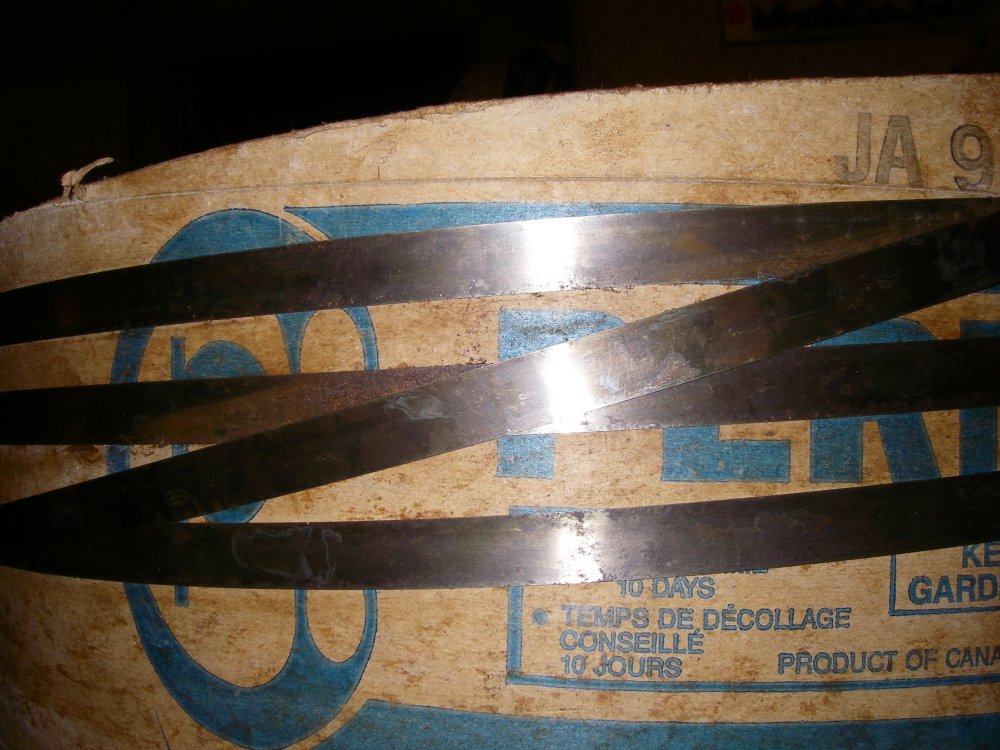
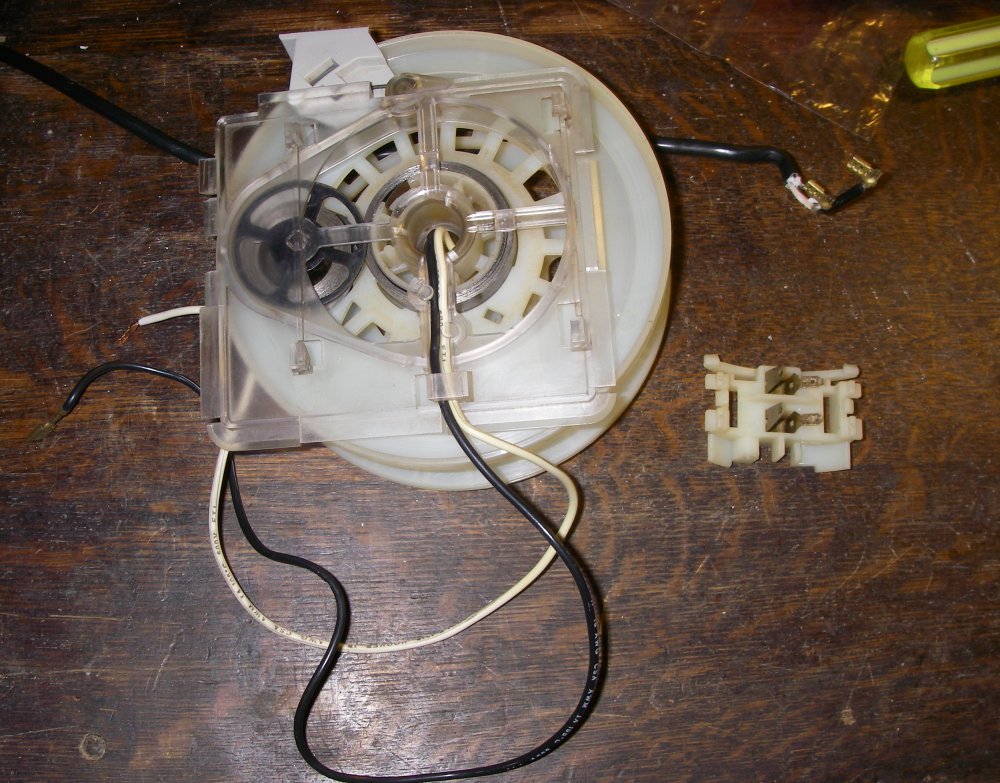
Carefully uncoil inside-out spring from large drum on to small diameter tube right side out to clean up the other surface, wiping down as you go. Repeat: scraping off the rust deposits with penknife, sandpaper the bejeezus the surface rust tarnish, finish up with elbowgrease steel wooling. Now re-coil the spring on the Cordwinder takeup drum... To be continued... 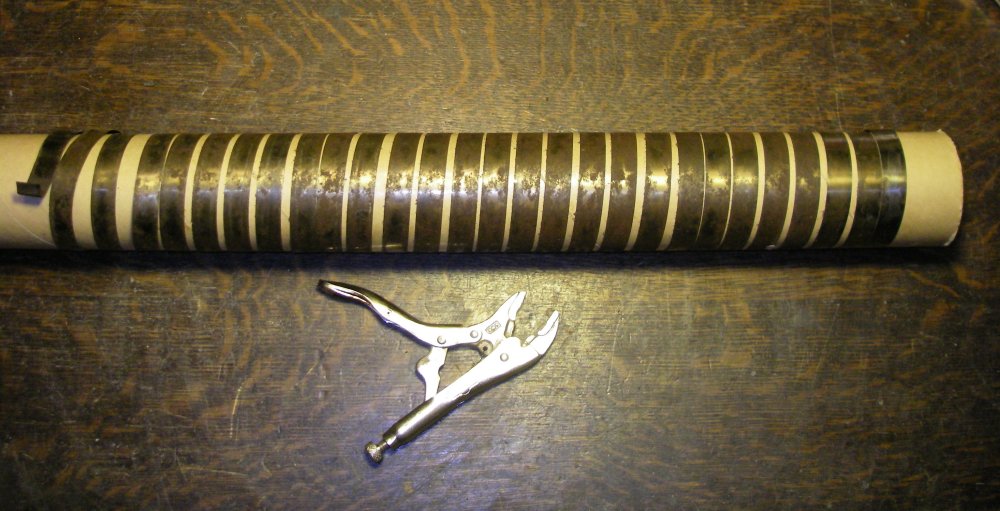
| ||
| Post# 39465 , Reply# 7 5/4/2008 at 11:33 (5,829 days old) by aeoliandave (Stratford Ontario Canada) | ||
|
| ||
| Post# 39466 , Reply# 8 5/4/2008 at 11:36 (5,829 days old) by aeoliandave (Stratford Ontario Canada) | ||
|
| ||
| Post# 39468 , Reply# 9 5/4/2008 at 12:06 (5,829 days old) by camelotshadow (Valley Village) | ||
|
wow nice technique you did a great job with that! | ||
| Post# 39483 , Reply# 10 5/4/2008 at 19:29 (5,829 days old) by aeoliandave (Stratford Ontario Canada) | ||
|
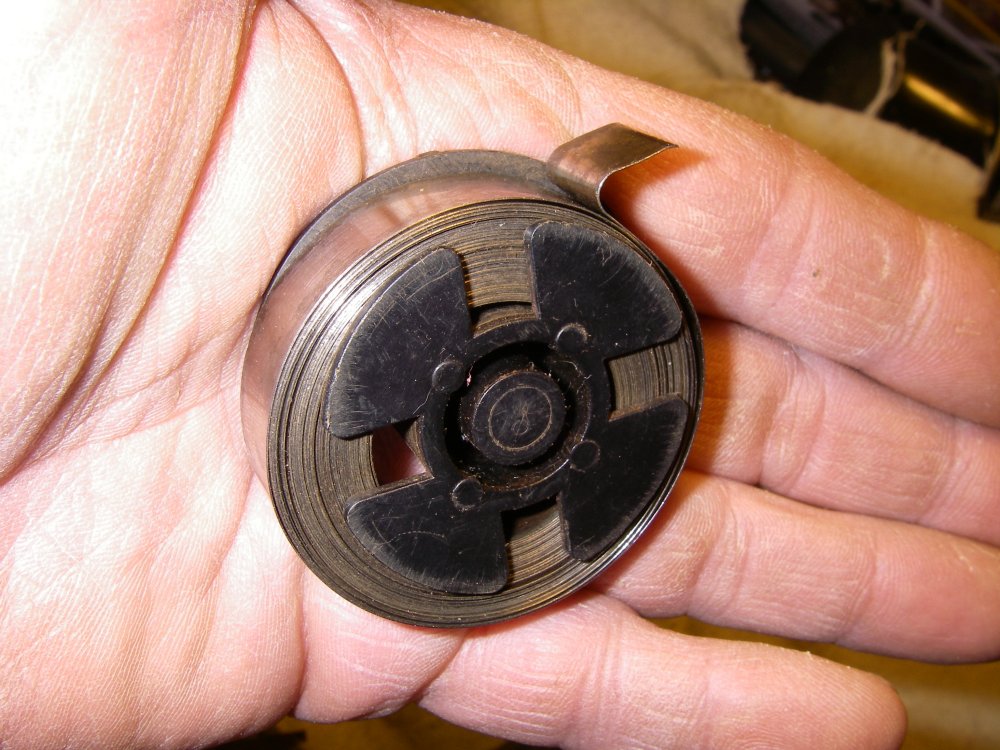
Cordwinder assembled. | ||
| Post# 39484 , Reply# 11 5/4/2008 at 19:34 (5,829 days old) by aeoliandave (Stratford Ontario Canada) | ||
|
Get out the damp rags, toothbrushes & crevicetool. | ||
| Post# 39485 , Reply# 12 5/4/2008 at 19:41 (5,829 days old) by aeoliandave (Stratford Ontario Canada) | ||
|
Cordreel installed and tested for snappy action.
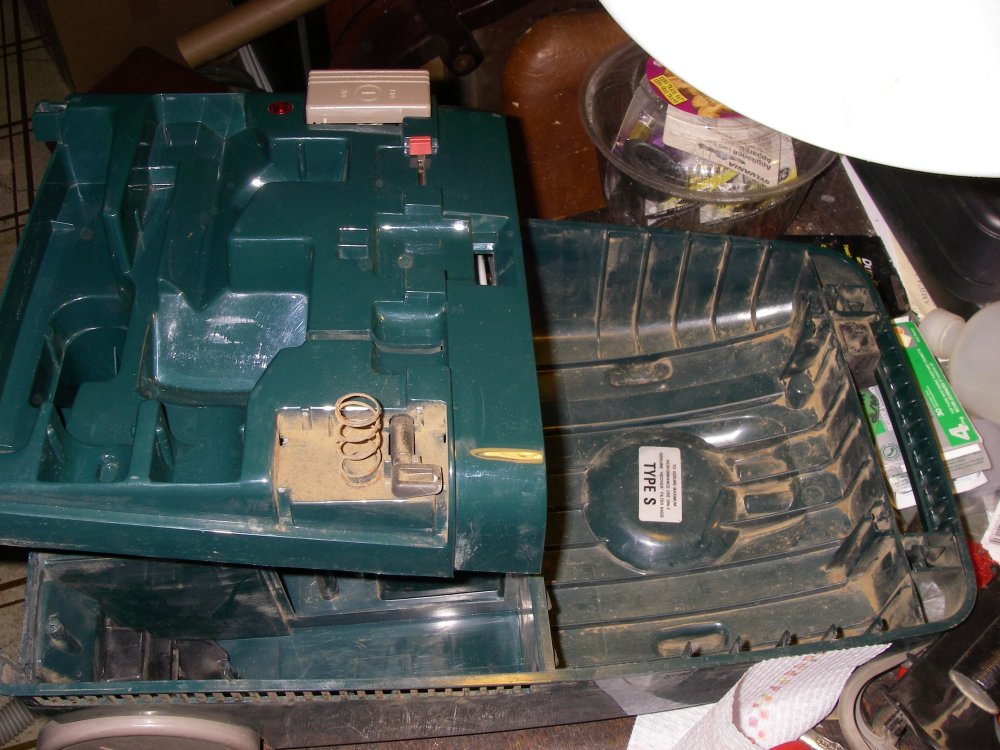
After careful consideration and because I don't have a suitable gray cord I chose a supple black 25 foot cord from a trashed Fantom Fury Second Edition - I have an original one with sleeker styling & green trim bits that's a keeper. The Hoover has a replacable after-motor filter that slides down in slots on the cordwinder frame - exhausts through the cordreel chamber. 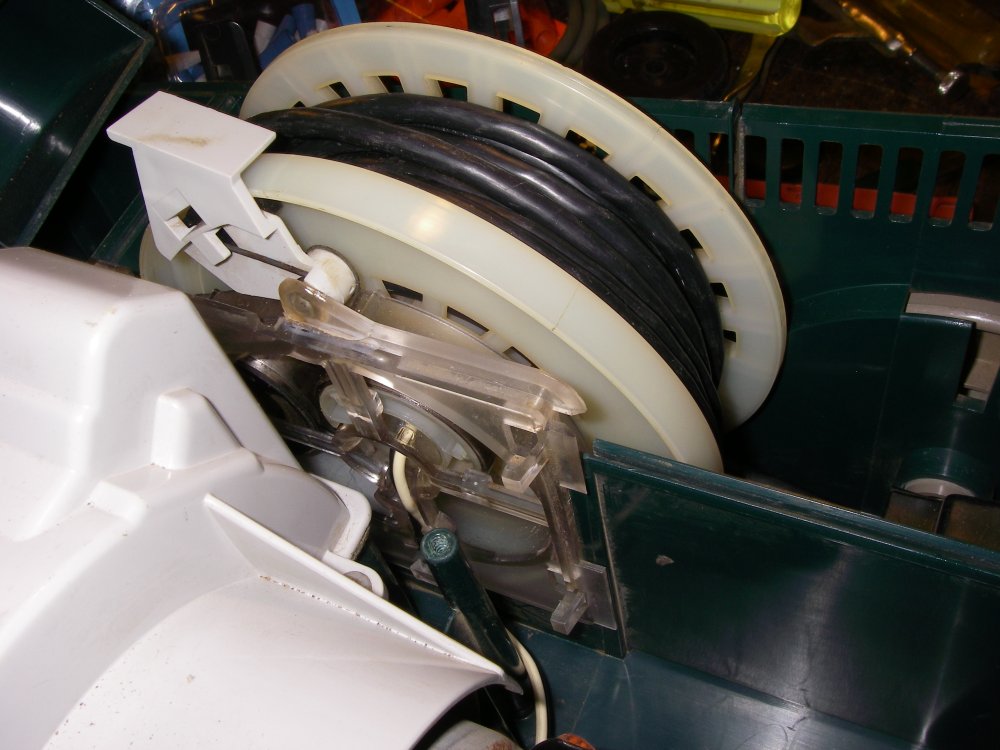
| ||
| Post# 39486 , Reply# 13 5/4/2008 at 19:48 (5,829 days old) by aeoliandave (Stratford Ontario Canada) | ||
|
Rewiring test.
Had to connect the hose plug to turn it on. Speed control also works great. 'Bag Full' airflow meter was plugged with carpet fibres aropund the spring - picked them out with a hooked pin and now it works again, too. Rust pattern on the outside of motor indicates Humidity damage, not total immersion. The motor and fans are unrusted. Since the motor exhausts directly through the cordwinder frame & spring it's not surprising the spring was toasted. I'm thinking the buildup and distribution of the impacted dust throughout the vacuum was moist earth perhaps... 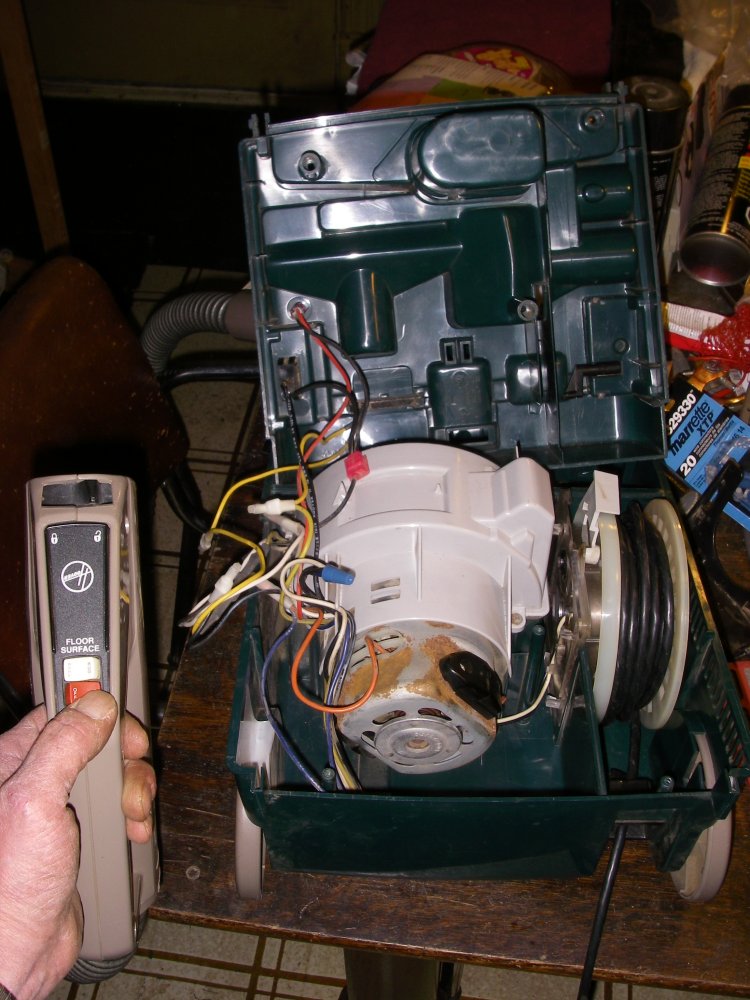
| ||
| Post# 39487 , Reply# 14 5/4/2008 at 19:52 (5,829 days old) by aeoliandave (Stratford Ontario Canada) | ||
|
The Money Shot | ||
| Post# 39488 , Reply# 15 5/4/2008 at 19:56 (5,829 days old) by aeoliandave (Stratford Ontario Canada) | ||
|
Money Shot #2 | ||
| Post# 39489 , Reply# 16 5/4/2008 at 20:00 (5,829 days old) by aeoliandave (Stratford Ontario Canada) | ||
|
Double Money Shot. | ||
| Post# 39492 , Reply# 17 5/4/2008 at 20:26 (5,828 days old) by camelotshadow (Valley Village) | ||
|
lot of work but there is a sense of satisfaction to bring back these ole faithful guys back from the grave & to give them a chance to again be useful... | ||
Post# 39513 , Reply# 18 5/5/2008 at 04:43 (5,828 days old) by arh1953  ( River Park, in Port St. Lucie, Florida) ( River Park, in Port St. Lucie, Florida) |
||
 | ||
| Post# 39514 , Reply# 19 5/5/2008 at 06:39 (5,828 days old) by aeoliandave (Stratford Ontario Canada) | ||
|
Thanks, Christine & Alan. I think the early 'Space Pod' design that evolved from the boxy canisters can look good if done right..and these two are. I also want to mention I wouldn't have gone to all this effort if not for the strong powerful motors, perfect hoses (rarely found even in a thrift store), complete tool set and the excellent 'rubbery' plastic that resists scuffing that they are molded of - this is not the brittle type of plastic you can snap off. The cases are over engineered with lots of strategicly placed molded internal thick support ribs. The Hoover bits fit into each other so perfectly it must have been designed on CadCam. | ||
|
Post# 39517 , Reply# 20 5/5/2008 at 07:31 (5,828 days old) by arh1953 ( River Park, in Port St. Lucie, Florida) |
||
|
| ||
| Forum Index: | 
| Other Forums: |

|

|

|

|

|

 Comes to the Rescue!