|
Thread Number: 25464
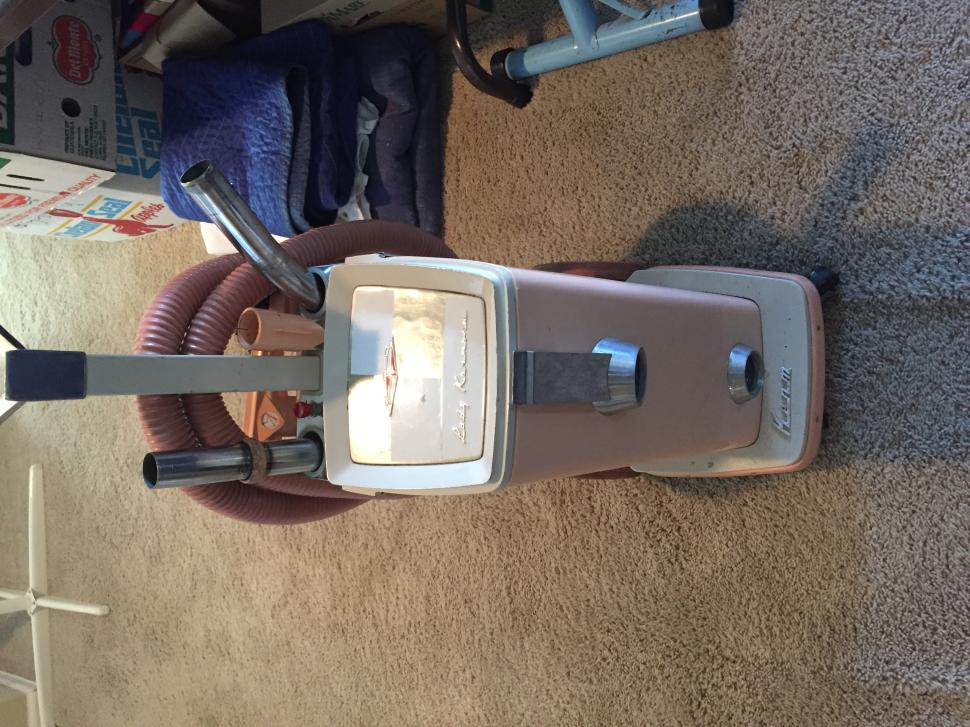
Look what came in the mail! My new "Chocolate Brown" Rainbow D2! |
[Down to Last] |  |
| Post# 286093 , Reply# 1 6/24/2014 at 19:15 (3,585 days old) by dysonman1 (the county) | ||
Beautiful machine. The cord is original. It is a late model chocolate rainbow, you can tell from the white power nozzle motor cord to the brown hose cord. We only got two shipments in like that in St. Louis. The power nozzle brush roller has been replaced recently with a ball bearing CWP brush roll. Congratulations on an excellent find
| ||
| Post# 286095 , Reply# 2 6/24/2014 at 19:16 (3,585 days old) by Gr8DaneDad () | ||
|
Nice score! A D series Rainbow is on my to acquire list | ||
Post# 286097 , Reply# 3 6/24/2014 at 19:27 (3,585 days old) by KirbyClassicIII  (Milwaukie, Oregon) (Milwaukie, Oregon) |
||
 | ||
|
Post# 286105 , Reply# 5 6/24/2014 at 21:00 (3,585 days old) by KirbyClassicIII (Milwaukie, Oregon) |
||
|
| ||
| Post# 286106 , Reply# 6 6/24/2014 at 21:16 (3,585 days old) by eurekastar (Amarillo, Texas) | ||
|
NICE! I have one too and love it! Those are quieter than the rest because they have a layer of Styrofoam insulation under the dome. And that is indeed the original cord. I think that model has the updated D3 motor in it too, which means its a little easier to service. Congratulations!
View Full Size
| ||
| Post# 286109 , Reply# 7 6/24/2014 at 21:37 (3,585 days old) by rainbowguy17 () | ||
|
Thanks! Thanks everyone for the kind words! I have a question, how do you remove the separator from this model? It's different than my d4 SE. It looks clean but I want to know how to remove it so I can give it a good cleaning and for future use. Thanks | ||
| Post# 286165 , Reply# 9 6/25/2014 at 09:40 (3,585 days old) by dysonman1 (the county) | ||
|
Remove the separator by inserting a small screwdriver through the hole in the separator screw. Turn counter clockwise while holding the separator itself down.
View Full Size
| ||
| Post# 286166 , Reply# 10 6/25/2014 at 09:50 (3,585 days old) by dysonman1 (the county) | ||
|
Be sure your separator is completely clean and dry, and the spider wheel on which the separator sits is also clean and dry.
View Full Size
| ||
| Post# 286192 , Reply# 12 6/25/2014 at 13:38 (3,585 days old) by eurekastar (Amarillo, Texas) | ||
|
You can remove the motor from the body of the vacuum and then disassemble the motor itself. If the spider is dirty, then the fans will be dirty as well. That is a thru-flow motor. The fans are on top of the motor and suck the air through motor before discharging it. So it will be good to clean the whole motor (housing, motor field, etc.). The bottom bearing is most likely rusty too because it is closest to the water. That bottom bearing is no longer available through Rainbow. However, you can still get one from bearing suppliers. I've found them on Ebay. Let me know if you decide to take it apart. I can help walk you through it. I've posted a few photos just to help you visualize what it looks like.
The moral to the story is always remove the separator from the vacuum when finished and NEVER leave the vacuum on the water basin when not in use. The bearings get hot and draw moisture that causes premature rusting. | ||
| Post# 286193 , Reply# 13 6/25/2014 at 13:42 (3,585 days old) by eurekastar (Amarillo, Texas) | ||
|
Fan Cleaning | ||
| Post# 286209 , Reply# 14 6/25/2014 at 15:50 (3,585 days old) by rainbowguy17 () | ||
|
Thanks, eurekastar Thanks for all of the helpful info! It was really helpful! I may decide to take it apart, and if I do, I'll let you know! Thanks again! | ||
| Post# 286218 , Reply# 15 6/25/2014 at 18:17 (3,584 days old) by eurekastar (Amarillo, Texas) | ||
|
Your first step will be to remove the motor from its housing. To do that, you'll need to remove the foam gasket that surrounds the spider. It's glued on. Sometimes, it's easily removed. But you may need to scrape it off or even use some acetone to expose the screws underneath. Once that's removed, you'll see 8 screws that hold a flange onto the motor support ring (the black rubber ring). Be careful in removing those screws, lest you strip the screw heads out. Be sure to use the correct size Phillips head screwdriver. I would recommend using an impact driver first. You may also need to scrape out dirt and adhesive in order to get the screwdriver well seated into the screw. If they're rusty, a little penetrating oil helps. Anyway, once the screws are removed, you can then remove the flange and then the motor will lift right out. With the motor completely out of its housing, you'll then be able to take the motor apart. I always like to remove the fan staging first. Simply pop the clips off with a flat blade screw driver. Then use an 11/16" wrench to remove the top fan nut. It will most likely be easier to remove than the lower nut. You can use the lower nut as a backup. They spin in opposite directions. Once that nut is off, you can then remove the top spacer. With that removed, take a thin flat blade screwdriver and hammer and gently tap around the edge of the top fan stage. They will usually all come off together. If that happens, you'll see the fans and the other spacers clanging around inside. At that point, you can usually just pull then apart with a little effort. I always soak the fans in water and laundry detergent and then use a bottle brush to scrub between the fan blades and the blades of the stage housings. I then run them in the dishwasher.
To remove the bottom nut, you may need some penetrating oil and patience. You'll notice that the bottom of the armature shaft is slotted. You can insert a flat blade screwdriver into those slots for backup when removing the large separator nut. Once that's off, you'll see the bearing shield that's held on by four screws. If you want to clean things thoroughly, you'll want to completely disassemble the motor. That will require removing the lower bearing. To do that, you'll have to tap it out from inside after you've removed the armature. I wash everything in the dishwasher (except for bearings and carbon brushes). You'll also find inside the motor that there's a bakelite air guide. Remove it and wipe it off but don't throw it in the dishwasher. Be careful with it, because those aren't made anymore. Because that motor is a thru-flow motor, the inside can get filthy. That's why I would completely disassemble everything and wash it. The motor field will be pretty rusty too. After washing it in the dishwasher, you might want to take a wire brush to it get the rust off. Also, if that motor flange is pretty rusty, you might want to buy a new one. You can get one on Ebay. That's a part that was used all the way through the D4. If it's ok, you can use some acetone the get the old adhesive off the flange and the flange screws. You can get a new gasket off Ebay too. To attach it, I just use automotive weatherstripping adhesive from Walmart. I hope this helps! Don't hesitate to ask questions. Also, that lower water pan gasket should be the only one you'll need. You can install a cork gasket between the bearing plate and the motor housing, but I don't think that gasket was spec'd for the D2 motor. It didn't show up until the D3. Let me know if you need more photos too! One more thing: If you remove that lower bearing, be sure to tap on it around the outside race. Do the same when reinstalling it.
This procedure may not be complete since I'm doing it from memory! LOL! | ||
| Post# 286223 , Reply# 16 6/25/2014 at 18:59 (3,584 days old) by eurekastar (Amarillo, Texas) | ||
|
The universal number for the lower bearing is 88502. If you do a google search with "bearing 88502", you should find what you need. Here's a link to another Ebay seller for that bearing. The top bearing is a proprietary item with the bearing already installed in a mounting plate. The bearing plate you'll need has four vents cut into the plate around the bearing. CLICK HERE TO GO TO eurekastar's LINK on eBay | ||
| Post# 286224 , Reply# 17 6/25/2014 at 19:12 (3,584 days old) by eurekastar (Amarillo, Texas) | ||
|
This is how the bottom of the motor looks with the spider removed. What you're looking at is the bearing retainer.
View Full Size
| ||
| Post# 286225 , Reply# 18 6/25/2014 at 19:14 (3,584 days old) by eurekastar (Amarillo, Texas) | ||
|
This is the inside of the motor housing. Note all the dirt and why it would be good to clean it. This should stay clean if the vacuum is properly used and cared for!
View Full Size
| ||
| Post# 286434 , Reply# 19 6/27/2014 at 13:59 (3,583 days old) by ultralux88 (Denver, Colorado) | ||
 | ||
| Forum Index: | 
| Other Forums: |

|

|

|

|

|

 Comes to the Rescue!


;)
;)
;)
;)