Thread Number: 24294
Handi-Butler Information
[Down to Last]

Vacuumland's exclusive eBay Watch:
scroll >>> for more items --- [As an eBay Partner, eBay may compensate vacuumland.org if you make a purchase using any link to eBay on this page]
Post# 272026   3/15/2014 at 19:30 (3,693 days old) by KirbyClassicIII (Milwaukie, Oregon)        

kirbyclassiciii's profile picture
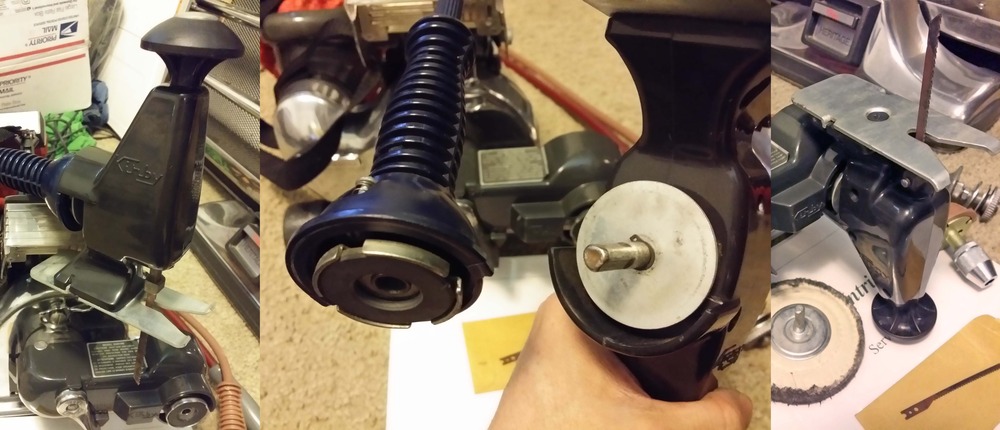
Does anyone with a good wealth of knowledge regarding the Kirby Handi-Butler know anything about the exact diameter of the work wheels used directly on the device? These include: wire wheel, grinding wheel, the two buffing wheels, and knife sharpener.

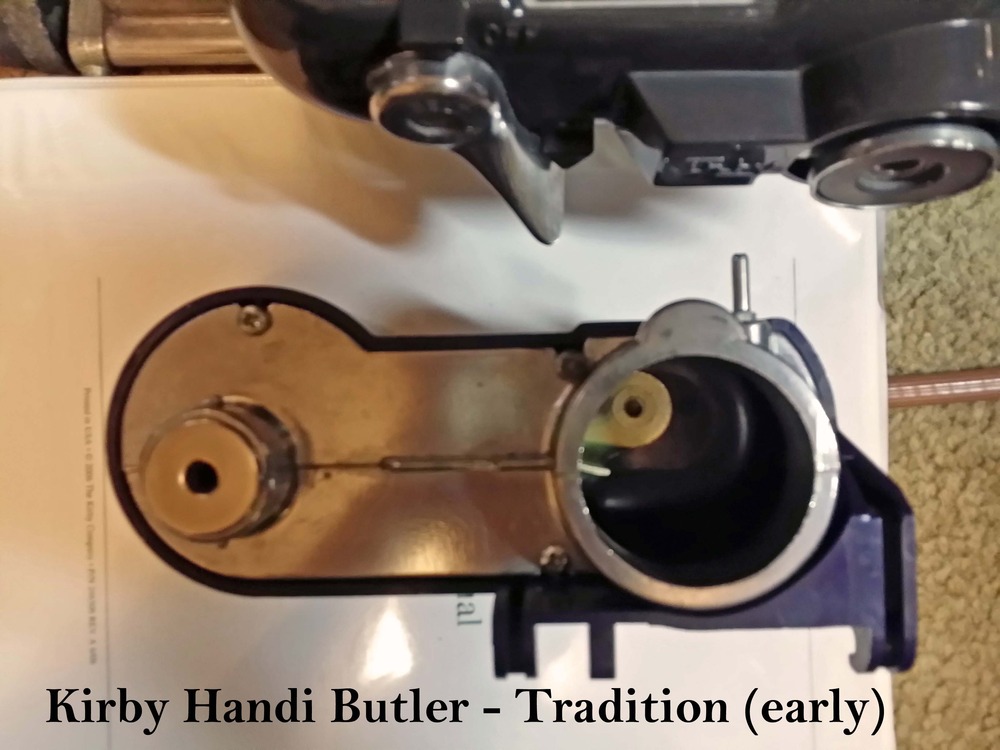
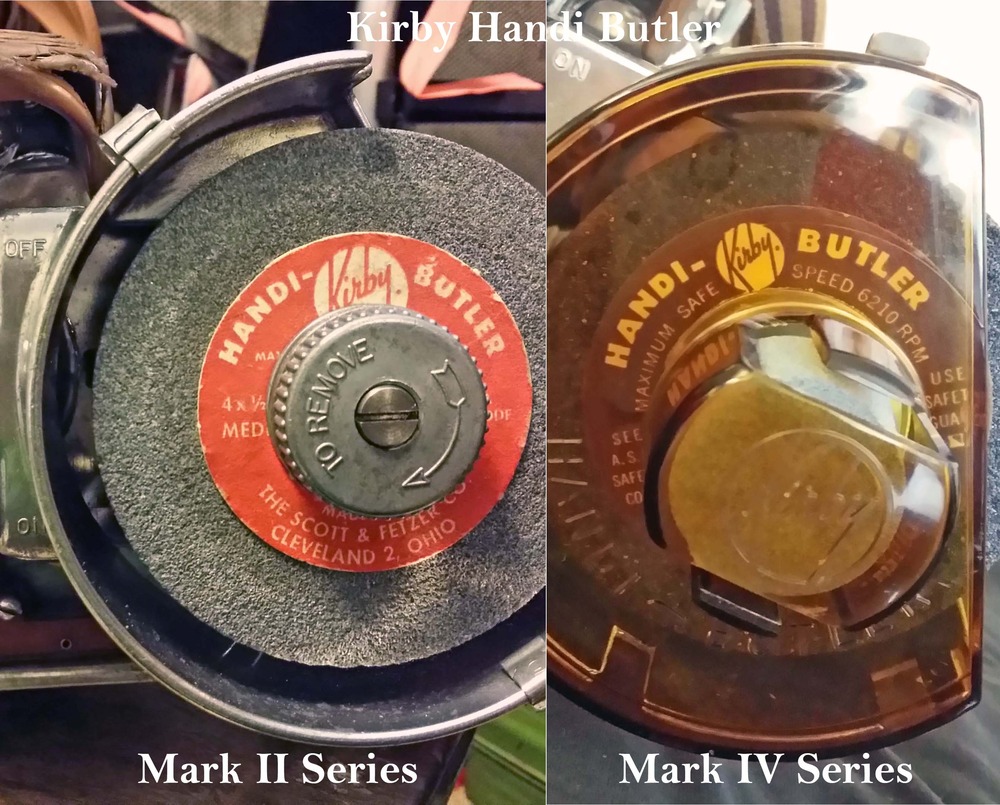
I mean, if there were pictures of the Mark III (used on models 562 and Sanitronic VII) and Mark IV Handi-Butlers (used on models Dual Sanitronic 50 and 80, and the Classic and Classic Omega) lined up together, I might have better knowledge of their exact compatibility. Please try to take pictures of these.

The Classic Omega's Handi-Butler is the only all-metal HB that will also work with the Classic III and the Tradition because all three have the same speed switch.

Thank you,


Ben Edge (KirbyClassicIII)


Post# 272034 , Reply# 1   3/15/2014 at 20:18 (3,693 days old) by super-sweeper (KSSRC Refurbishment Center)        
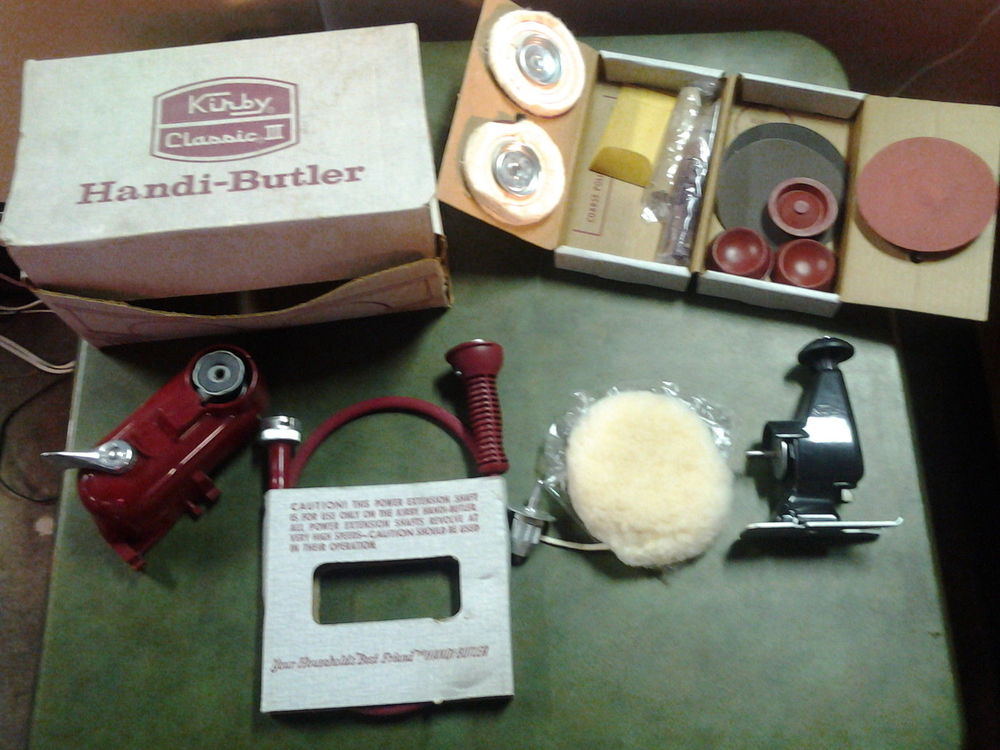
Ben!

super-sweeper's profile picture

I'd be glad to measure and photograph my 511's Handi-Butler when I get the chance. The grinding wheel that came with it is labeled under the Universal name, could this be a replacement or included with the Kirby from purchase? but why would you need to replace a grinding head? they rarely wear out.


As a side-note, I will not be able to get to the Tradition until early to mid April, It's both in storage and in the middle of restoration.


Post# 272035 , Reply# 2   3/15/2014 at 21:36 (3,693 days old) by KirbyClassicIII (Milwaukie, Oregon)        

kirbyclassiciii's profile picture
Alex,

I didn't know that (about the Tradition). Unless they are badly damaged, I hope the metal fan and headlight speed switch stay.

~Ben


Post# 272047 , Reply# 3   3/16/2014 at 00:31 (3,693 days old) by super-sweeper (KSSRC Refurbishment Center)        
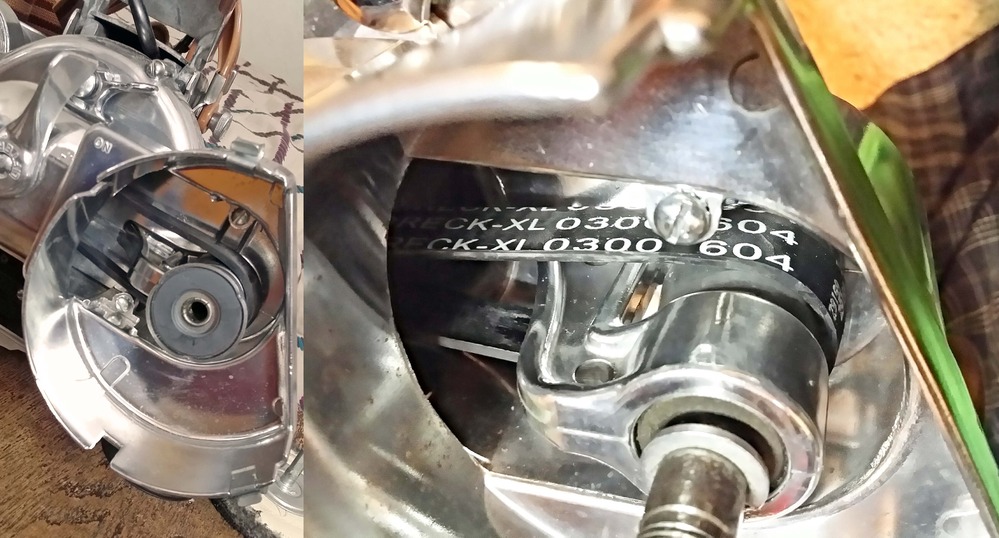
The switch and fan are fine,

super-sweeper's profile picture

OF COURSE they will stay!Laughing


Post# 272169 , Reply# 4   3/16/2014 at 19:46 (3,692 days old) by super-sweeper (KSSRC Refurbishment Center)        
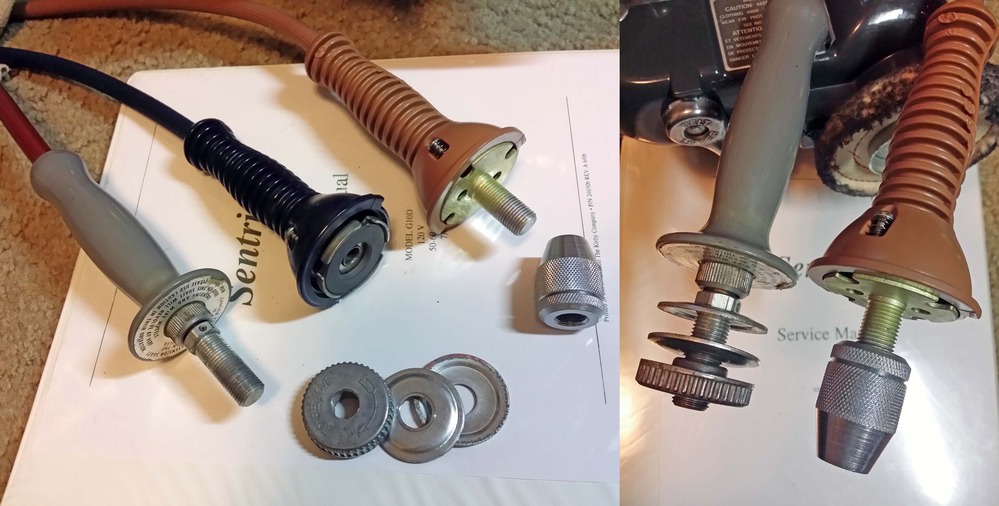
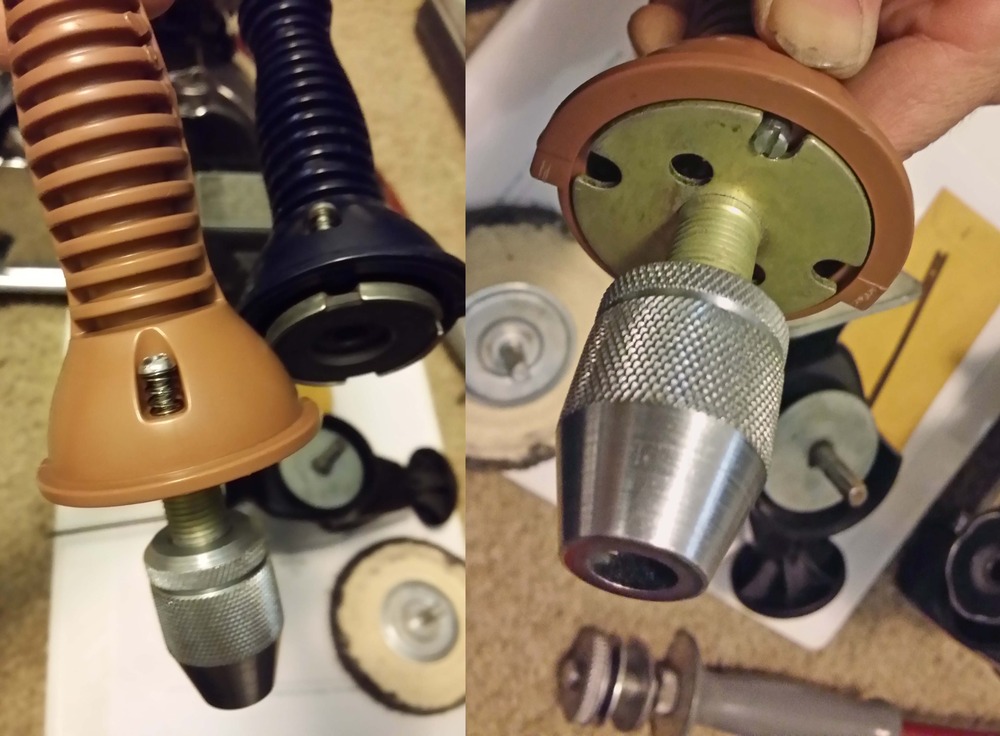
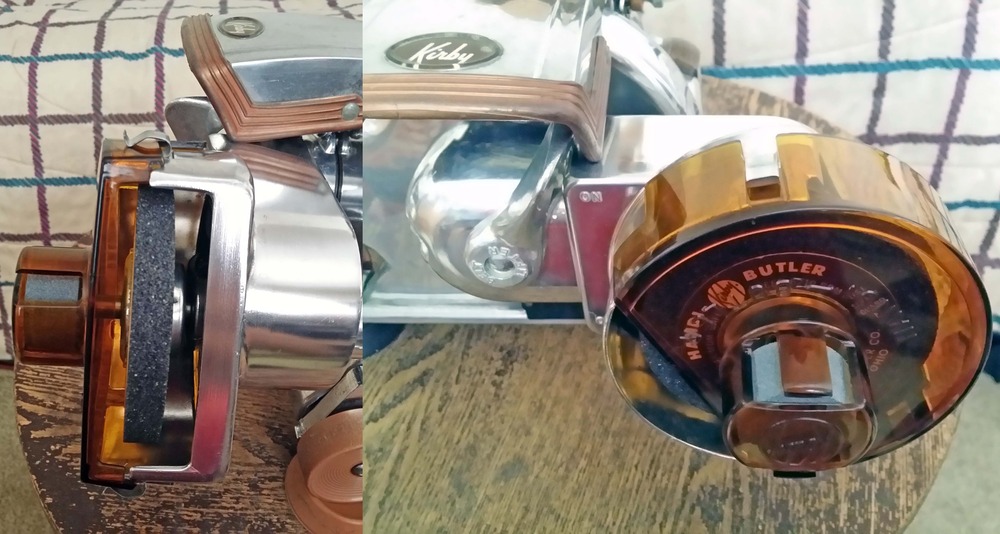
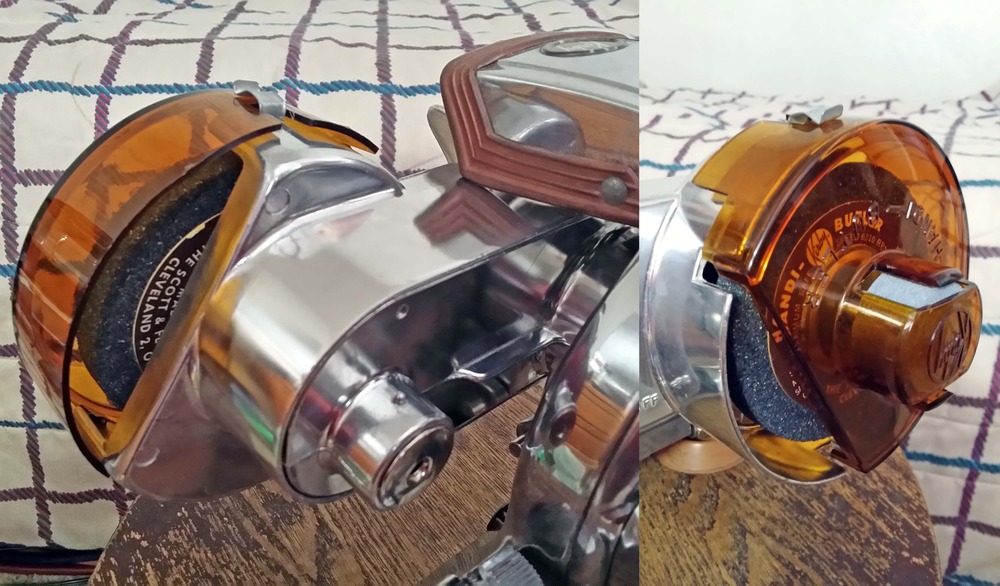
BEN!

super-sweeper's profile picture

Here's your measurements of my 511's kit:


Wire Wheel-4 inches.

Polishing Wheel:3 1/6 inches.

Polishing Wheel #2:3 1/2 inches.

Power Buffer (Connects to Handi-Butler flexible rotating arm):5 inches.

Grinding Wheel (Labeled "UNIVERSAL", Not sure if originally sold with 511 Handi-Butler kit, but why would you replace a grinding wheel? since when do they wear out?):4 inches.


Post# 272356 , Reply# 5   3/18/2014 at 04:39 (3,690 days old) by tolivac (Greenville,NC)        

If you do a lot of grinding--the wheel will wear out-and depending on WHAT you grind.For the hobbyist householder using the Handi-Butler as a grinder-the wheel would last a long time-but a grinding wheel in a busy machine shop--not so long.

Post# 272500 , Reply# 6   3/19/2014 at 09:10 (3,689 days old) by super-sweeper (KSSRC Refurbishment Center)        
hi Tolivac!

super-sweeper's profile picture

Since the grinding wheel is a nice, even 4 inches, I'd say it has not seen will that much use!!Laughing


Post# 279470 , Reply# 7   5/6/2014 at 00:33 (3,642 days old) by Elektrolux ()        
RE: Pictures. . .

I own and operate various vintage Kirbys. I'd be happy to photograph some in mounted position, in use or just close ups up the various connections between each.

I have on hand to demo a 518 (late production) & 562 w/ a Mark II Handi butler, a D50 & D80 w/ a Mark IV Handi Butler, a Heritage 1-HD w/ matching 1-HD Handi Butler. I do have a Tradition (1st run) Handi Butler but the vacuum itself is still in the works & out in garage.

I actually do have the G10D Sentria Handi Butler but this is vacuum driven by now. Doesn't run as strong on older units w/ old hoses. It's essentially just a dermal so it is compatible with any off the shelf bit you can get in local shops.

I'll take some pix & post as I get them w/ a description of what I know of it & if I leave anything out have our group members step in to fill in the blanks or just add details as they can.

Here we go. To start; The Tradition Handi Butler mounting lugs. This is the early version w/ top post to jibe headlight hood switch. It has an extra lug on plastic housing. Someone can confirm if this fits other models or just a 2nd safety switch tab.


Post# 279473 , Reply# 8   5/6/2014 at 01:37 (3,642 days old) by Elektrolux ()        
Handi Butler - grinder wheels

here's a side by side of 2 grinder wheels I set up on a Mark II on a 562 & a Mark IV on a D50. Both are 4-1/2" rated medium but w/ a safe speed max of 6000 RPM (older) & 6210 RPM (newer)

The photo shows both side by side where you can see the Mark II Series wheel is sized 4-1/2" but not seen in photo (covered by retaining washer) is rated a speed of 6000 RPM. The Mark IV series on the right shows a rated safe speed of 6210 RPM. I found this became the rated speed up to the 1-HD Handi Butler


Post# 279477 , Reply# 9   5/6/2014 at 02:21 (3,642 days old) by Elektrolux ()        
HB Cable Drive (Bowden) , Tradition

This photo shows a close up of the "2" connection ends of the Handi Butler Tradition drive cable assembly.

Notice the Bowden steel drive connection (left) w/ the bayonet screw mount. it's same is had been used since the Mark III Series & all the way till the end w/ the 1-HD. The various things that changed however over the years was the power take off end (right).

By a certain point (fill in anyone!!!) Kirby simplified the attachments end by adding a magnet ring to drive cable end, same type of magnet as 1st seen on the Mark III front end. The attachments, still the same as from the Mark III, had a keyed shaft w/ metal base so it just dropped in the slot and the magnet holds it in place.

I 2nd that said above about using the grinder wheel on open cable end. These wheels were eventually can break down in strength so chips or chunks break off and fly out and/or when they hit the wrong thing they can explode into a thousand shards and you do not wanna be anywhere near that mess. So I as well strongly suggest using these carefully in the shielded casing of the Handi Butler main body unit. For sparks and all, always use eye protection.


Post# 279489 , Reply# 10   5/6/2014 at 04:22 (3,641 days old) by Elektrolux ()        
Handi Butler drive cables connections...

This photo shows 3 type of Handi Butler cables. from left to right; Mark II, Tradition, & Mark IV. A close up in right side shows the differences in the way the Mark II & Mark IV mount attachments opposed to the Tradition. whereas on the Tradition most attachments w/ built in shaft mount directly into cable end & stay in place with magnet. The Mark II requires use of "2" washers w/ for example, a buffing wheel in between secured w/ a locking cap which on this model screws on left hand thread. The Mark IV has the buffing wheels w/ the retaining plate and shaft built on but requires use of the arbor drill mount adapter which screws onto the shaft right hand thread. Instead of a wrench or chuck key, you depress the screw in rear of flange (see later photos) to lock plate as you tighten arbor by hand. Certain attachments on the Tradition may require use of an Arbor which came with it to use such things as a drill bit or paint mixer and so on.

Post# 279582 , Reply# 11   5/6/2014 at 16:20 (3,641 days old) by Elektrolux ()        
Handi Butler - Drill Attachment

Some of the attachments not only need to attach with keyed shaft & magnet but need to lock in place onto flange to not turn in hand when using. 1 such attachment is the optional Jigsaw.

Center photo shows in left hand the keyed, or cut away rim of the dive cable power end. Notice the matching cut away in the rear of the jigsaw, half the surround is cut away allowing it to align in place on cable handle end so now you hold cable handle and saw will not spin in hand. You can see where this could be dangerous if it had.

The left photo shows the jigsaw mounted on drive cable of a Tradition drive cable. The top knob of saw spins for ease of maneuvering in projects. There's no actual switch on these attachments so care should be had to keep a good grip on saw if it was to hit a knot or such to not fall from hand. One idea I can suggest is to plug vacuum into a foot pedal control switch. Otherwise, keep near motor unit for reach of power switch.

The photo in right shows the jigsaw can mount directly to the Handi Butler power unit but upside down. This base of the power unit has the same matching cutaway in housing to secure. Although not easily seen in photo, the hand knob of the jigsaw will clear the same surface of the Kirby w/ wheel cups in place for about nearly 1 inch.

This is the only attachment I have that utilizes this type of connection. Maybe some members can share with us other attachments that mounted like this. Or maybe Kirby intended to offer more later before discontinued.


Post# 279587 , Reply# 12   5/6/2014 at 16:32 (3,641 days old) by KirbyClassicIII (Milwaukie, Oregon)        

kirbyclassiciii's profile picture
Kris,

During the Classic and Classic Omega runs, there also existed for the Handi-Butler the "Swedish Massager" attachment that was to obviously massage.

~Ben


Post# 279590 , Reply# 13   5/6/2014 at 16:42 (3,641 days old) by Elektrolux ()        
Handi Butler - connection compatability,

I chose these 3 most popular representations of the Handi-Butler to show how they changed over the years yet retained some form of compatibility.

As you can see so far from the photos, the "3" power drive cables of the Mark I/II, Mark III/IV & Tradition/1-HD all share a sort of common means to share attachments over the years. All cables from the Mark III onward mount to the Handi-Butler itself w/ same bayonet coupler. This means we can mix & match drive cables to use certain attachments in a certain way. For example, using the jigsaw on the Mark III/IV requires the newer cable of the 1-HD or like.

I like using my own buffing wheels so I utilize the Mark III/IV cable with Mark I/II style wheels. I like these better since the lock cap is smaller in diameter and not as sharped edged. The pre assembled attachments have a larger outer flange that sticks out & is sharp and can get in way polishing and if/when comes in contact w/ project can leave good sized scratches in soft metal or wood. Not saying they don't work but just that care needs to be taken.

Using the jigsaw on the Mark I/II is not possible since the newer cables cannot mount the power unit the way they do in Mark III/IV. However, since the Mark II/III share the same safety switch lug you can switch the actual Handi-Butler power unit on your given Kirby of choice. My Mark III runs off my 1958 518 just fine.


Post# 279595 , Reply# 14   5/6/2014 at 16:52 (3,641 days old) by Elektrolux ()        
RE: Swedish Massager.

That's cool. I wanna find 1 of those now. Maybe someone can post a pic. I only have the Turbo Kit for the 1-HD sop by then it was air vacuum powered. These newer models had the soft massage pads as well as sanding and polishing pads. This kit, The Kirby Turbo Kit, was the offering to replace our ever so loved positive drive Handi-Butler.
To have the Handi-Butler + Turbo Accessories Kit (including hair clippers & early zip brush) together w/ Heritage 1-HD is pretty neat since it marked the end of 1 but begging of another in accessories.

Kristopher


Post# 279603 , Reply# 15   5/6/2014 at 17:14 (3,641 days old) by KirbyClassicIII (Milwaukie, Oregon)        

kirbyclassiciii's profile picture
Kris,

It was starting with the Classic III 2CB that the Handi-Butler took on a new design that would be known as the "Mark V." The wire and grinding wheels (and Handi-Sharpener) were all dropped, but the jig/saber saw was added (they were red early, but in 1978 changed to black).

~Ben


Post# 279605 , Reply# 16   5/6/2014 at 17:23 (3,641 days old) by Elektrolux ()        
Handi-Butler cable mounting lock screw.

As mentioned earlier above, thread on attachments can easily be threaded on w/o need of wrench or chuck key buy depressing this sprig loaded locking screw in rear of cable handle flange.
The same screw is used in newer cables for ease of aligning wheels, jigsaw or pointed out, the "Swedish Massage" as Ben (KirbyClassicIII) kindly shared with us. (:


Post# 279612 , Reply# 17   5/6/2014 at 17:58 (3,641 days old) by Elektrolux ()        
Kirby Handi-Butler Mark II connection...

This photo shows the Handi-Butler drive cable connection of the Mark II (late) on a 1958 518. Similar to Mark I with only differences (and correct me if mistaken) being the shaft size and threading. I forget when, but the cable shaft thickness changed then back again. I remember a member asking or hinting of that.

The Mark I/II mount w/ just a finger tightening of the cable shaft in a left hand thread. a wrench is supplied if needed but I usually haven't had to use it. usually only if motor tightened up on something like drill or sanding. As seen in earlier photo of the grinding wheels, a slotted screwdriver can be inserted into center of wheel as you hand tighter locking cap.


Post# 279617 , Reply# 18   5/6/2014 at 19:52 (3,641 days old) by Elektrolux ()        
Handi-Butler, bels & replacement.

** Oreck XL-033-604 **

This is the most often asked question, replacement belts. Does Kirby still make them and or where can I find them. The short answer, "NO". Best place is an old local vacuum shop or salesmen from yesteryear. I was told long ago Kirby hasn't made those belts in 20+ year. Your best bet is new old stock but even then, they may not last as long as rubber, like a tire has a shelf life and will eventually fatigue.

At best, you can, & I have, used the Kirby belt # 301289 (floor polisher). They are very tight if new, even on the late year Mark II (slightly smaller belt). I would save your used pulled large roller belts. I had better luck w/ the used, slightly stretched but they will tend to slip on you once worn in a little more.

So after lots of reading I came upon a tread in here where a member mentioned Oreck. Didn't say what belt so I ordered "2" basic belts and the 1st "1" was the charm. The Oreck XL Upright, part # 0300-604. Online for as low as $1.50 if you shop around. I used Amazon. I tried a generic repro for testing but later I ordered the Oreck brand for better quality. The are closer in thickness to the old Kirby, see photo, Kirby old stock on left in a Mark IV, new Oreck on right in a Mark II.

These belts were so close a compatible swap I ordered more for the rest of my collections and for standby. They fit best in the smaller belt version of the Mark II but just fine in the Mark III to 1-HD. Just a little tight at 1st but break in fine.

Changing these belts is done in 2 different ways. for larger front opening metal housings you can simply work the belt off lifter from rear then pull out through front. To replace, I feed belt around lifter from rear then pull over front hub. Whichever method gets it up & running is just fine. As for the later plastic bodied models you do need to remove the "3" screw on rear then slip over front hub then as you carefully replace metal back cover get finger into rear opening to guide belt over lifter as you mount in place. And that's pretty much it.


Post# 279623 , Reply# 19   5/6/2014 at 22:15 (3,641 days old) by Elektrolux ()        
Handi-Butler, grinder wheel shielf.

New for the Handi-Butler Mark III is the absents of the side knife guide but an added smaller front wheel w/ knife slots. The safety shield went from solid red to matching transparent colors such as brown as seen on this Mark IV on a D50. The plastic shield can be removed from its standard position when using large wheel to upside down for using smaller wheel. The slots were the same but this option allowed to cover the exposed large grinder wheel when only using to sharpen knives on small wheel or if using for other task as to not bump into exposed wheel.

In the later Mark IV runs into the Classic models the cover shield actually had marking pointing "This side up" for... each large & small wheel. I leave mine upside down when using cable attachments as to not run up against it by accident or grind it up against something , especially if using in carrying strap to stand and buff or polish


Post# 279624 , Reply# 20   5/6/2014 at 22:45 (3,641 days old) by Elektrolux ()        
Handi-Butler, safety shield in "small wheel" mode

This next photo just shows a close up of the Handi-Butler safety shield in its "small wheel" mode, upside down. Notice how the slots in shield line up and slots in housing allow for lip of shield to set in on front. As you can see, the large wheel is exposed a little so safety should be taken if near things that can be sucked in as the there will be vacuum in those areas. Example: long hair, too close to light drapes or other dangling light weight items. You can just remove wheel but just keep in mind you will still have the vacuum presence.

Practice safety when using your Handi-Butler & you will have years of fun. (:


Forum Index:       Other Forums:                      


Comes to the Rescue!

Woops, Time to Check the Bag!!!
Either you need to change your vacuum bag or you forgot to LOG-IN?

Discuss-O-MAT Log-In


New Members
Click Here To Sign Up.


automaticwasher.org home
Discuss-o-Mat Forums
Vintage Brochures, Service and Owners Manuals
Fun Vintage Washer Ephemera
See It Wash!
Video Downloads
Audio Downloads
Picture of the Day
Patent of the Day
Photos of our Collections
The Old Aberdeen Farm
Vintage Service Manuals
Vintage washer/dryer/dishwasher to sell?
Technical/service questions?
Looking for Parts?
Website related questions?
Digital Millennium Copyright Act Policy
Our Privacy Policy