|
Thread Number: 17968
Rainbow D2 Reassembly |
[Down to Last] |  |
| Post# 196065 8/18/2012 at 20:37 (4,267 days old) by eurekastar (Amarillo, Texas) | ||
|
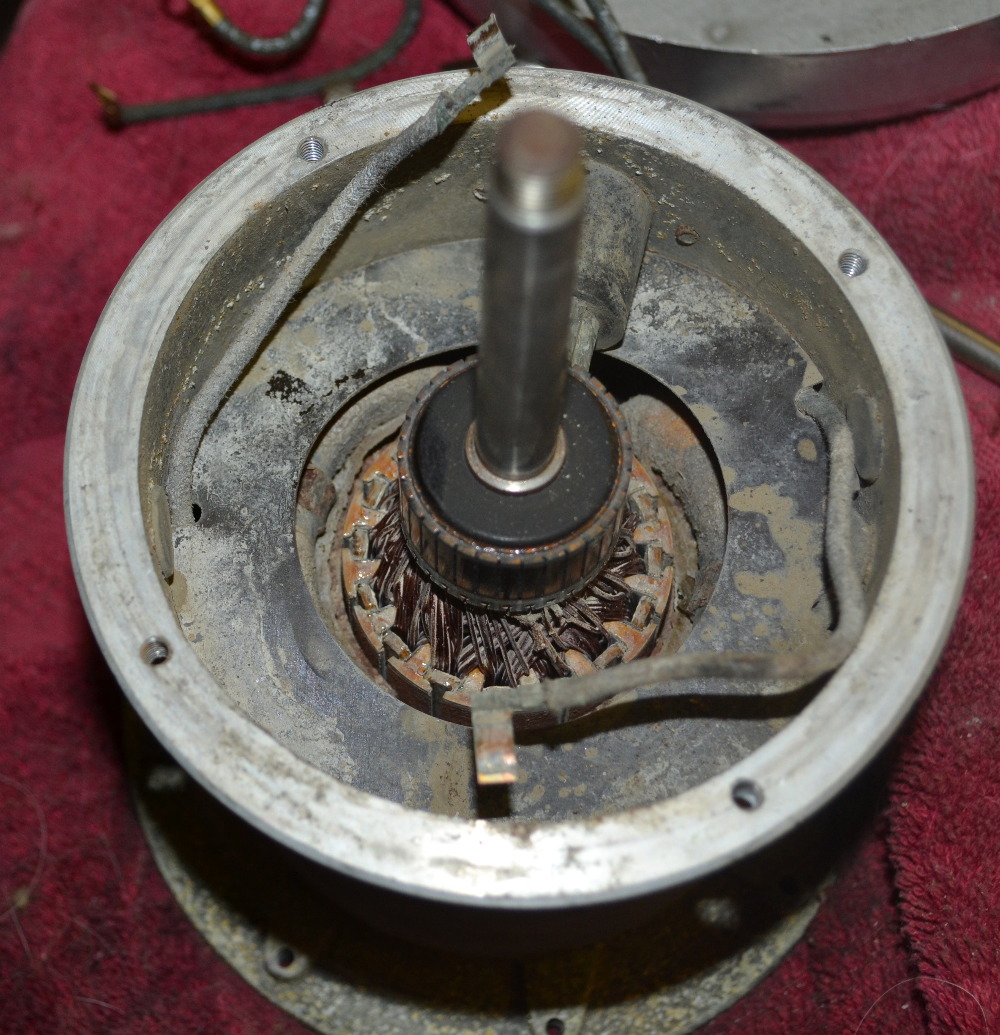
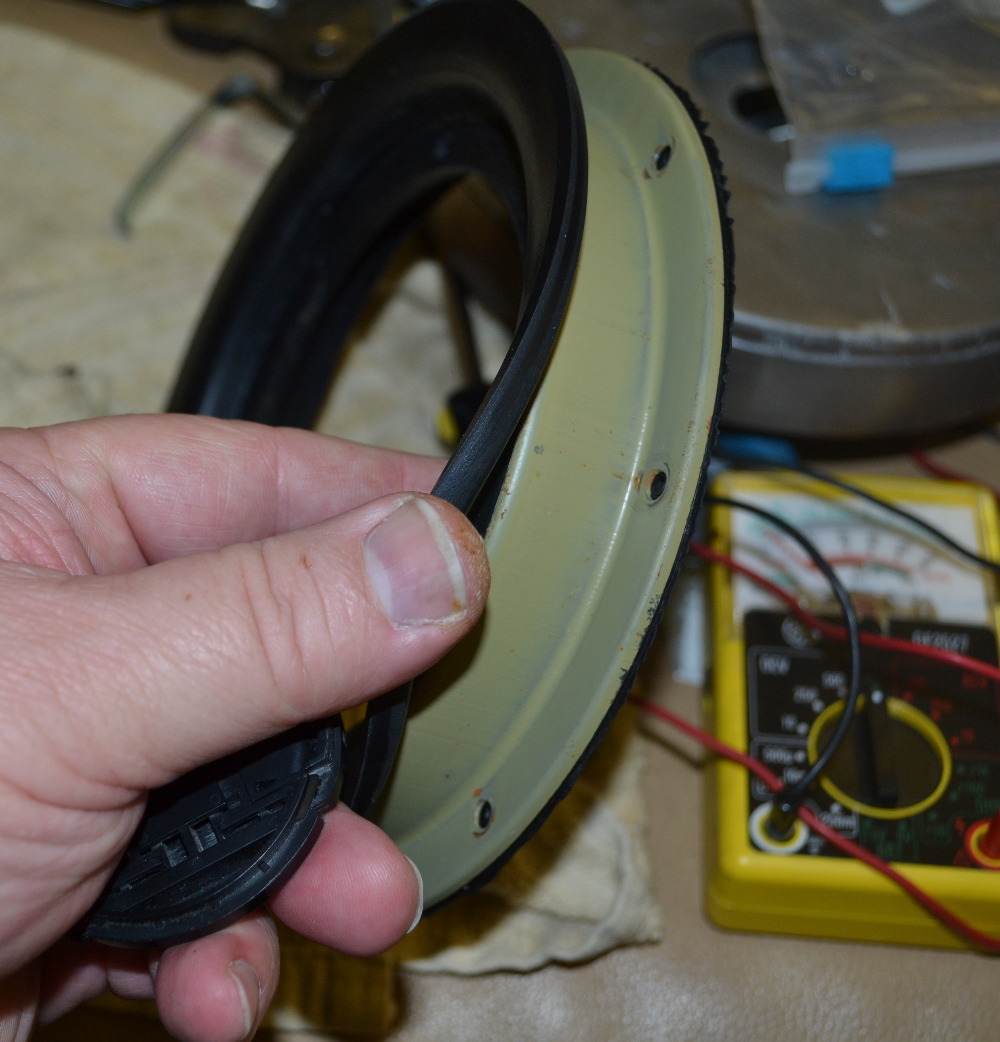
I found a D2 with a power nozzle outlet about a month ago. I think it is an aftermarket add on, because the power nozzle receptacle is a 2 wire. I just happen to have a 3 wire power nozzle, so I'll need to convert it to a 2 wire setup. Until then, I've busy trying to find all the parts to rebuild the main motor. Unfortunately, the lower bearing AND the bearing plate are no longer available through Rainbow. Nor does the aftermarket maker of the bearing plate manufacture it anymore. HOWEVER, a diligent search uncovered a source for NOS bearing plates. In addition, I found out the number for the lower bearing (88502) and was able to find several sources for it too! I'm still waiting for the bearing plate to arrive, but I thought I'd begin the reassembly process. This is a photo of the old bearing plate. You can see from the cutouts around the bearing that air flows through the motor itself. 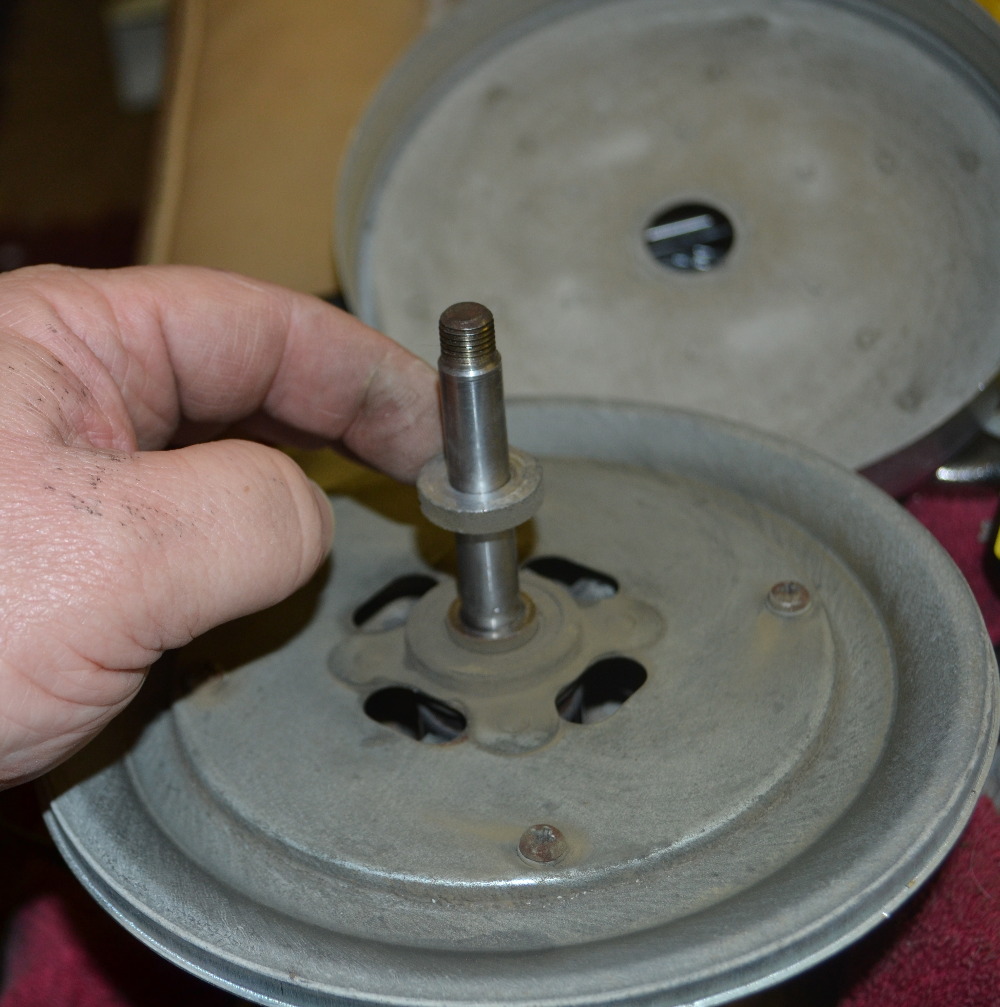
| ||
| Post# 196066 , Reply# 1 8/18/2012 at 20:39 (4,267 days old) by eurekastar (Amarillo, Texas) | ||
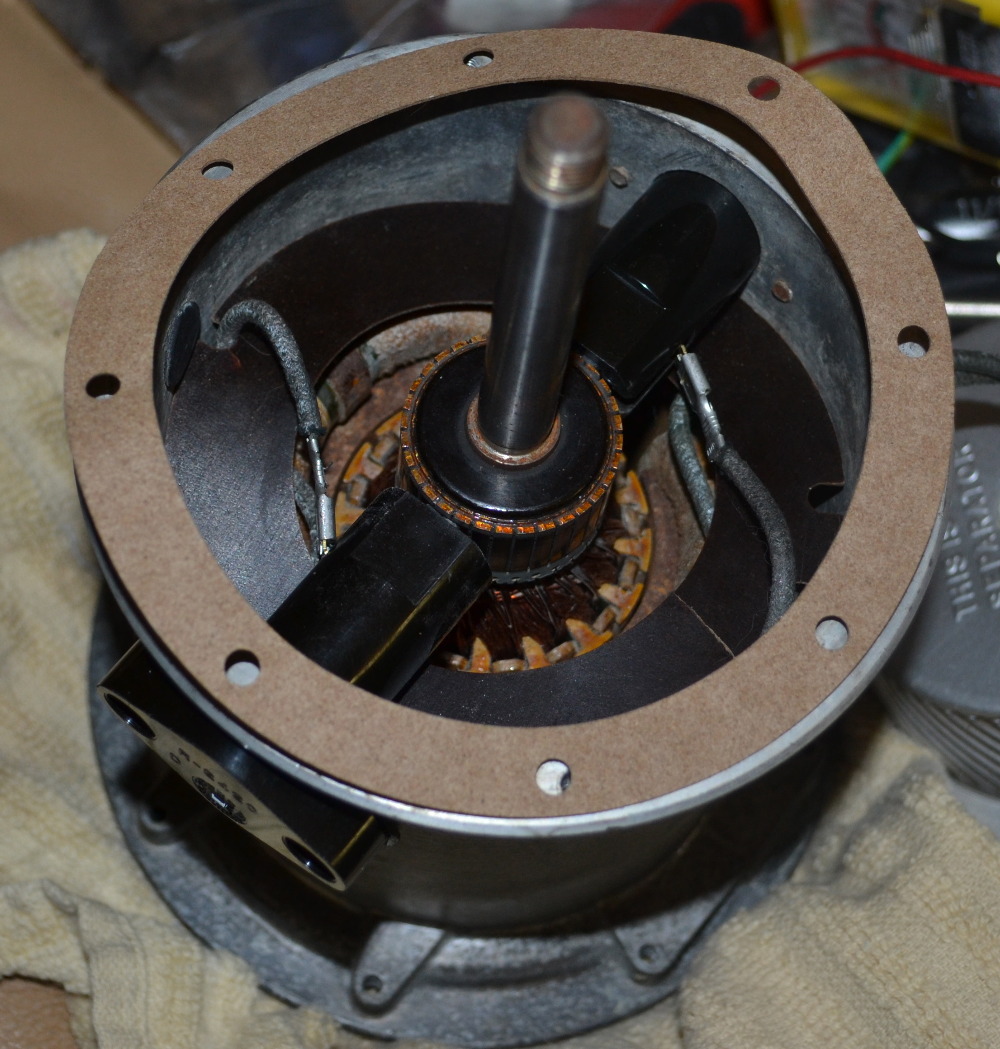
|
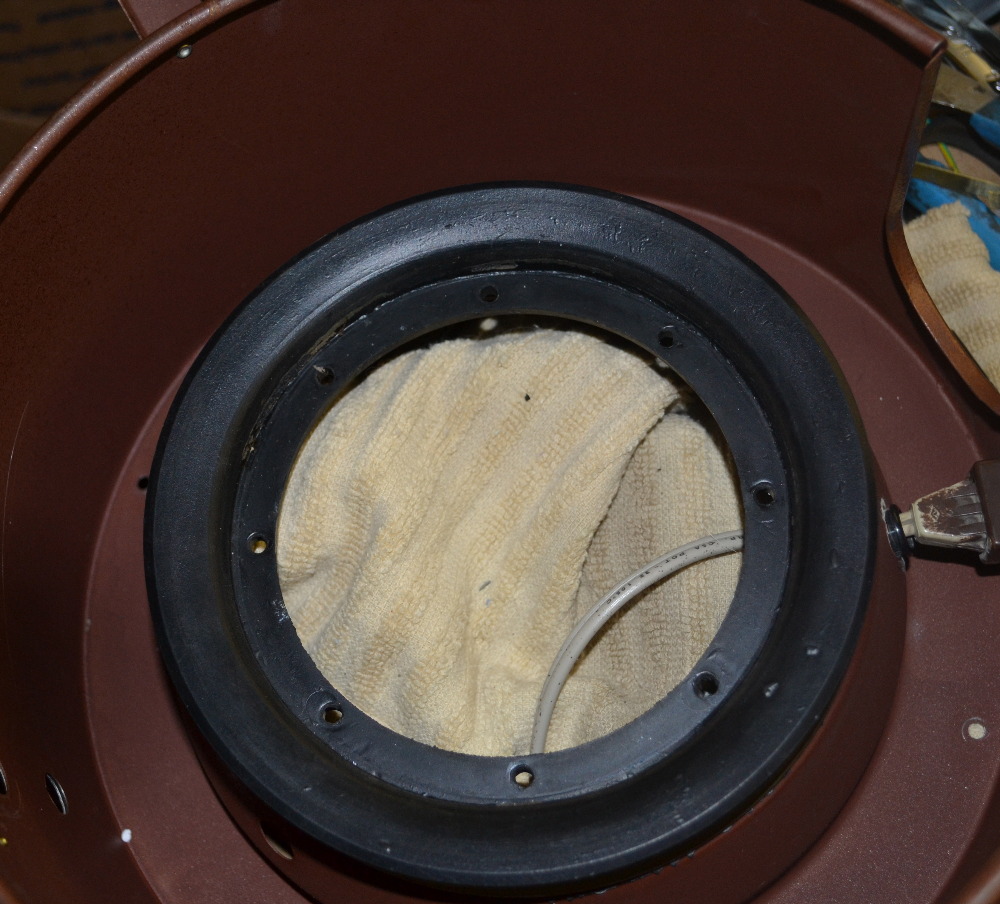
A view of the motor's interior | ||
| Post# 196068 , Reply# 2 8/18/2012 at 20:44 (4,267 days old) by eurekastar (Amarillo, Texas) | ||
|
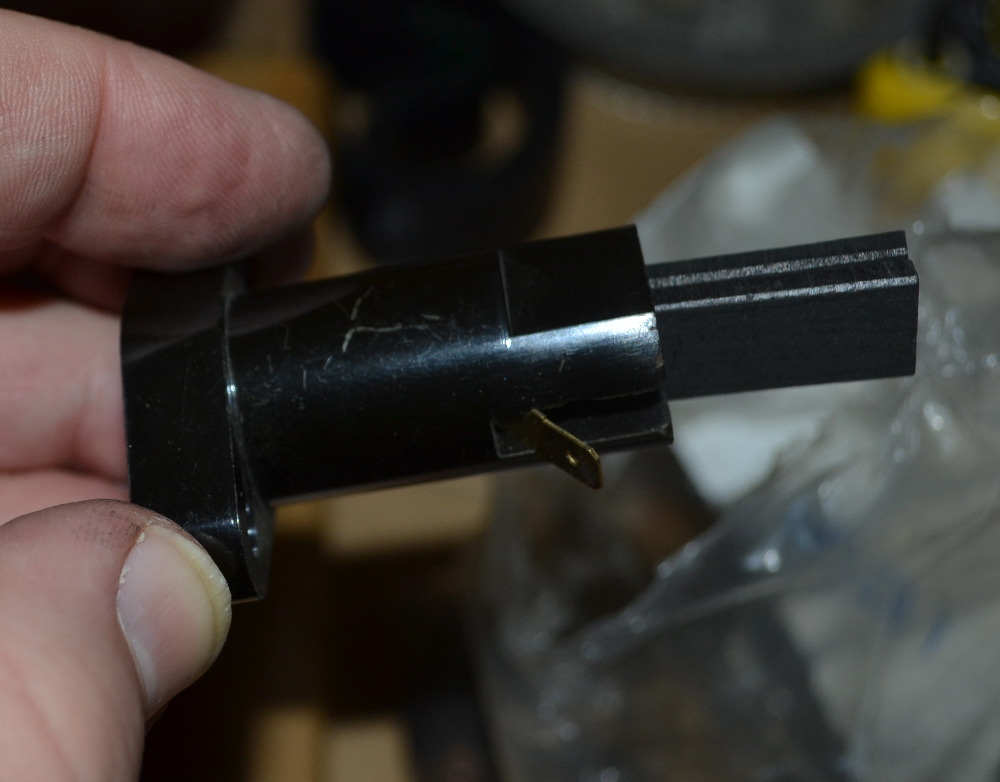
This motor needed new carbon brushes. Unfortunately, the old carbon brushes are no longer available. However, the good news is that the new style brushes and brush holders from the D3 fit perfectly. But the terminal clips for the old brushes had to be converted to female spade connectors in order to work. This is what the new style female spade connectors look like. 
This post was last edited 08/18/2012 at 21:15 | ||
| Post# 196069 , Reply# 3 8/18/2012 at 20:47 (4,267 days old) by eurekastar (Amarillo, Texas) | ||
|
| ||
| Post# 196070 , Reply# 4 8/18/2012 at 20:47 (4,267 days old) by eurekastar (Amarillo, Texas) | ||
|
This post has been removed by the member who posted it. | ||
| Post# 196071 , Reply# 5 8/18/2012 at 20:49 (4,267 days old) by eurekastar (Amarillo, Texas) | ||
|
| ||
| Post# 196072 , Reply# 6 8/18/2012 at 20:56 (4,267 days old) by eurekastar (Amarillo, Texas) | ||
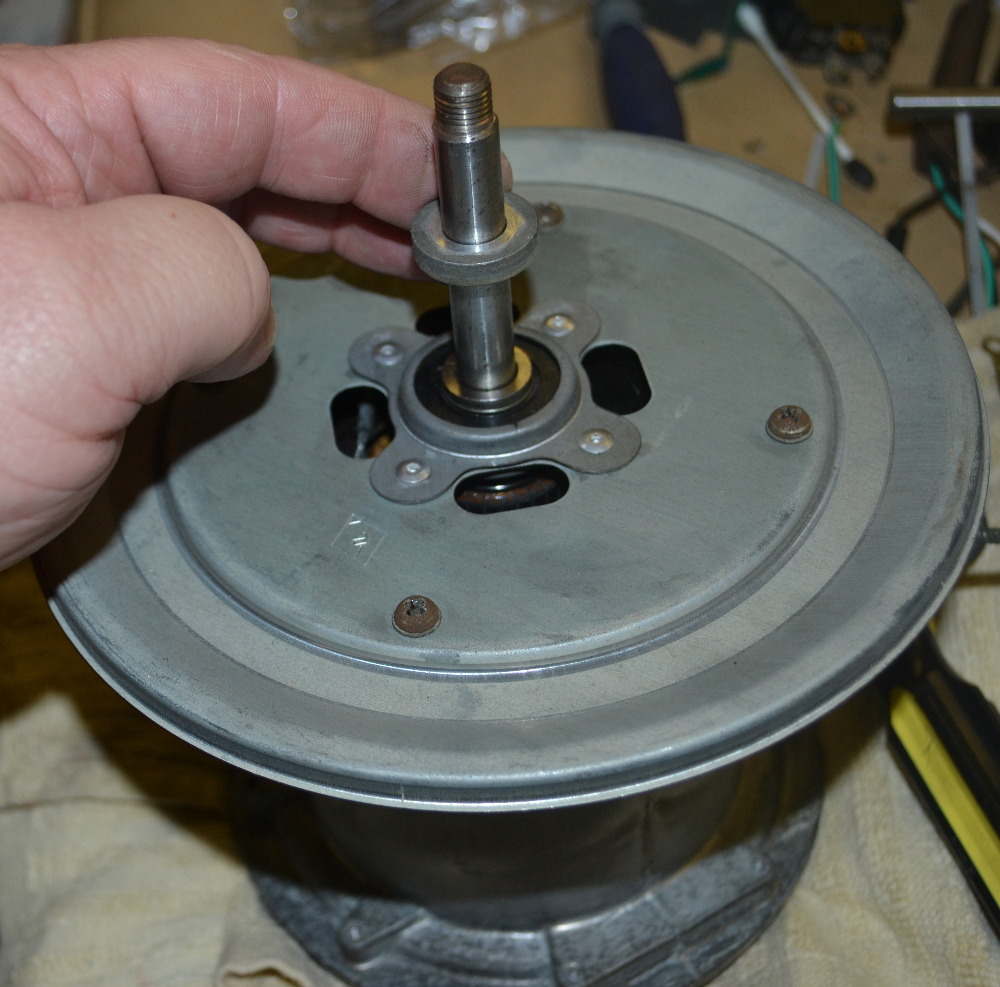
|
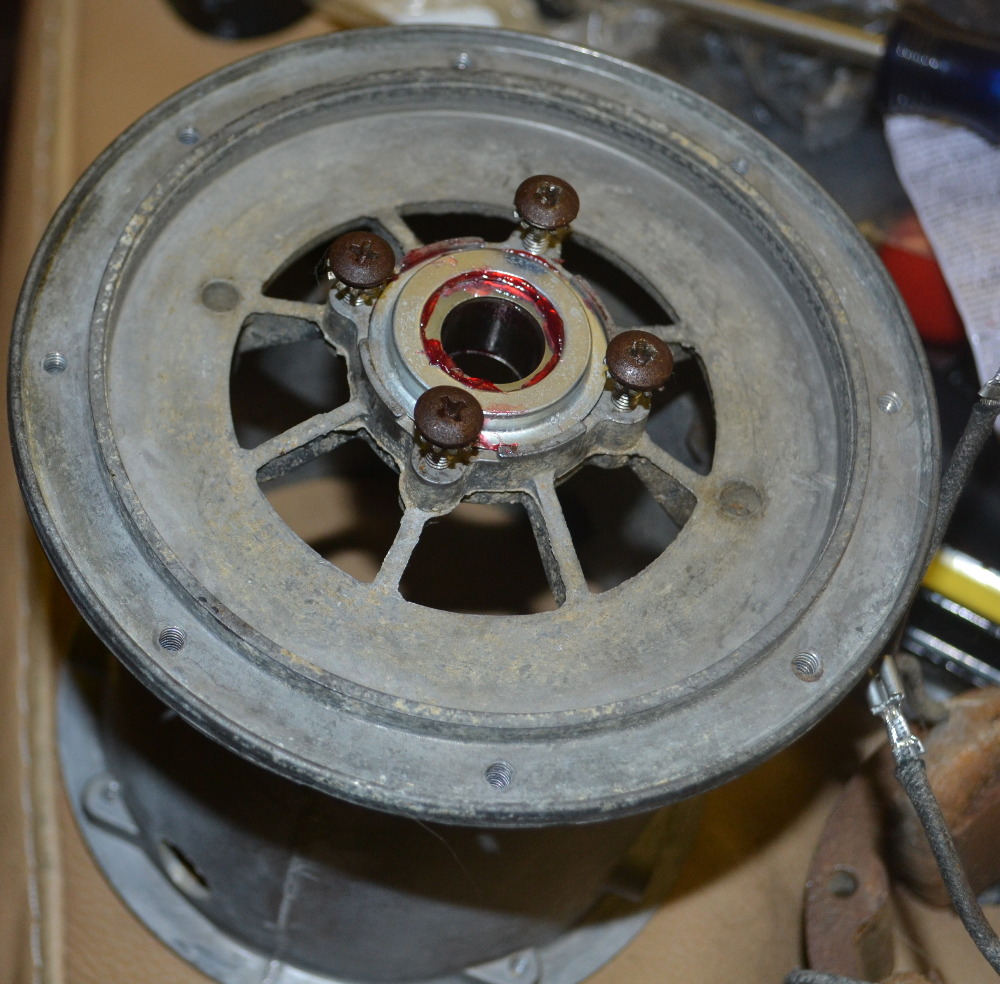
The lower bearing has a larger inside diameter than the top bearing. I'm not quite sure why it's designed that way, except the separator is held on with a large screw. That would require the lower shaft to be larger. There is a bearing shield and slinger ring on the inside. Rainbow recommends that grease be applied to both sides. It's probably not necessary today, because new bearings are sealed with plastic in order to protect against rust and corrosion. Old style bearings were shielded, but they weren't sealed. This bearing has to be tapped into place around the outside race just like the front bearing in may Kirby vacuums. 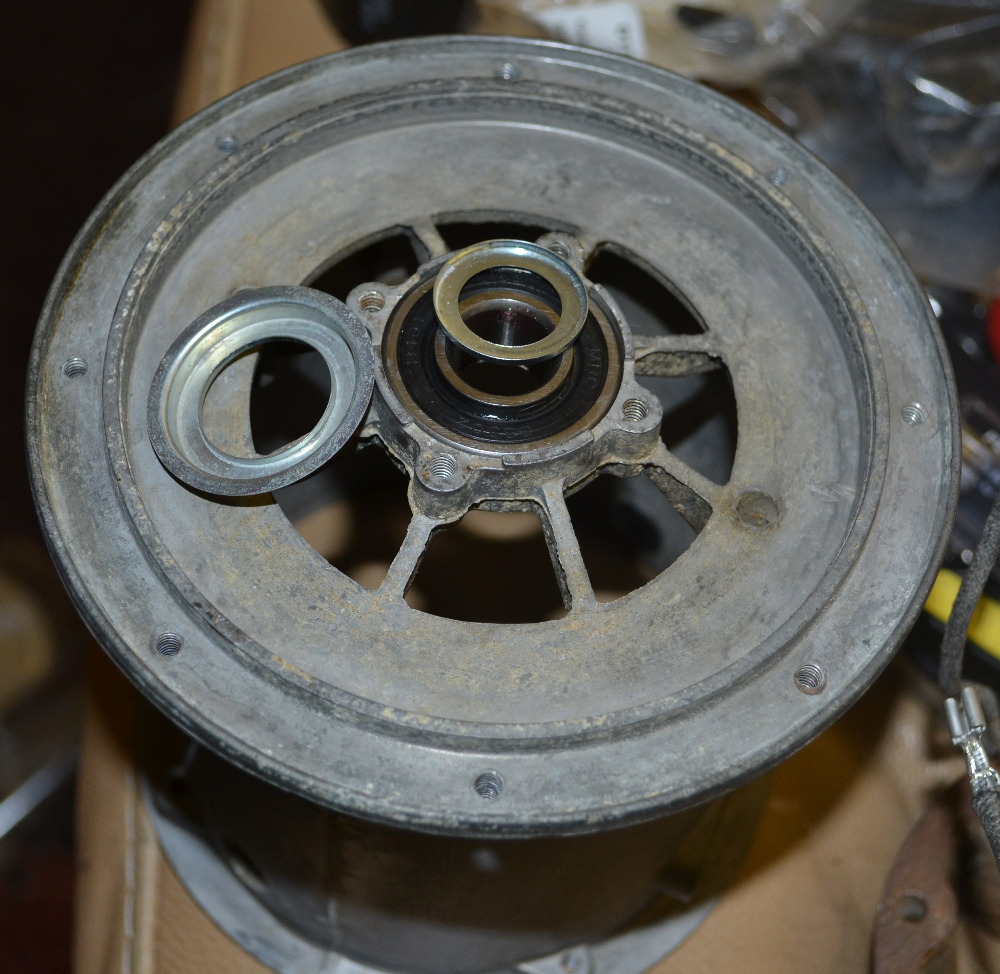
| ||
| Post# 196074 , Reply# 7 8/18/2012 at 21:00 (4,267 days old) by eurekastar (Amarillo, Texas) | ||
|
| ||
| Post# 196075 , Reply# 8 8/18/2012 at 21:04 (4,267 days old) by eurekastar (Amarillo, Texas) | ||
|
Motor field, motor brushes, armature, air deflector, and spider all installed. This is all I can do until the bearing plate arrives. Hopefully that will happen on Monday. I accidentally cracked the air deflector. It's actually a thin piece of heat resistant plastic. I don't think the crack will hurt. It actually looks kind of like Bakelite. 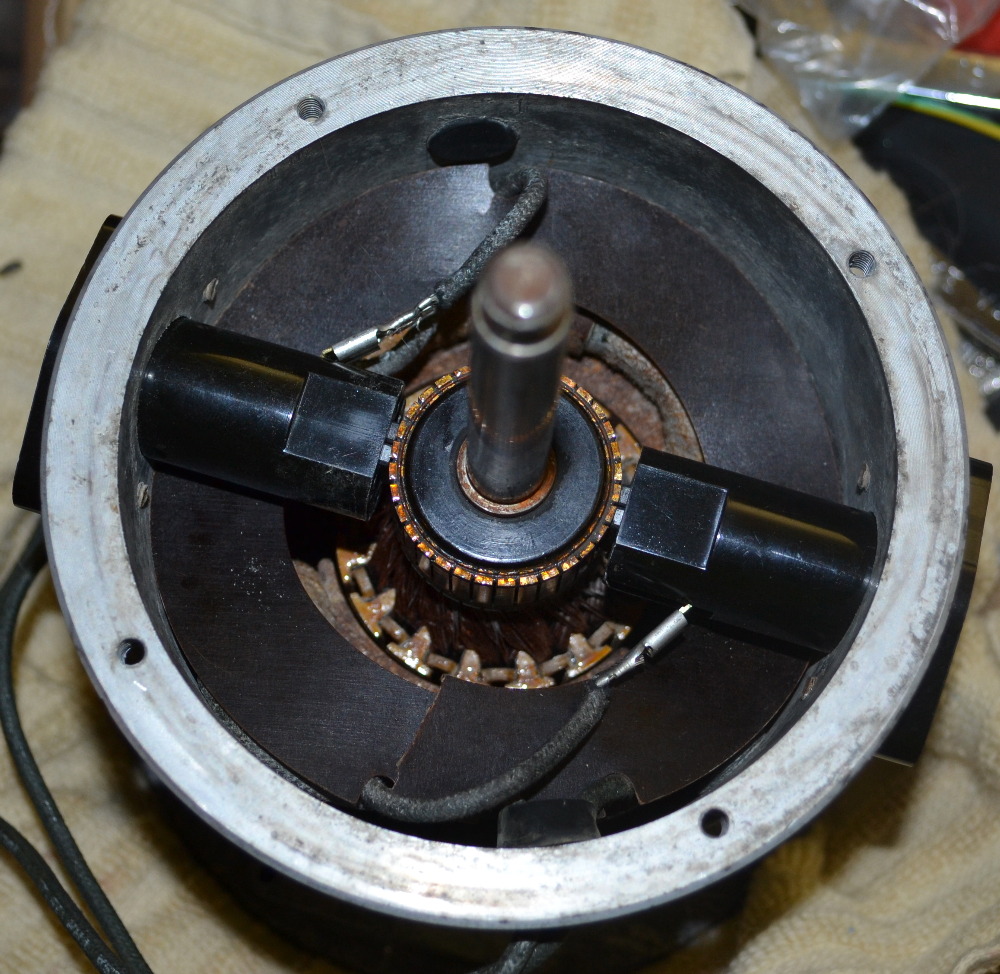
| ||
| Post# 196404 , Reply# 9 8/20/2012 at 22:46 (4,265 days old) by eurekastar (Amarillo, Texas) | ||
|
| ||
| Post# 196405 , Reply# 10 8/20/2012 at 22:49 (4,265 days old) by eurekastar (Amarillo, Texas) | ||
|
| ||
| Post# 196406 , Reply# 11 8/20/2012 at 22:50 (4,265 days old) by eurekastar (Amarillo, Texas) | ||
|
| ||
| Post# 196407 , Reply# 12 8/20/2012 at 22:52 (4,265 days old) by eurekastar (Amarillo, Texas) | ||
|
| ||
| Post# 196409 , Reply# 13 8/20/2012 at 22:55 (4,265 days old) by eurekastar (Amarillo, Texas) | ||
|
| ||
| Post# 196411 , Reply# 14 8/20/2012 at 22:58 (4,265 days old) by eurekastar (Amarillo, Texas) | ||
|
| ||
| Post# 196413 , Reply# 15 8/20/2012 at 23:04 (4,265 days old) by eurekastar (Amarillo, Texas) | ||
|
View of the installed motor from the bottom. The foam motor gasket installs directly on top of the flange that's used to support the motor. It is the primary gasket and the lip around the motor support ring functions as a secondary gasket. You can see the windings on the motor field through the spider. 
| ||
| Post# 196418 , Reply# 16 8/20/2012 at 23:16 (4,265 days old) by eurekastar (Amarillo, Texas) | ||
|
After getting the motor installed onto the main housing, it's time to seat the motor brushes. To do this, I wired the motor in sequence with a D3. They are close to the same amperage, so I didn't think it would hurt. I ran it for 30 minutes to break in the motor brushes. The careful eye will note that, on the bottom fan stage, there is a grounding screw. That stage design isn't original to the D2. Originally, the motor was grounded to the motor support ring clamp. However, the ground wire was run between the sharp edge of the switch cover and the motor support ring clamp. That wasn't a great design in my opinion, because it wore away the insulation on the ground wire. Also, on the original cord, the ground wire was too short to reach the ground screw. Luckily, the D3 that I had for part still had a good cord, so I used it. 
| ||
| Post# 196422 , Reply# 17 8/20/2012 at 23:19 (4,265 days old) by eurekastar (Amarillo, Texas) | ||
|
| ||
| Post# 196427 , Reply# 18 8/20/2012 at 23:34 (4,265 days old) by eurekastar (Amarillo, Texas) | ||
|
After taking it on its inaugural run, I noticed that the chrome was quite warm. I was a little concerned about that until I remembered that air in this model is drawn directly through the motor instead of around it. Therefore, the exhaust is going to be much hotter than that on peripheral discharge motors. | ||
| Post# 426199 , Reply# 20 5/28/2020 at 22:55 (1,427 days old) by joetrader (Chicago) | ||
|
Clean Motor, NICE!! Was wondering how you got the motor so clean. any tips? Also, I ave never seen running two motors in tandem like that and have never done it. Can you enlighten us as to why that is done to run in the brushes? Thanks! | ||
| Post# 426209 , Reply# 21 5/29/2020 at 07:49 (1,426 days old) by bikerray (Middle Earth) | ||
 | ||
Post# 426242 , Reply# 22 5/29/2020 at 21:53 (1,426 days old) by luxlife  (Under a Pecan Tree) (Under a Pecan Tree) |
||
|
Such impressive work! I always like seeing these posts. This takes a great deal of work. | ||
| Post# 426266 , Reply# 23 5/30/2020 at 09:18 (1,425 days old) by dysonman1 (the county) | ||
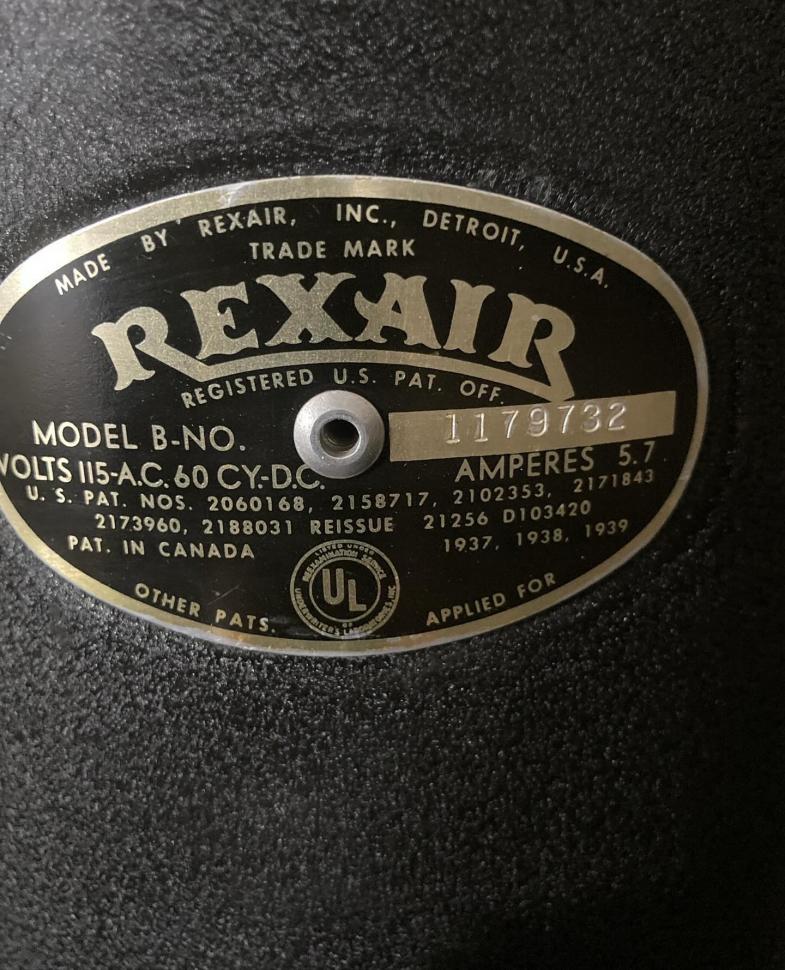
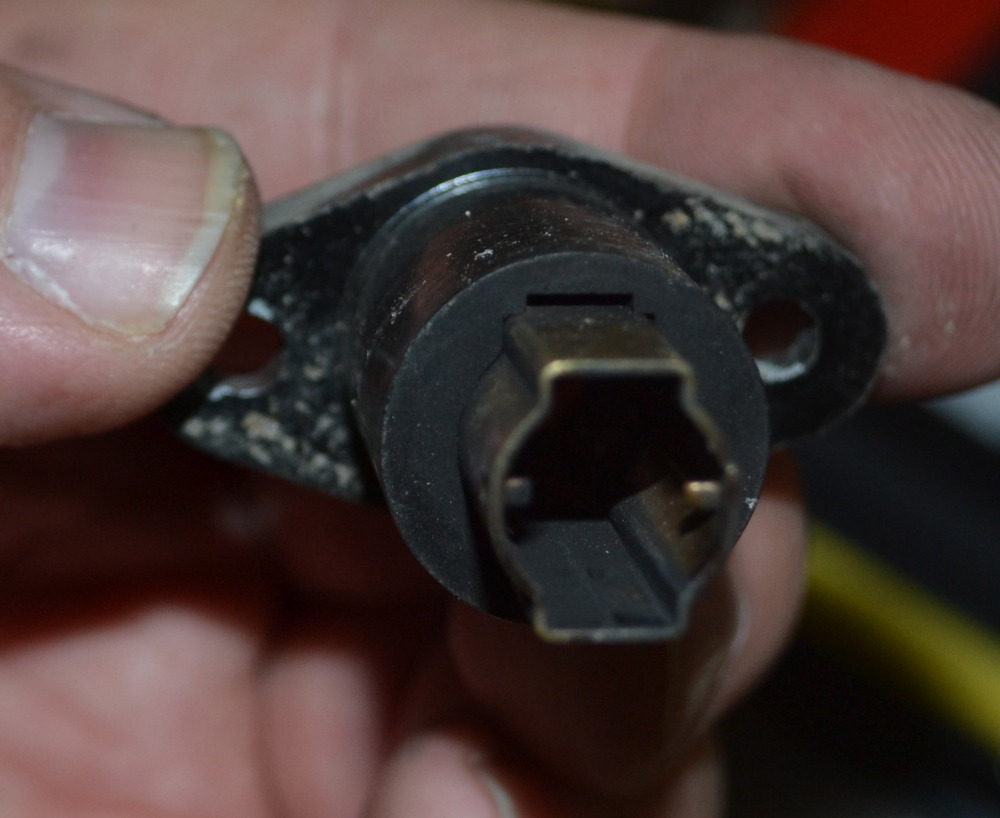
That's a factory original 2 wire power nozzle receptacle. The first models with power nozzles used (at first) a Whirlpool "L" shaped power nozzle, then the Oreck power nozzle, then the Eureka nozzle. They used 2 wire nozzle outlet until the second run of the Eureka power nozzle, when it was changed to 3 wire. The change to 3 wire came in 1975.
| ||
| Forum Index: | 
| Other Forums: |

|

|

|

|

|

 Comes to the Rescue!