|
Thread Number: 10779
Question for anyone familiar with 70's Canadian Lux shampooers |
[Down to Last] |  |
| Post# 116522 , Reply# 1 11/30/2010 at 18:39 (4,888 days old) by Collector2 (Moose Jaw, Sk) | ||
Yes to both questions. They are surposed to snap in. Unfortunately if the brushes dont there is a good chance that the problem is the part on the gears itself. And that is not replaceable as a separate part. It comes on the gear. You can try new brushes but I would take the machine with you and try it in the store incase that isnt it.
Doug | ||
| Post# 116530 , Reply# 2 11/30/2010 at 19:02 (4,888 days old) by sireluxomatic () | ||
|
Thanks for the help; I'll have to take the whole kit and caboodle to Aerus and hope its not a gear problem. | ||
| Post# 116549 , Reply# 3 11/30/2010 at 22:22 (4,887 days old) by aeoliandave (Stratford Ontario Canada) | ||

Don't give up just yet, Bob.
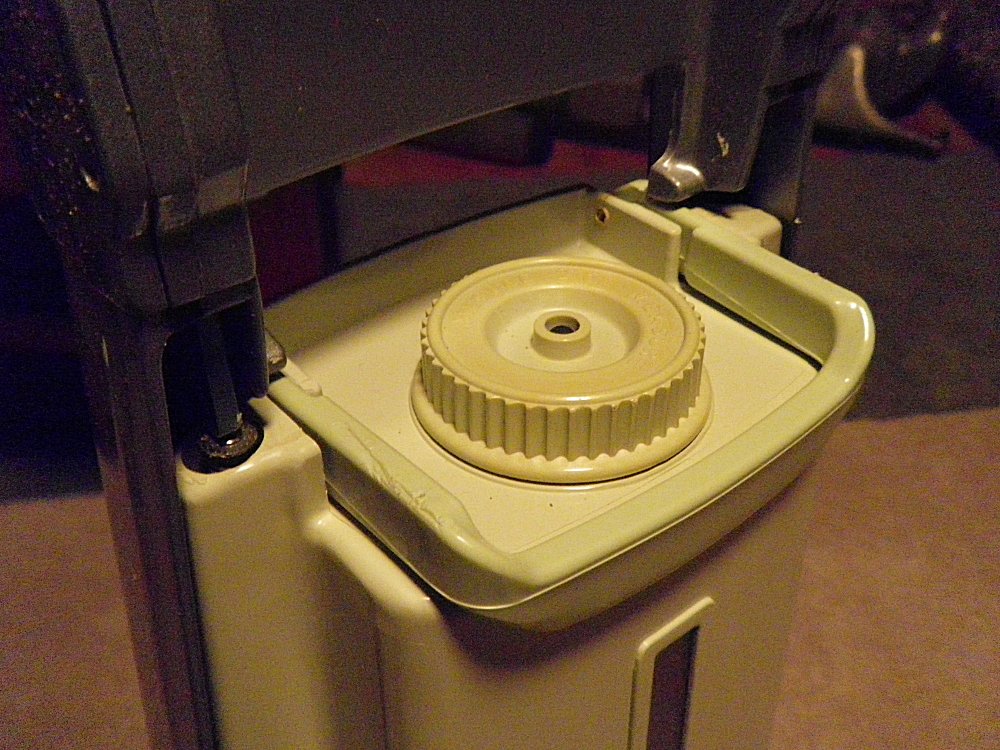
Just underneath/behind the riveted-on 11/16" socket washer you should see a yellowish ring. This ring acts like a compression O ring and slips past a slightly raised inner lip on the brush spindle, keeping the brush firmly in place and making it easy to pop off. However, it is not an O ring. It is a yellowed with age nylon washer with an enlarged outer rim and flattened center. That is, the washer's diameter cross section is U shaped. The edge wears down over time allowing the brushes to fall off. The nylon used for these washers (as well as the cast-on helical gears) gets crumbly with age. That's the sad truth and the weakness in these polishers. But all is not despair and anguish, not by a long shot... The easy fix is to dig out the old washer rim which will leave behind a 1/8" square groove. A pen knife works well. Do not try to dig out the flat central washer section. With luck you can find a fat rubber O ring that will fit firmly in the groove and keep the brushes on when the ring compresses. I'm estimating that the inner diameter of the groove is 1/2". So a 5/32" thick O ring could be ideal. Home Depot has a large selection of O rings as will any plumbing shop. Another version would be to find a suitable flat 1/8" thick hard rubber faucet washer, drill out the center to 1/2" and force it on like a tire, or split it and slip it in place. The wide flange created by the riveted flat washer will keep it in place. A better long-term fix, if I had been the Electrolux engineer in charge of this crusial component, is a metal split ring (like a spiral lock washer only flattened)sized to fit loosely enough that when the brush is popped on the ring compresses like a piston ring. The same principal as the split ring joining hose coupling to swivel handle on early Lux woven hoses. 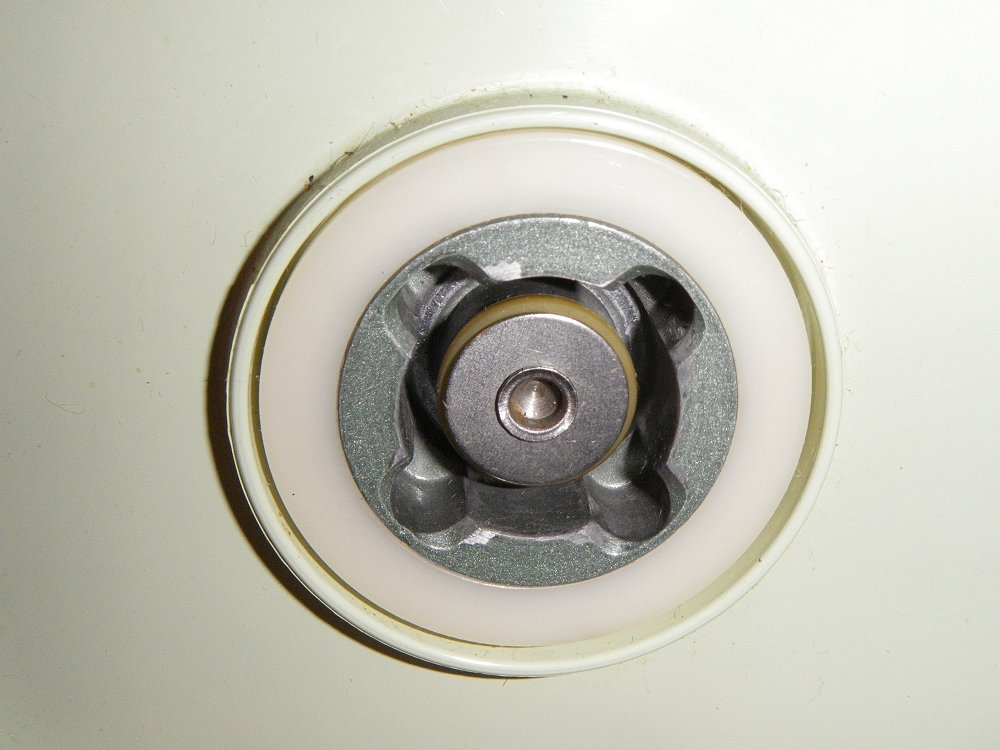
| ||
| Post# 116550 , Reply# 4 11/30/2010 at 22:28 (4,887 days old) by aeoliandave (Stratford Ontario Canada) | ||
|
The gears underneath the bottom cover. The entire machine has to be dismantled to access this shot. I replaced the crumbled hears in one of my B-21s from a later trashed polisher.
The steel axle, that spins in a bearing, is pressed through the gear emerging at the socket side, where in the manufacture process, the nylon washer and then the steel flat washer are placed on the spindle and the edge stamped down like a rivet. You could grind off the rivet flange but then would have to devise a way to re-fasten the flat washer after replacing the compression washer/O-ring. Far too much bother, methinks. But then, unless you come across a set of unused N.O.S. replacement gears the best fix will be to fashion your own. 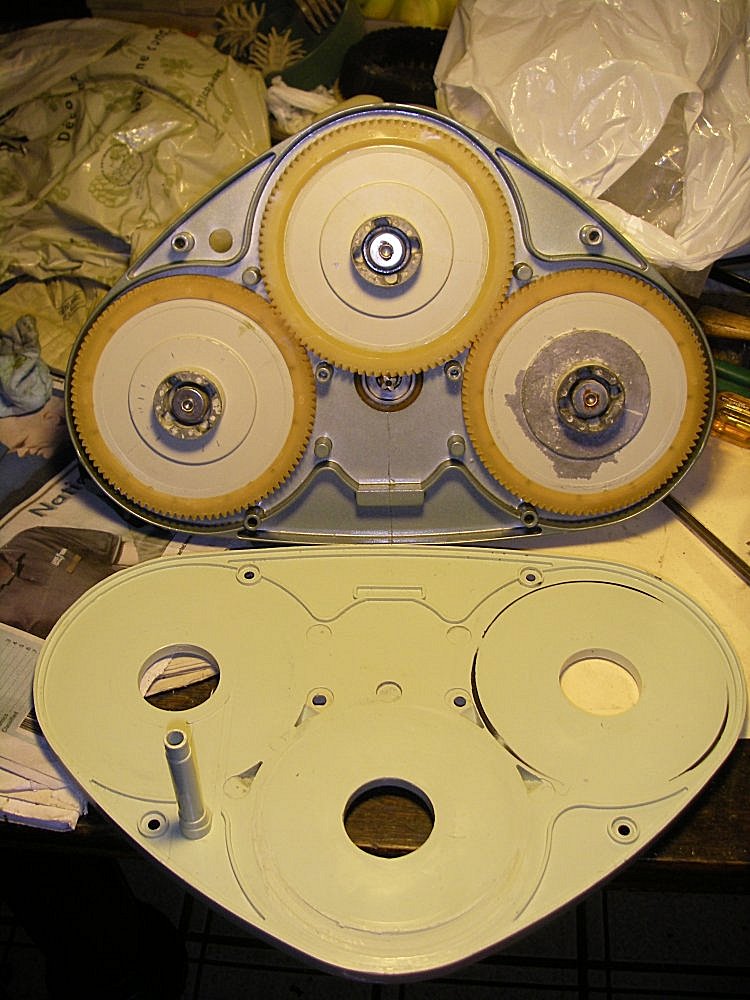
| ||
| Post# 116551 , Reply# 5 11/30/2010 at 22:36 (4,887 days old) by aeoliandave (Stratford Ontario Canada) | ||
|
Yup, a fat rubber O ring, that's the ticket!
Here's a fragment of the old compression washer which gives a better idea of the flattened center.
Actually, it's not that difficult to replace the gears as their axles are held in place on the top side with a simple C clip washer. If all your spindles are rotating leave well enough alone. I have replaced stripped crumbled gears on two polishers with donor gears from trashed machines. Takes about a day at the workbench but the cosmetics of the transplant recipients were well worth it. 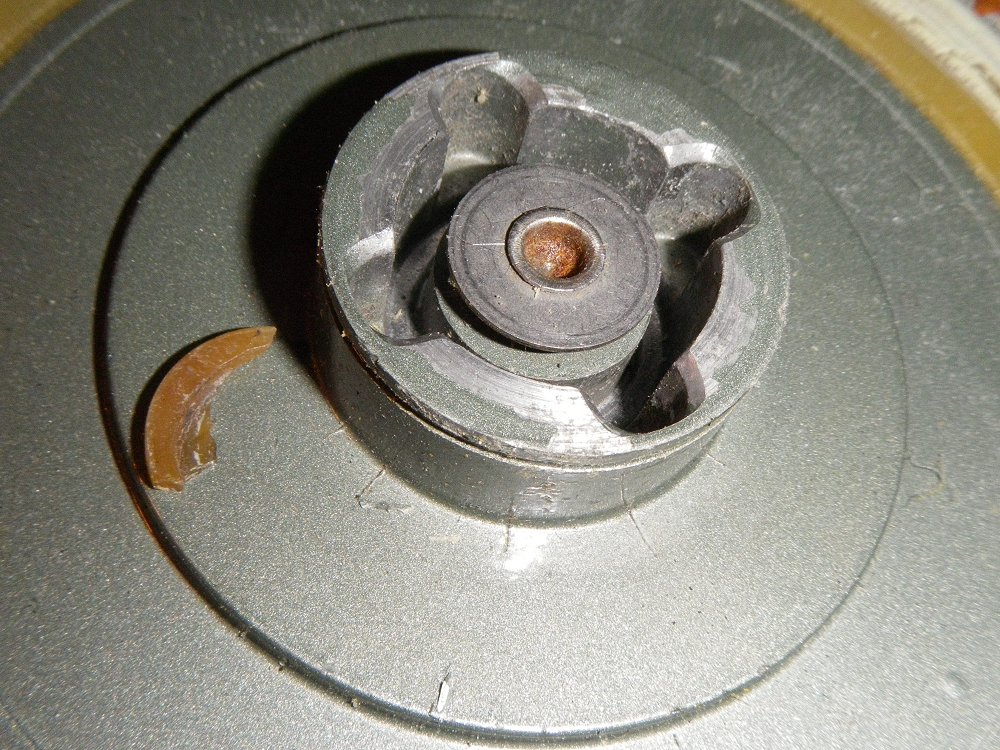
| ||
| Post# 116554 , Reply# 6 11/30/2010 at 22:59 (4,887 days old) by aeoliandave (Stratford Ontario Canada) | ||
|
| ||
| Post# 116555 , Reply# 7 11/30/2010 at 23:02 (4,887 days old) by aeoliandave (Stratford Ontario Canada) | ||
|
| ||
| Post# 116576 , Reply# 9 12/1/2010 at 09:11 (4,887 days old) by aeoliandave (Stratford Ontario Canada) | ||
|
Still noodling over this dilemma I've come up with another work-a-round. And this one is CHEAP!
Since the problem is that the nylon snugging washers have had their outside edge worn down, the fix is to increase that diameter again by a hair. There is a fair amount of play on the washer shaft even when new so that the pads are free to wobble - it is the 4 keys in the slots that propel the pad, not the washer - its function is to keep the pad from falling off. Get a latex or vinyl examination glove (not a rubber kitchen glove because it may be too thick). Cut off about 2" of the three largest finger tips. Make sure the pad collar is clean of slippery wax/soap film and dry. Insert half of the finger tip inside the polishing pad arbour. Then stretch & fold the remaining inch down and around the outside collar and keys. Smear some dishwashing liquid on the rubber surfaces for lubrication and pop the pads onto the machine. There should be enough new thickness and rubber 'give' to keep the pads securely in place until you want to remove them. I tried this this morning with a vinyl glove on one of my worn machines and it works great. The pads stayed on even trying to shake them off. The dishwasher lube made them fairly easy to pop off without tearing up the vinyl sheath. Vinyl gloves are cheap and replaceable. For the number of times you'll use this machine over a year I think you'll find the sheath method more than stands up to the completion of the task without having any polishing/napping discs fall off. (You could place a 1" fingertip over just the washer in the socket but I think it would tend to work itself off in use. Besides, it's the very devil to maneuver the 'condom' over the shaft in such a confined space.) Dave 
| ||
| Post# 116578 , Reply# 10 12/1/2010 at 09:47 (4,887 days old) by Collector2 (Moose Jaw, Sk) | ||
|
| ||
| Forum Index: | 
| Other Forums: |

|

|

|

|

|

 Comes to the Rescue!