|
Thread Number: 10525
Kirby Model 509 |
[Down to Last] |  |
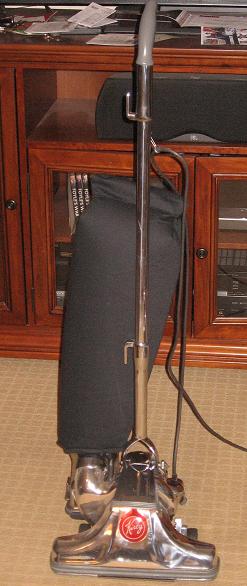
| Post# 113767 11/6/2010 at 23:51 (4,911 days old) by eurekastar (Amarillo, Texas) | ||
|
| ||
| Post# 113769 , Reply# 1 11/6/2010 at 23:56 (4,911 days old) by eurekastar (Amarillo, Texas) | ||
|
| ||
| Post# 113770 , Reply# 2 11/6/2010 at 23:58 (4,911 days old) by eurekastar (Amarillo, Texas) | ||
|
| ||
| Post# 113771 , Reply# 3 11/7/2010 at 00:03 (4,911 days old) by eurekastar (Amarillo, Texas) | ||
|
I have one small thing left to do -- install a new rubber Emtor gasket. I think I have one somewhere, but I can't seem to find it! This vacuum seems to have more power than my 4C. I don't know if it's because the bag on it breathes more freely or because the 3 AMP motor is more powerful than the 3 AMP motor on the 4C.

| ||
| Post# 113776 , Reply# 4 11/7/2010 at 01:17 (4,911 days old) by electrolux~137 () | ||
|
Very very lovely! You are very fortunate to have one of the round-ended cords (made by Belden btw). They're scarcer than hens' teeth!! And the bag looks great on it! | ||
| Post# 113811 , Reply# 5 11/7/2010 at 08:06 (4,911 days old) by luxg () | ||
|
Beautiful job Bill!! How many Kirbys do you have in your collection now? | ||
| Post# 113839 , Reply# 7 11/7/2010 at 12:13 (4,911 days old) by tom519 (Long Island, New York ) | ||
|
Gray trim Bill, That gray trim color looks great. What brand and color did you use? Did you prep. the vinyl first before you painted it? I know with a brush on paint you could have Home Depot match the color, but with spray paint in a can that's not possible, so you have to find a spray paint that matches as close as possible. | ||
| Post# 113878 , Reply# 8 11/7/2010 at 14:23 (4,911 days old) by eurekastar (Amarillo, Texas) | ||
|
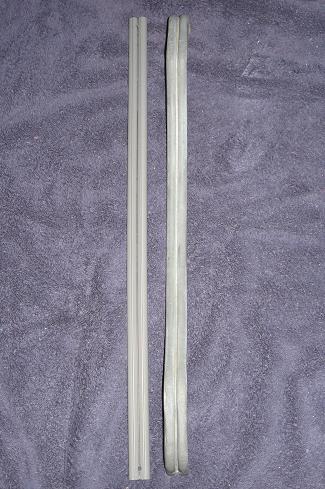
@ Tom: As you know, since Kirby only sells tan trim, painting is the only option for matching original colors. The paint I use is an automotive paint that's used to paint vinyl and plastic trim. They even use it to paint car mats a different color so it is very durable. Painting trim is a simple four step process: 1) Wash the trim with soap and water and let dry; 2) Then wash the trim with a solvent called Methyl Ethyl Ketone (MEK). You can buy it at Home Depot, Lowes, etc. MEK removes the shining finish and creates a "tacky" surface; 3) Spray on a coat of Sandless Primer from SEM (see photo); 4) While the trim is still wet with the primer, spray it with your color of choice. Let it dry at least an hour and follow up with a second coat. I let it cure for at least two days before installing it. The SEM colors that I've used are Medium Slate Gray (Model 509), Landau Black (Model 4C), and Portola Red (Various 500 models). If you can't find the paint at your local automotive parts store, you can buy it off the internet. Also, I just hang it with a coat hanger for painting and drying.
Removing nozzle bumpers isn't hard. You just drill through the rivet from the inside with a 1/8" bit and it comes right off. Although the older models didn't use the mounting brackets that the late 500s used, I've always ended using them and reinstalled with a pop-rivet and washer. The tool used to reinstall the original semi-tubular rivets is way too expensive! That's why I go the poor man's route and use pop-rivets. No one knows but me (and now you!!). Plus, if you try to reuse the large rivet that was originally on there, chances are you'll pull the bumper through, because the plastic bumpers have to be stretched so much. The mounting brackets minimize that risk. (I learned the hard way!) 
| ||
| Post# 113900 , Reply# 9 11/7/2010 at 15:43 (4,911 days old) by eurekastar (Amarillo, Texas) | ||
|
@Terry -- I kind of lost count! LOL! Of the pre-G series models I have 13 that are restored. The models I have waiting for restoration (not including parts machines) probably numbers around 8. Post war models yet to be found -- 505, 508, 511, and 514. Generation series that I own: G3, G4, G5, G6, and Diamond G.
@Chad -- I've never seen a gray bag from a 508/509, etc., not even on Ebay. I wonder if the material wasn't as durable as the black pre-war and 505 and thus creating a shorter life and short supply. The bag material on my 4C is quite heavy and lined with felt. Other than stitching that unraveled in one small area, it is still in very good condition. No holes, tears or weak spots. | ||
| Post# 113949 , Reply# 11 11/7/2010 at 20:38 (4,911 days old) by luxg () | ||
|
Thanks Bill, that is a fantastic collection and your machines are pristine!!! Do you do all of your own polishing? Terry | ||
| Post# 113954 , Reply# 12 11/7/2010 at 21:12 (4,911 days old) by hygiene903 (Galion, OH) | ||
Beautiful!! | ||
| Post# 113959 , Reply# 13 11/7/2010 at 21:42 (4,911 days old) by eurekastar (Amarillo, Texas) | ||
|
Thanks everyone for your complements! It's a lot of fun working on them.
Terry, I do indeed do all my own polishing. I have a bench polisher set up in my workshop. It's very messy and kind of dangerous. So great care should be taken!!! When I rebuild one of these, I try to be thorough. I wash everything with degreaser before polishing. Some castings even require hand sanding. But I go through every screw, spring, bearing, gasket, washer...I even polish the screw heads! I especially enjoy working on the pre-516 models. | ||
| Post# 113995 , Reply# 14 11/8/2010 at 07:09 (4,910 days old) by luxg () | ||
|
Thanks again Bill, the end results of your machines really show your great attention to details. Terry | ||
Post# 114079 , Reply# 16 11/8/2010 at 18:44 (4,910 days old) by a007kirbyman  (--->> Originally My Mom <<--- (now Wisconsin)) (--->> Originally My Mom <<--- (now Wisconsin)) |
||
Hey Bill... | ||
| Forum Index: | 
| Other Forums: |

|

|

|

|

|

 Comes to the Rescue!