|
Thread Number: 878
Latest restoration project . |
[Down to Last] |  |
| Post# 9001 2/4/2007 at 18:54 (6,288 days old) by davortho10 () | ||
|
Since I finally remembered to take some "before" pics. I thought I'd post a couple. I will take more as I go and post some of them too. Jay 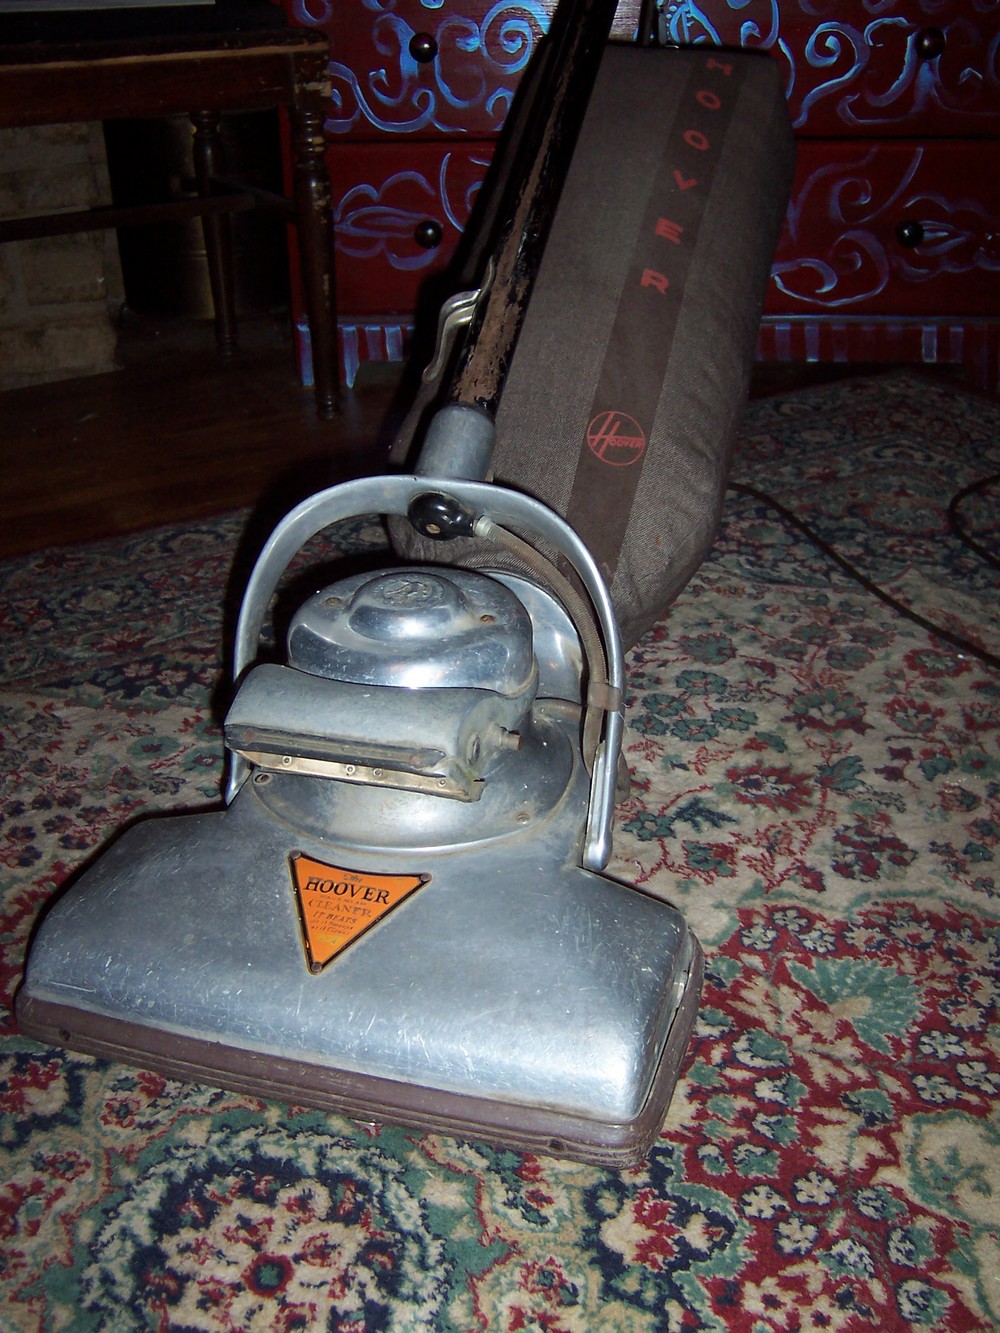
| ||
| Post# 9002 , Reply# 1 2/4/2007 at 18:56 (6,288 days old) by davortho10 () | ||
|
and another 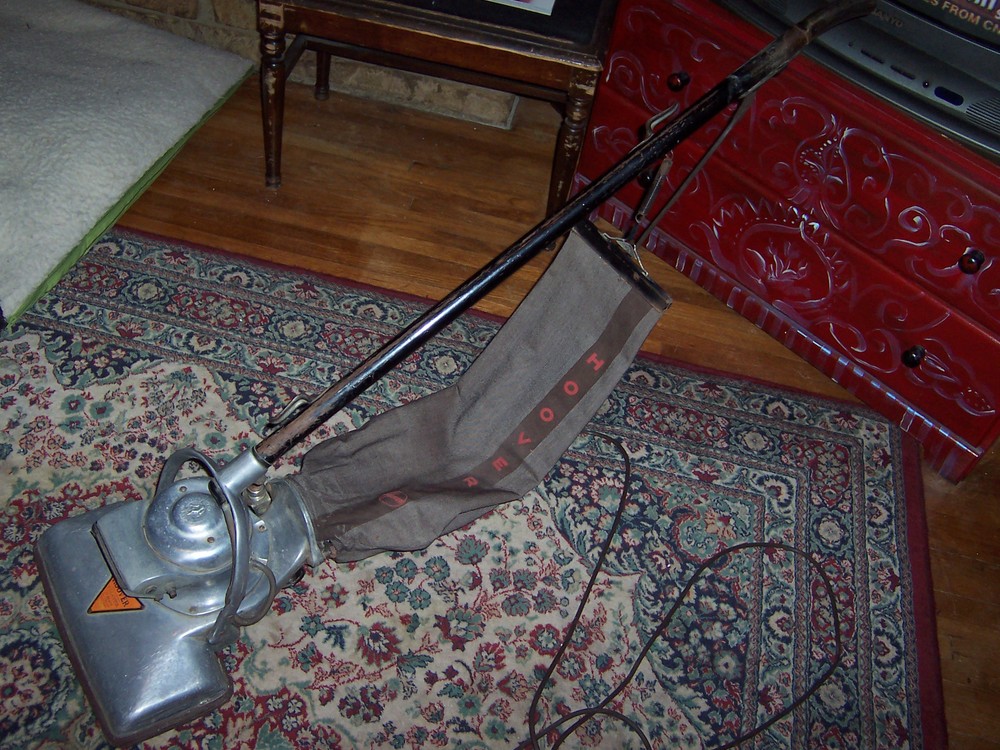
| ||
| Post# 9115 , Reply# 2 2/5/2007 at 21:00 (6,287 days old) by davortho10 () | ||
|
beginning dissassembly Hi, hope some of you find this interesting,...lol. It's a lot of fun for me. This is the 1st time I've remembered to take pics during the process. Jay 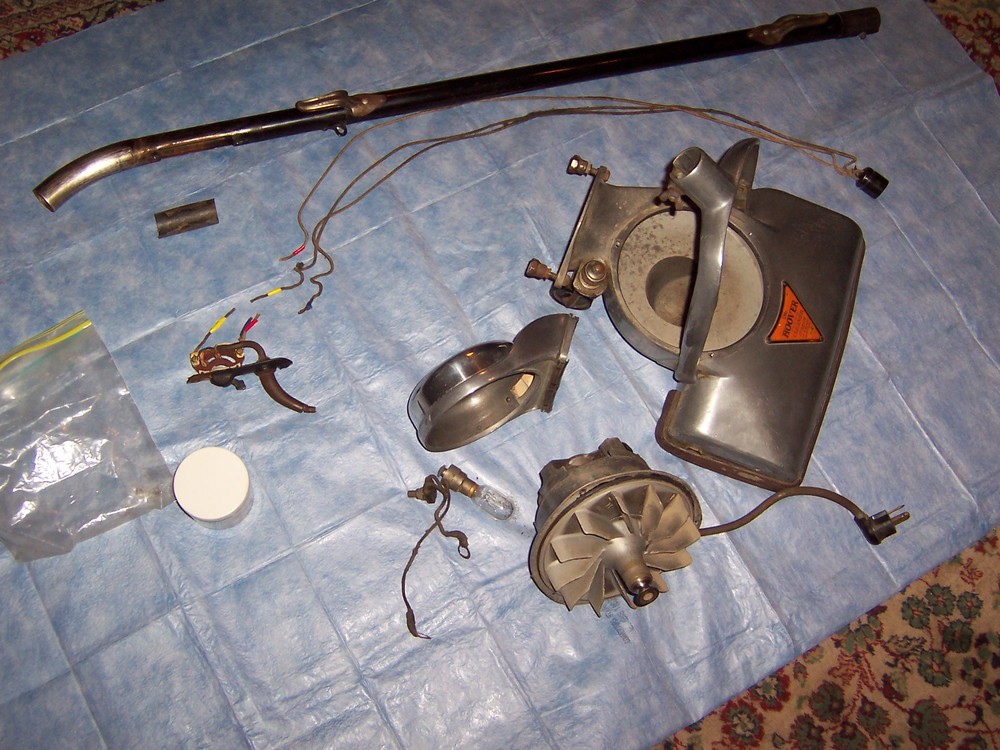
| ||
| Post# 9170 , Reply# 6 2/6/2007 at 11:30 (6,286 days old) by ahzeks () | ||
|
Great Thread! Thanks for sharing! Very interesting and informative! I love the photos. | ||
| Post# 9180 , Reply# 7 2/6/2007 at 12:50 (6,286 days old) by thunderhexed (Edmond, OK) | ||
BRAVE | ||
| Post# 9183 , Reply# 8 2/6/2007 at 13:28 (6,286 days old) by kirbyvacuum (Long Island New York) | ||
|
Hi Jay I cant wait to see your Hoover done. A lot of hard work ahead. Good luck Doug | ||
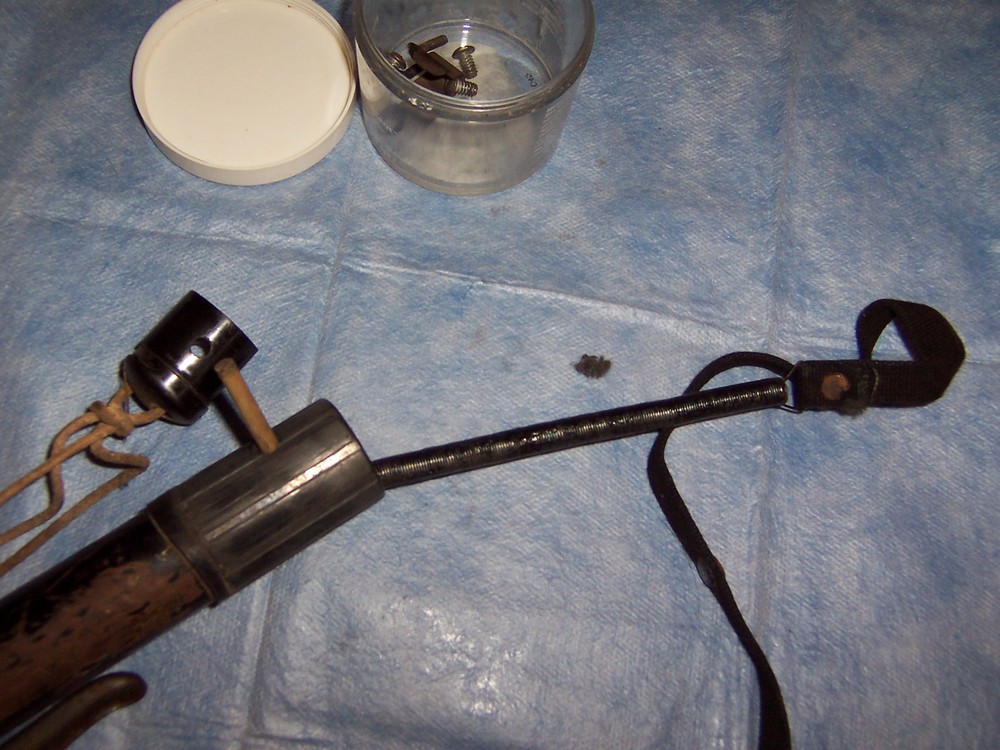
| Post# 9284 , Reply# 10 2/7/2007 at 08:07 (6,285 days old) by davortho10 () | ||
|
finished view Cap down on socket, and knot tied in wire. 
| ||
| Post# 9328 , Reply# 11 2/7/2007 at 15:52 (6,285 days old) by vacuumkid3 () | ||
|
This is going to look great! I am glad to see you are using "official" wiring...with the cloth wire and all. Good luck to 'ya! ~~K~~ | ||
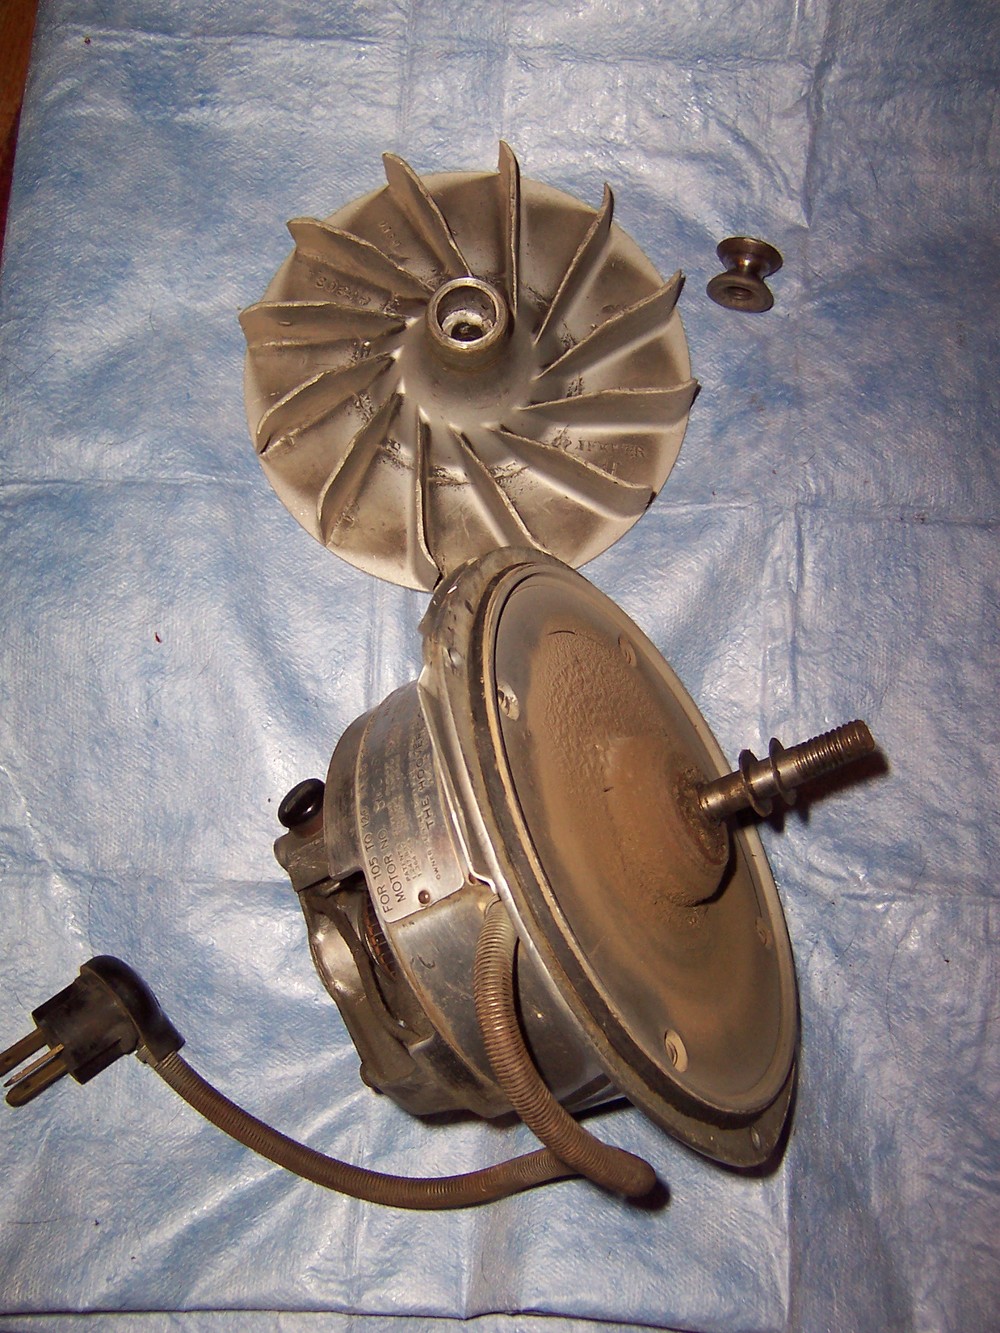
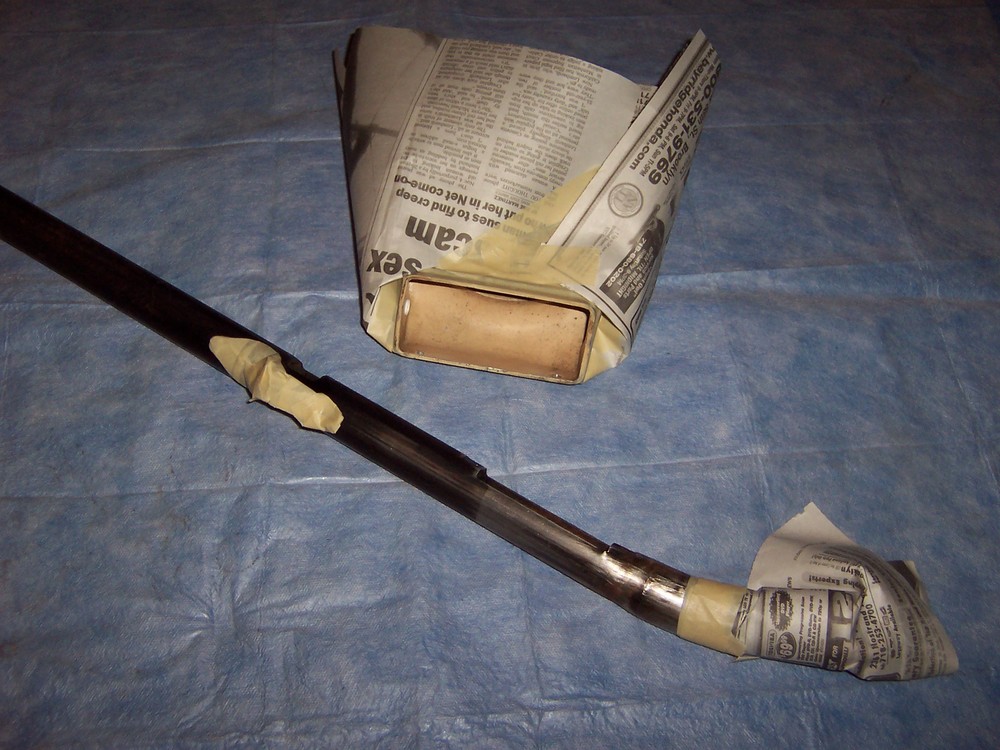
| Post# 9384 , Reply# 13 2/8/2007 at 08:17 (6,284 days old) by davortho10 () | ||
|
bottom plate and bearing Here's the other view. 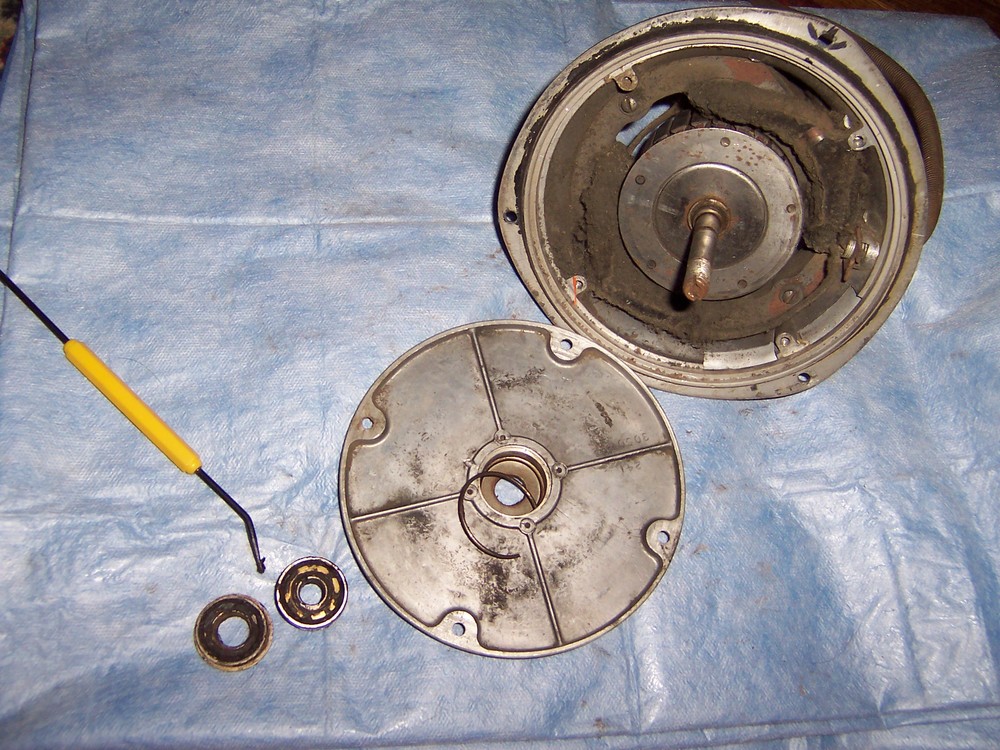
| ||
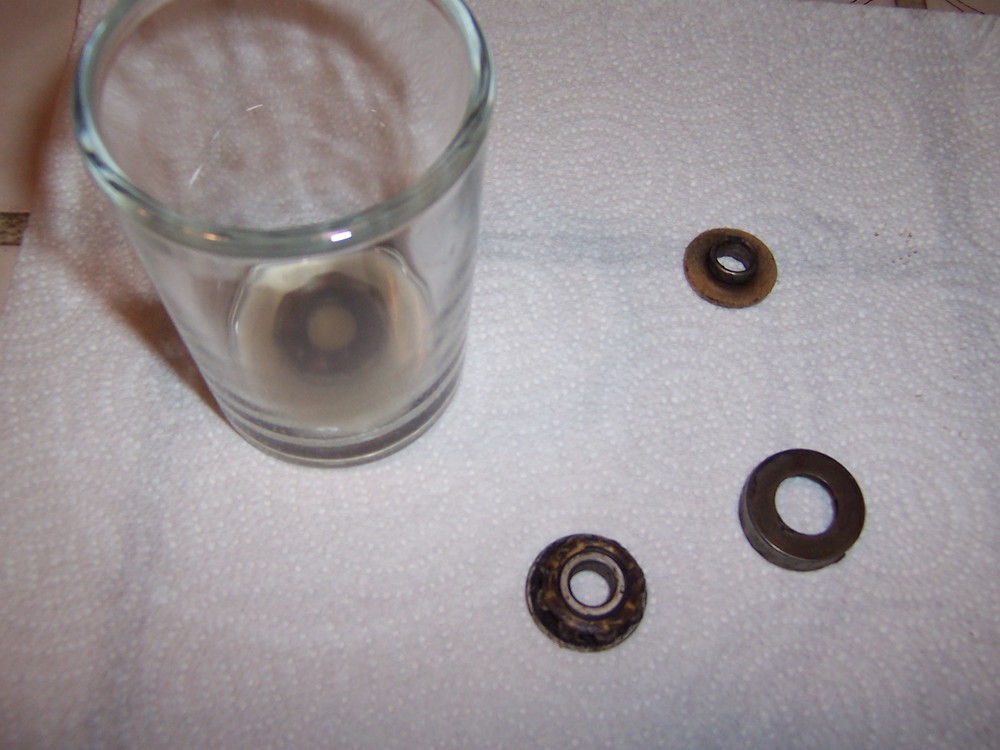
| Post# 9413 , Reply# 15 2/8/2007 at 20:06 (6,284 days old) by davortho10 () | ||
|
etc. Bearing and plate clean and ready to reassemble. 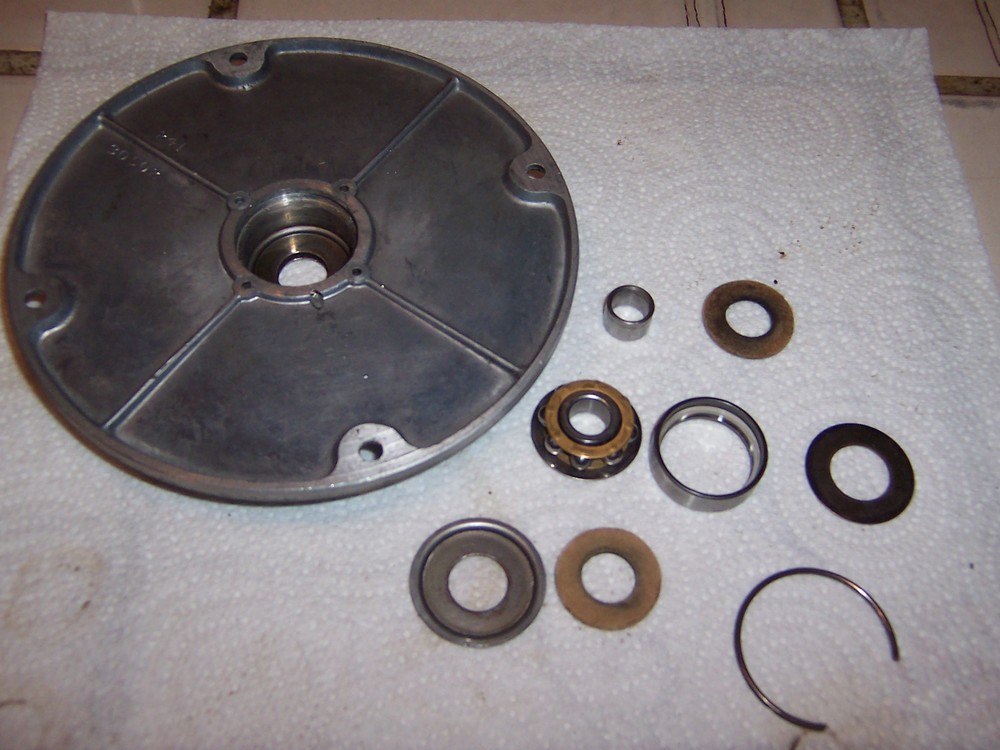
| ||
| Post# 9414 , Reply# 16 2/8/2007 at 20:08 (6,284 days old) by davortho10 () | ||
|
upper bearing Upper bearing and rotor out of motor. 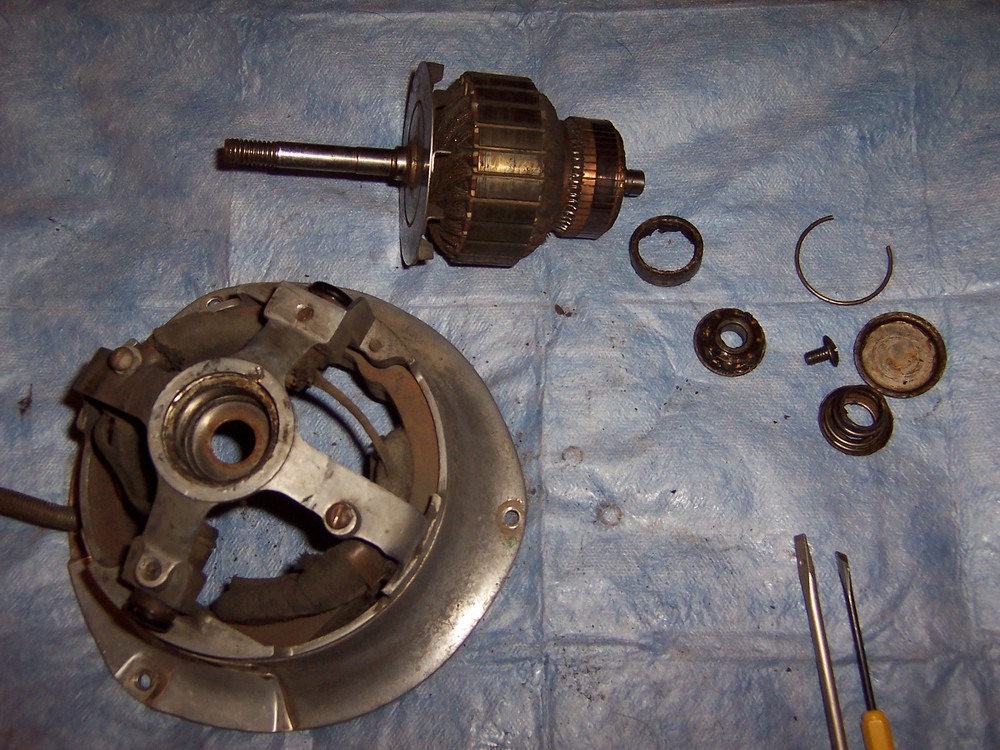
| ||
| Post# 9415 , Reply# 17 2/8/2007 at 20:11 (6,284 days old) by davortho10 () | ||
|
And finished All back together. Cosmetics come later, if anyone was wondering. 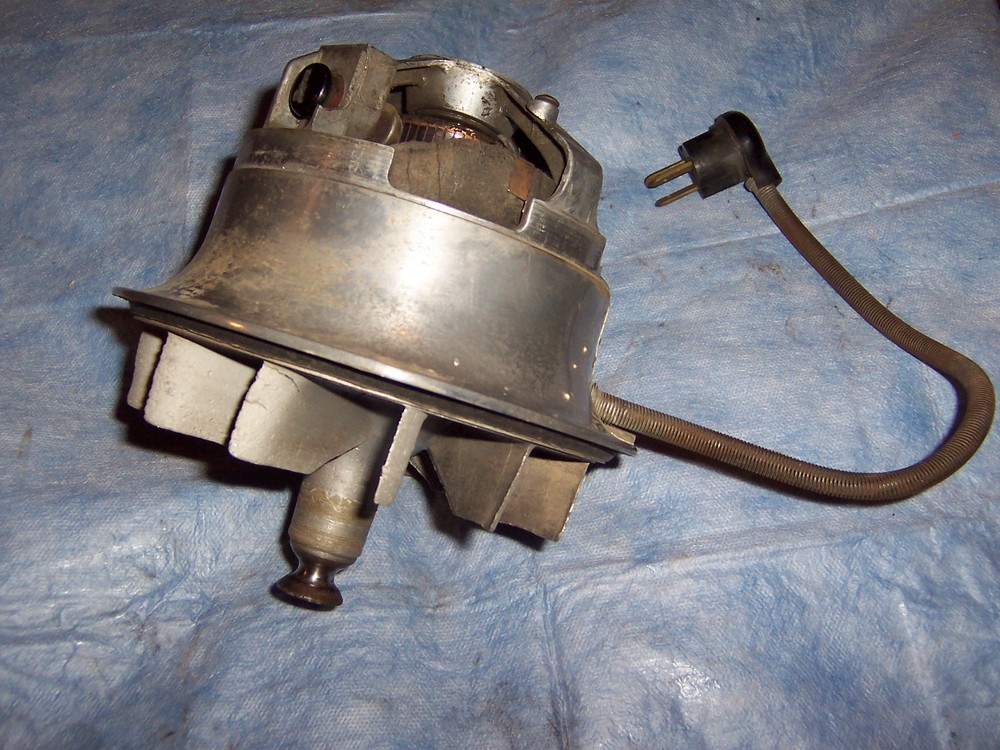
| ||
Post# 9419 , Reply# 18 2/8/2007 at 20:30 (6,284 days old) by compactelectra  (Palm Springs) (Palm Springs) |
||
Fabulous! | ||
| Post# 9423 , Reply# 19 2/8/2007 at 20:50 (6,284 days old) by thunderhexed (Edmond, OK) | ||
|
? | ||
| Post# 9434 , Reply# 23 2/8/2007 at 22:01 (6,284 days old) by vacjwt () | ||
|
vacuumkid3 I love repairing vacuums antique radios I love it allmost as much as useing and seeing the finished product boy do I love it and maybe one day thare will be a vacuum club in evry state | ||
| Post# 9435 , Reply# 24 2/8/2007 at 22:08 (6,284 days old) by convertible68 () | ||
|
Hi Fred, When it comes to bearings and removing old grease, Varsol will do the job just fine. Chem-Dip IS a type of carburetor cleaner and is overkill for this type of use. --Austin | ||
| Post# 9439 , Reply# 25 2/9/2007 at 00:18 (6,284 days old) by hoover28 (Oneida N.Y.) | ||
|
bearings most older hoover bearings dont come a part, they must be greased with a speical hoover grease nozzle tip that ataches to a grease gun. the tip fits into the bearig and the grease workes its way into the bearing. part of the tip also comes off to grease the brush roll bearings. chris | ||
| Post# 9442 , Reply# 26 2/9/2007 at 08:19 (6,283 days old) by hoovercelebrity (Germany) | ||
|
Hey Chirs... Yup, I have one of the grease gun nozzles of which you speak... Used on all of the convertibles, and 60-series machines when they went to a lower ball bearing in the motor. ~Fred | ||
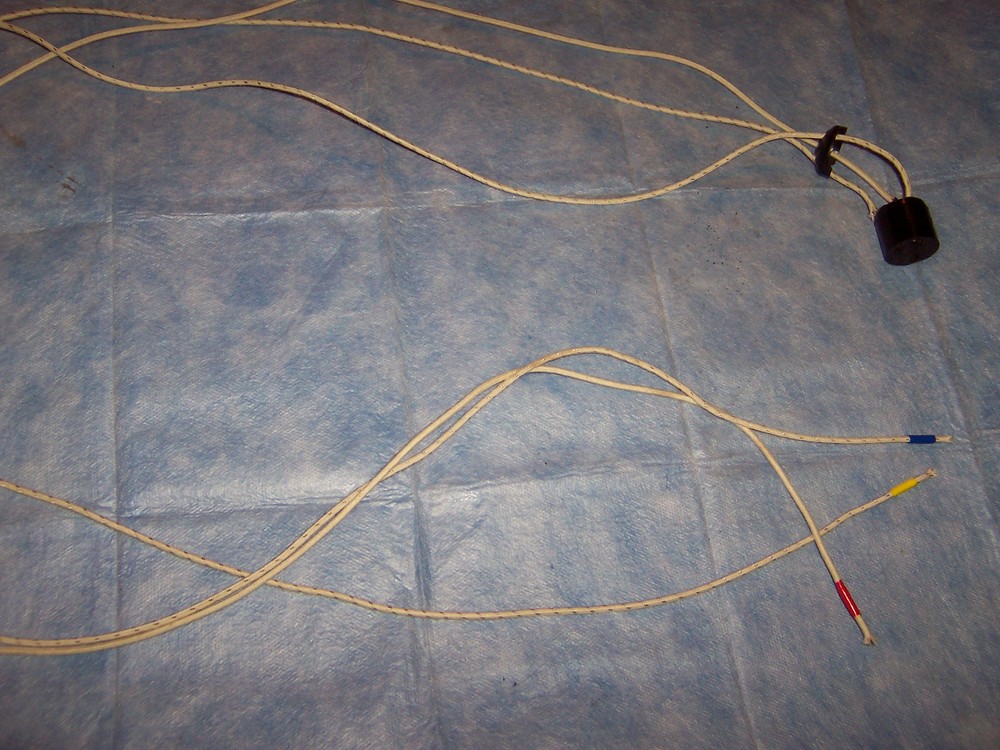
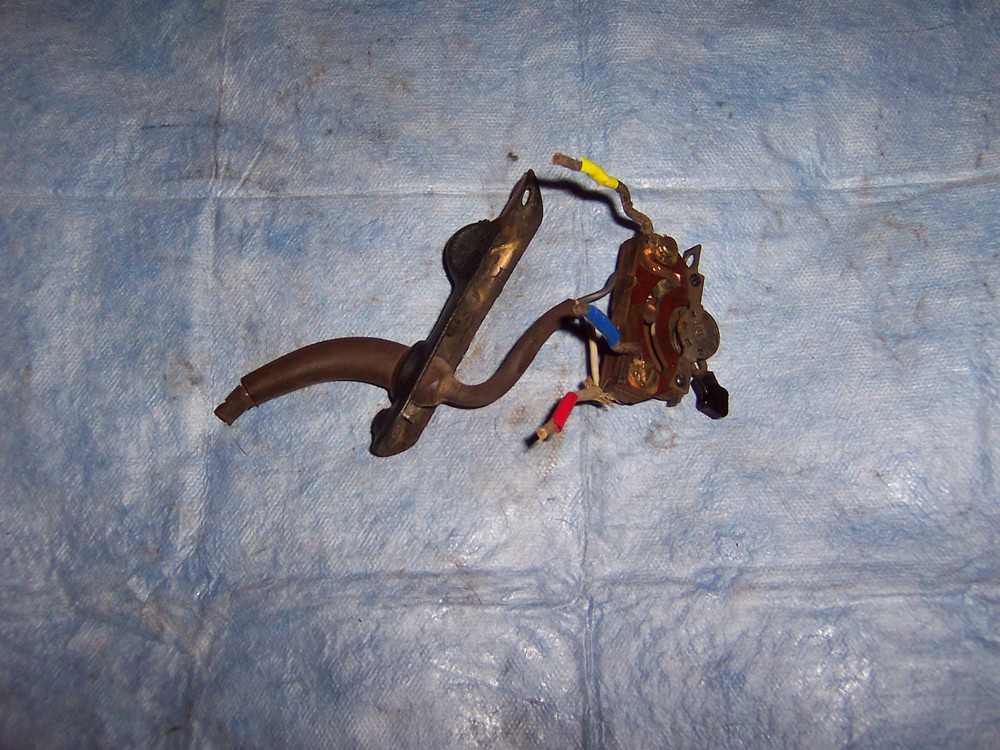
| Post# 9494 , Reply# 32 2/9/2007 at 19:23 (6,283 days old) by davortho10 () | ||
|
etc. Another view. 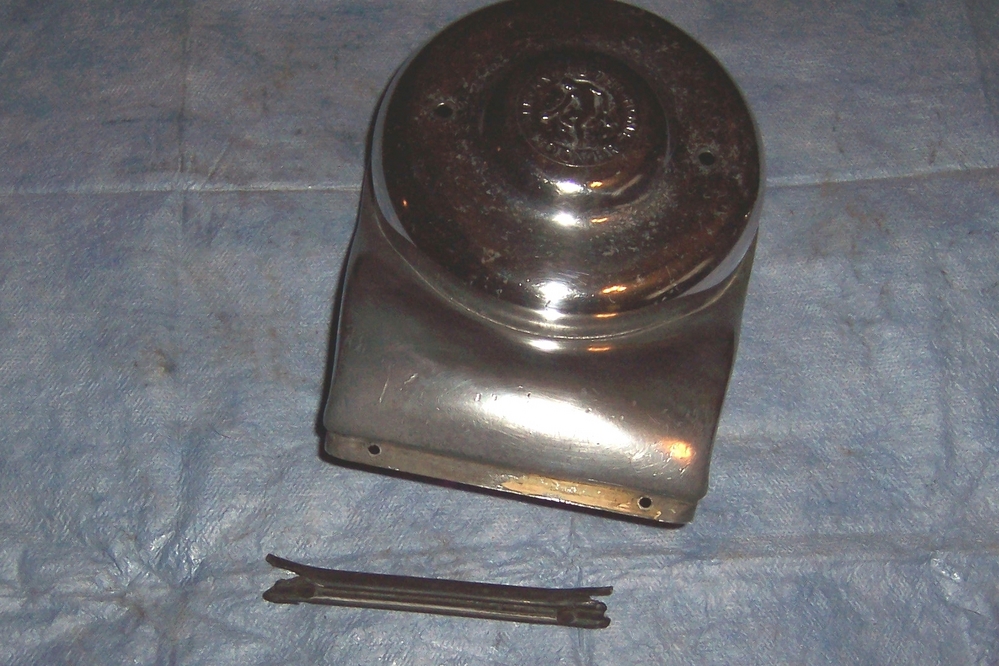
| ||
| Post# 9495 , Reply# 33 2/9/2007 at 19:53 (6,283 days old) by myhooverco () | ||
|
Here are some views of the handle grip...I have never taken one down this far...they are very well built...best of luck in your restoration....these are such classic machines. --Tom 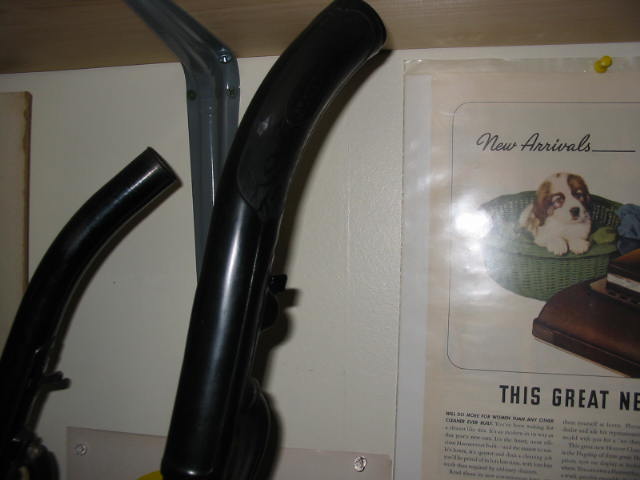
| ||
| Post# 9496 , Reply# 34 2/9/2007 at 19:53 (6,283 days old) by myhooverco () | ||
|
Here is a closer look...forgive the pic...I am sorry that they are not clearer. --Tom 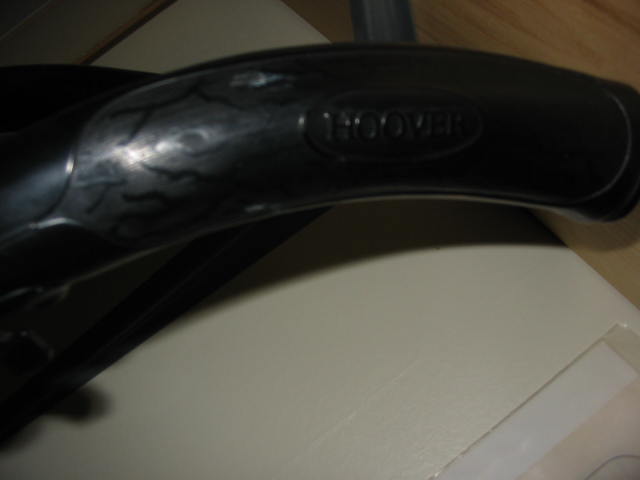
| ||
|
Post# 9499 , Reply# 35 2/9/2007 at 20:02 (6,283 days old) by compactelectra (Palm Springs) |
||
|
Jay | ||
| Post# 9501 , Reply# 36 2/9/2007 at 20:20 (6,283 days old) by davortho10 () | ||
|
pictures Tom, thank you so much, that will help. Not sure yet how I'll try to replicate that, but it gives me an idea. Guess I'll save that till everything else is done. | ||
| Post# 9502 , Reply# 37 2/9/2007 at 20:23 (6,283 days old) by davortho10 () | ||
|
brushes I do reuse them if they're in good shape and have a lot of length left. No chips or burn marks or anything like that. | ||
| Post# 9510 , Reply# 38 2/9/2007 at 22:08 (6,283 days old) by hygiene903 (Galion, OH) | ||
Thank You For Sharing
the photos of your project with us. It's almost as if we were watching the progress over your shoulder!! With the attention you are giving to all the details, you are going to have one fantastic Hoover when you are finished. And you have a 1930 DeSoto?? Hope you post some pictures of that sometime, too. Jeff | ||
| Post# 9524 , Reply# 39 2/10/2007 at 02:07 (6,282 days old) by hoovercelebrity (Germany) | ||
|
Another Question... Where'd you find that cloth covered wire? And was it difficult to re-wire the handle socket? How are the wires attached in the plug at the bottom of the handle? --I've never seen one apart... ~Fred | ||
| Post# 9539 , Reply# 40 2/10/2007 at 09:31 (6,282 days old) by davortho10 () | ||
|
To Jeff Thanks, I'm really glad about the interest from everyone. I posted a picture of me and my car in the Off Topic Forum under the other "odd" collections thread. Jay | ||
| Post# 9579 , Reply# 42 2/11/2007 at 00:13 (6,282 days old) by hygiene903 (Galion, OH) | ||
|
DeSoto | ||
| Post# 9586 , Reply# 43 2/11/2007 at 03:56 (6,281 days old) by vacjwt () | ||
|
sundial wire sundial.com go thare I love the wire they sell it is grate and may be the place you all are looking for it is grate and you dont have to wory about that old wire with this stuff hope this helps john tyminski | ||
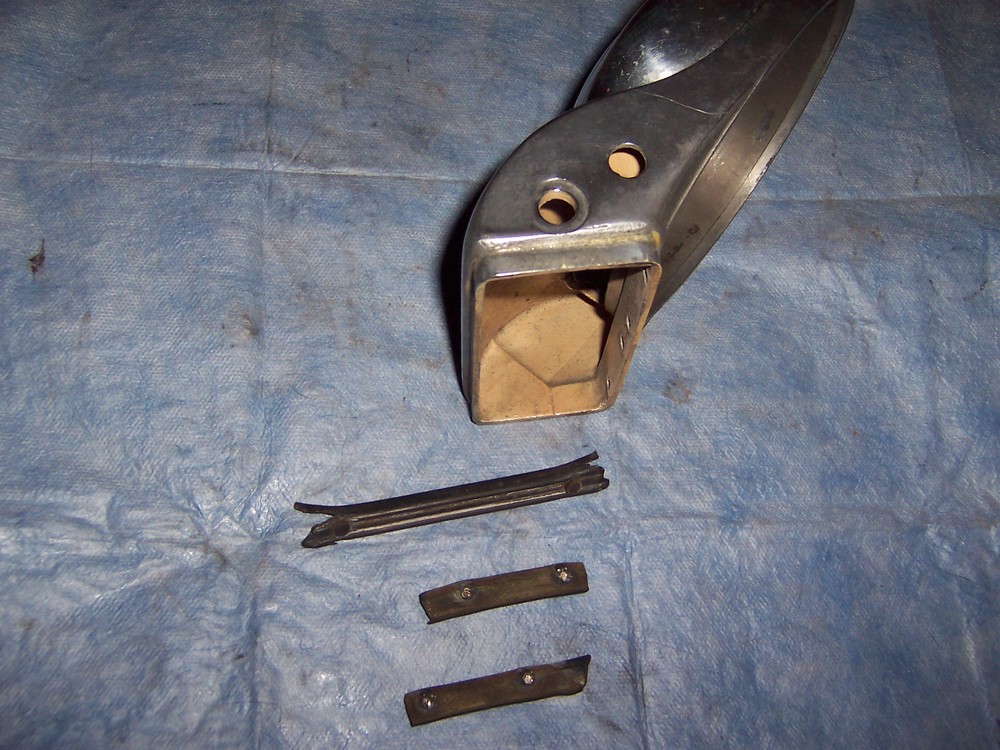
| Post# 9611 , Reply# 45 2/11/2007 at 09:21 (6,281 days old) by davortho10 () | ||
|
another view Other side of switch 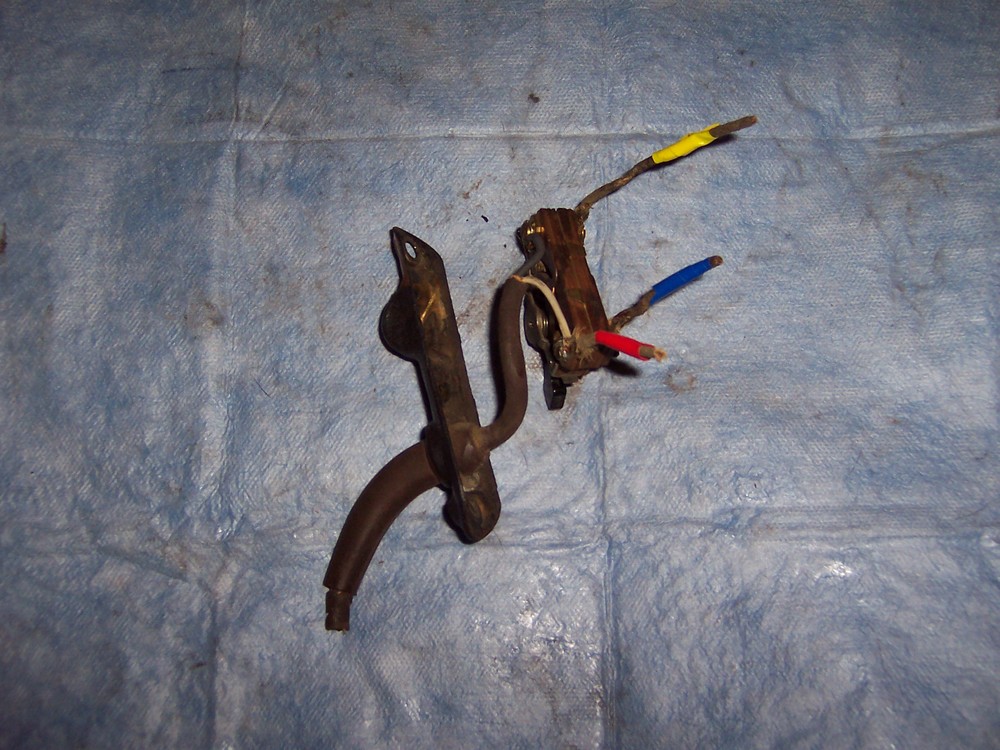
| ||
| Post# 9833 , Reply# 47 2/13/2007 at 21:37 (6,279 days old) by davortho10 () | ||
|
Wheels Front wheel removed 
| ||
| Post# 9834 , Reply# 48 2/13/2007 at 21:38 (6,279 days old) by davortho10 () | ||
|
etc. Another view. 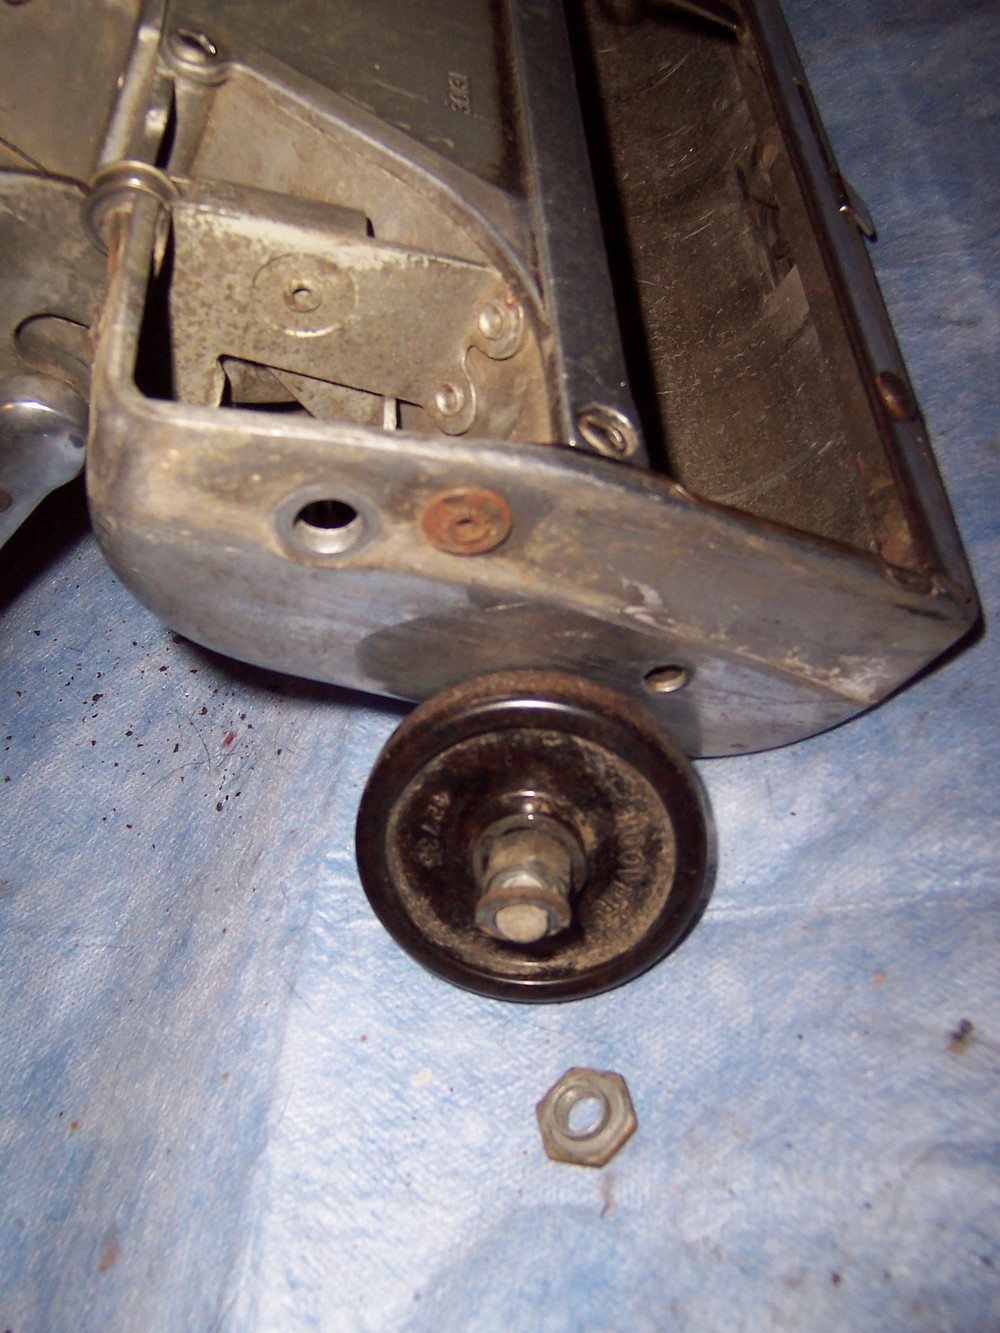
| ||
| Forum Index: | 
| Other Forums: |

|

|

|

|

|

 Comes to the Rescue!