Thread Number: 17801
Rivet tool for bumper on Kirby Classic III?
[Down to Last]

Vacuumland's exclusive eBay Watch:
scroll >>> for more items --- [As an eBay Partner, eBay may compensate vacuumland.org if you make a purchase using any link to eBay on this page]
Post# 193266   8/4/2012 at 18:53 (4,281 days old) by chucknorse ()        

I am in the process of rebuilding my first Kirby. I have purchased a new bumper and rivets for my Kirby 2CB, but I have no idea how to secure them. Is there a tool that rolls a lip on the back of the rivet?

One more question please. Is this the right position for the belt lifter arm?

Thanks in advance!


Post# 193273 , Reply# 1   8/4/2012 at 19:16 (4,281 days old) by eurekastar (Amarillo, Texas)        

eurekastar's profile picture

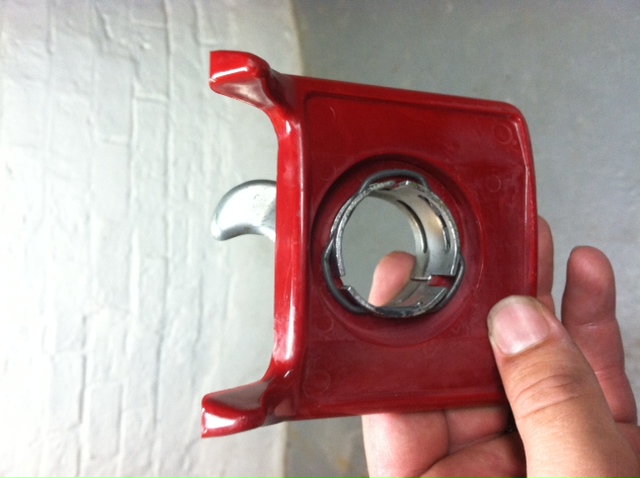
On that particular model, the tubular rivets should be on the nozzle.  The easiest way to install those bumpers is to heat them under water to make the plastic soft and pliable.  Then, insert a thin flat blade screwdriver through the hole in the bumper.  Then butt the screwdriver blade underneath the rivet while sliding the bumper down the screwdriver itself and finally onto the rivet.  Repeat that procedure for the other side, then stretch the bumper all the way onto the nozzle.  I've also heated those bumpers up in the microwave for a few seconds.  If those tubular rivets are missing, you'll need to install the bumper with pop-rivets and a special pop-rivet gun.  I would suggest you get the bumper brackets that are made for the 500 series bumpers.  They won't be quite large enough, but they will help stabilize the bumper.  To do that, insert the rivet into the gun.  Then, insert the other end of the rivet through the bracket, then the bumper, then through the nozzle, and finally through a washer on the inside of the nozzle.  Squeeze the handle on the gun a couple of times and the rivet will flatten out on the washer.  The gun will usually also break off the piece of the rivet in the gun.  Also, I think the "finger" on the belt lifter may need to be moved 180 degrees.  It's been a while since I've done one of those, so I'm not positive about that. 


Post# 193341 , Reply# 2   8/5/2012 at 08:45 (4,281 days old) by chucknorse ()        

Thank you so much for the tips. This is one of the more helpful message boards that I have been on!

Post# 193368 , Reply# 3   8/5/2012 at 15:21 (4,280 days old) by chucknorse ()        
It is finished!

I finally put it back together. The hot water trick worked great and the belt arm did need to be adjusted. I polished the metal as best I could with my 8" grinder and buffing wheels. The metal could have been polished better, but my grinder did not have enough grunt to do it. Thank you all for your expert advice!

Post# 193373 , Reply# 4   8/5/2012 at 15:58 (4,280 days old) by eurekastar (Amarillo, Texas)        

eurekastar's profile picture

Very nice!  Congratulations!


Forum Index:       Other Forums:                      


Comes to the Rescue!

Woops, Time to Check the Bag!!!
Either you need to change your vacuum bag or you forgot to LOG-IN?

Discuss-O-MAT Log-In


New Members
Click Here To Sign Up.


automaticwasher.org home
Discuss-o-Mat Forums
Vintage Brochures, Service and Owners Manuals
Fun Vintage Washer Ephemera
See It Wash!
Video Downloads
Audio Downloads
Picture of the Day
Patent of the Day
Photos of our Collections
The Old Aberdeen Farm
Vintage Service Manuals
Vintage washer/dryer/dishwasher to sell?
Technical/service questions?
Looking for Parts?
Website related questions?
Digital Millennium Copyright Act Policy
Our Privacy Policy