|
Thread Number: 17718
Rainbow D3 Rebuild!!!! |
[Down to Last] |  |
| Post# 191961 7/28/2012 at 21:20 (4,286 days old) by eurekastar (Amarillo, Texas) | ||
|
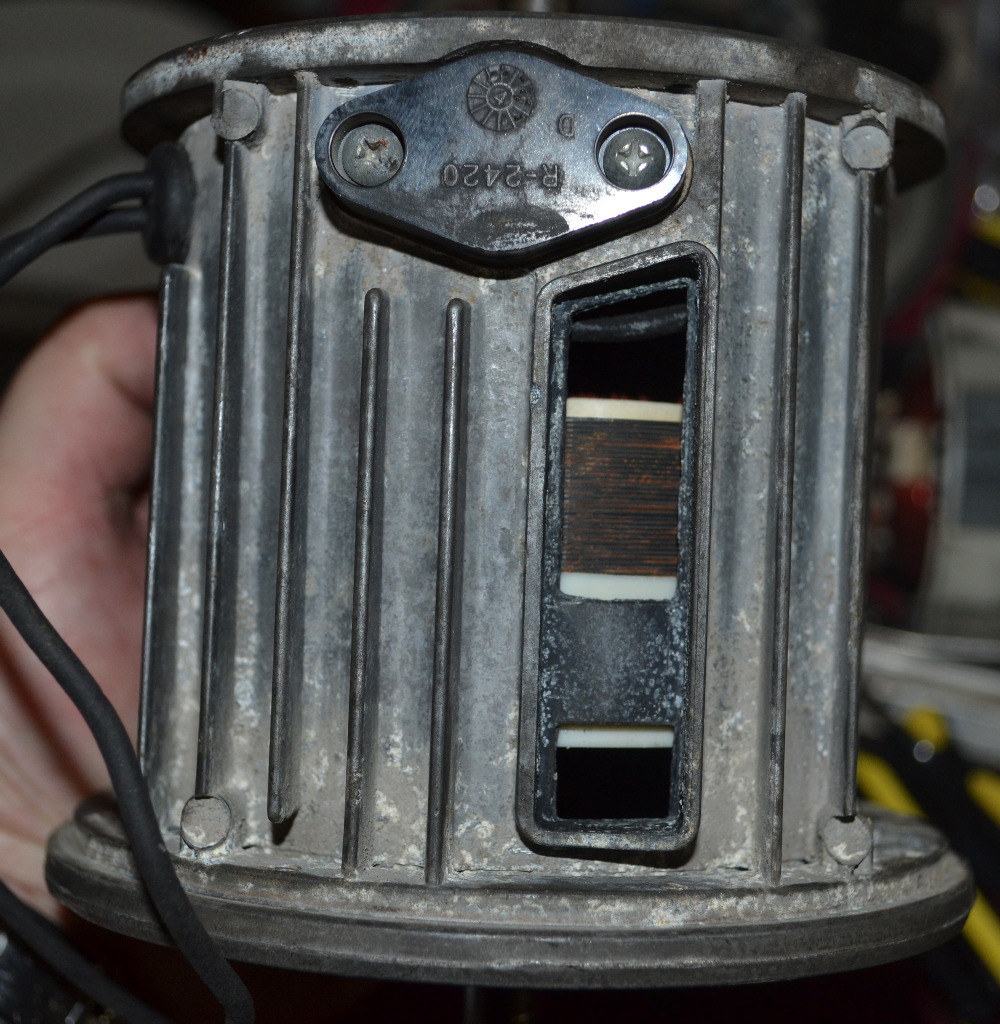
Well, the bearing plate for which I've been waiting finally arrived, so I was able to to complete the rebuild that began over one month ago. This photo reveals why the rebuild was necessary. Notice the vents around the periphery of the motor housing. It is through these vents that air flows. Some of them were completely covered over with dirt. 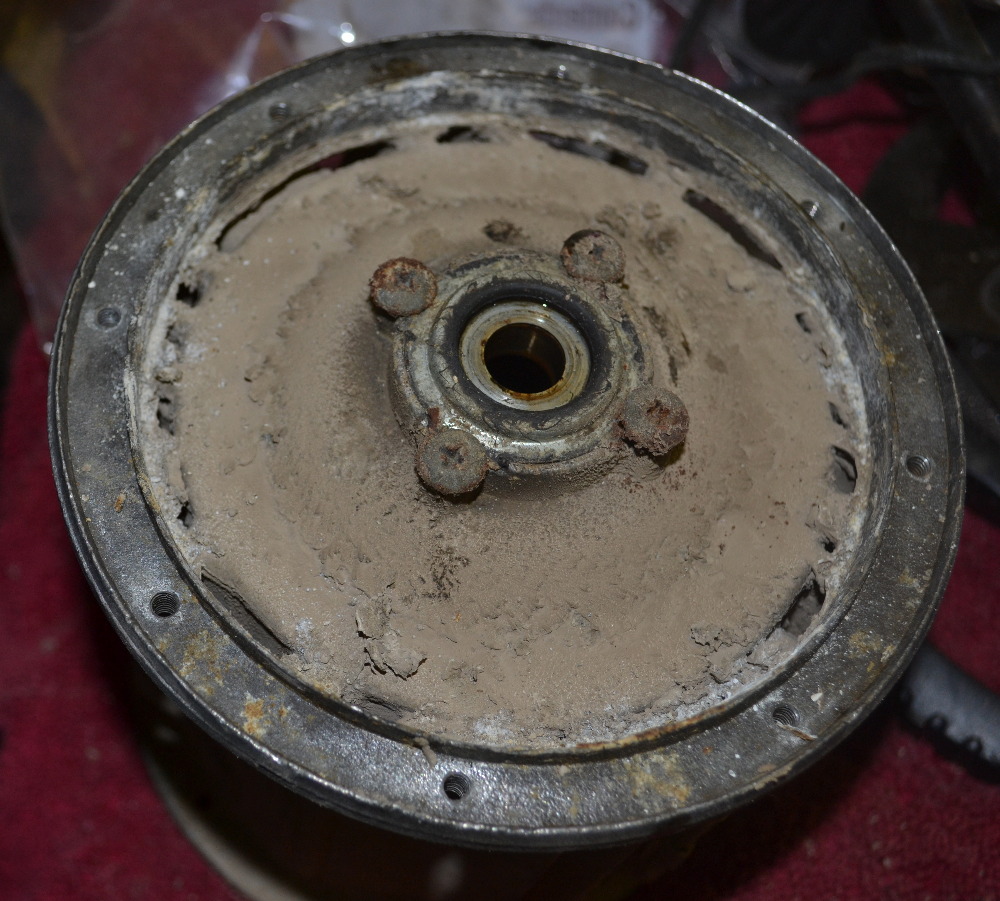
| ||
| Post# 191962 , Reply# 1 7/28/2012 at 21:22 (4,286 days old) by eurekastar (Amarillo, Texas) | ||
|
| ||
| Post# 191963 , Reply# 2 7/28/2012 at 21:24 (4,286 days old) by eurekastar (Amarillo, Texas) | ||
|
| ||
| Post# 191964 , Reply# 3 7/28/2012 at 21:27 (4,286 days old) by eurekastar (Amarillo, Texas) | ||
|
| ||
| Post# 191965 , Reply# 4 7/28/2012 at 21:28 (4,286 days old) by eurekastar (Amarillo, Texas) | ||
|
| ||
| Post# 191967 , Reply# 5 7/28/2012 at 21:32 (4,286 days old) by eurekastar (Amarillo, Texas) | ||
|
| ||
| Post# 191968 , Reply# 6 7/28/2012 at 21:38 (4,286 days old) by eurekastar (Amarillo, Texas) | ||
|
| ||
| Post# 191970 , Reply# 7 7/28/2012 at 21:40 (4,286 days old) by eurekastar (Amarillo, Texas) | ||
|
| ||
| Post# 191972 , Reply# 8 7/28/2012 at 21:43 (4,286 days old) by eurekastar (Amarillo, Texas) | ||
|
Now, the fan assembly begins, starting with the "air guide" which goes on top of the bearing plate. There are three "stages" to this fan assembly. Each fan stage has its own housing air guide and spacers. 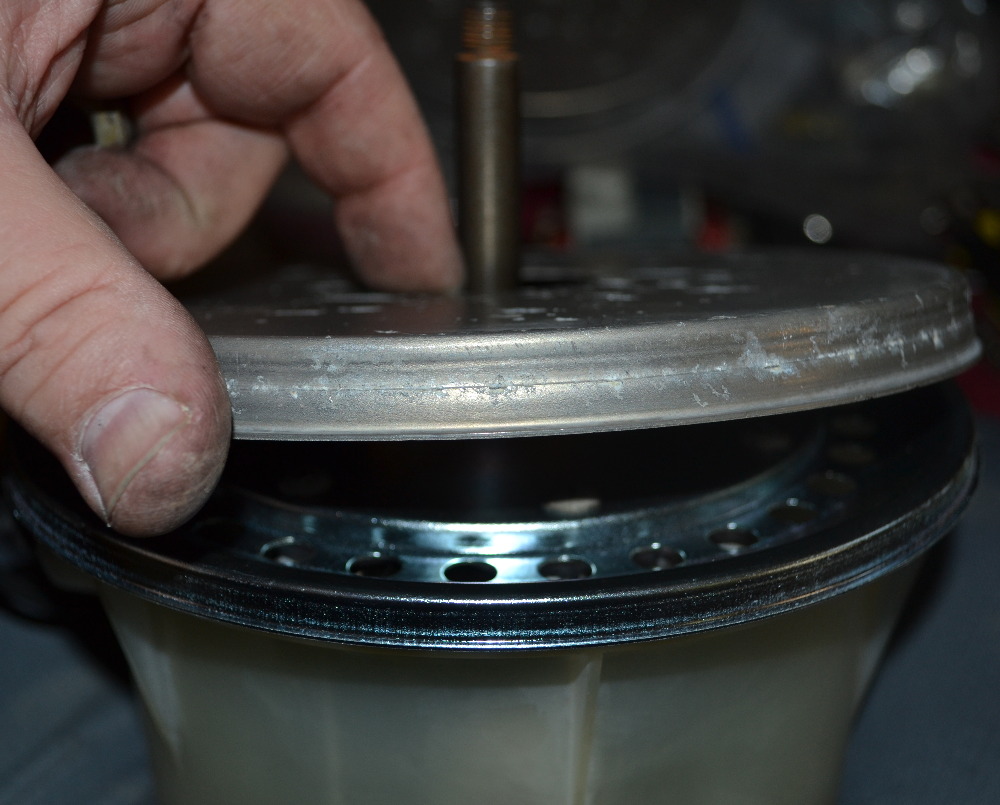
This post was last edited 07/28/2012 at 22:26 | ||
| Post# 191973 , Reply# 9 7/28/2012 at 21:46 (4,286 days old) by eurekastar (Amarillo, Texas) | ||
|
| ||
| Post# 191975 , Reply# 10 7/28/2012 at 21:47 (4,286 days old) by vacumaniac () | ||
|
Awesome!!! Cannot wait to see the final fully assembled unit pics!!!! | ||
| Post# 191979 , Reply# 11 7/28/2012 at 21:57 (4,286 days old) by eurekastar (Amarillo, Texas) | ||
|
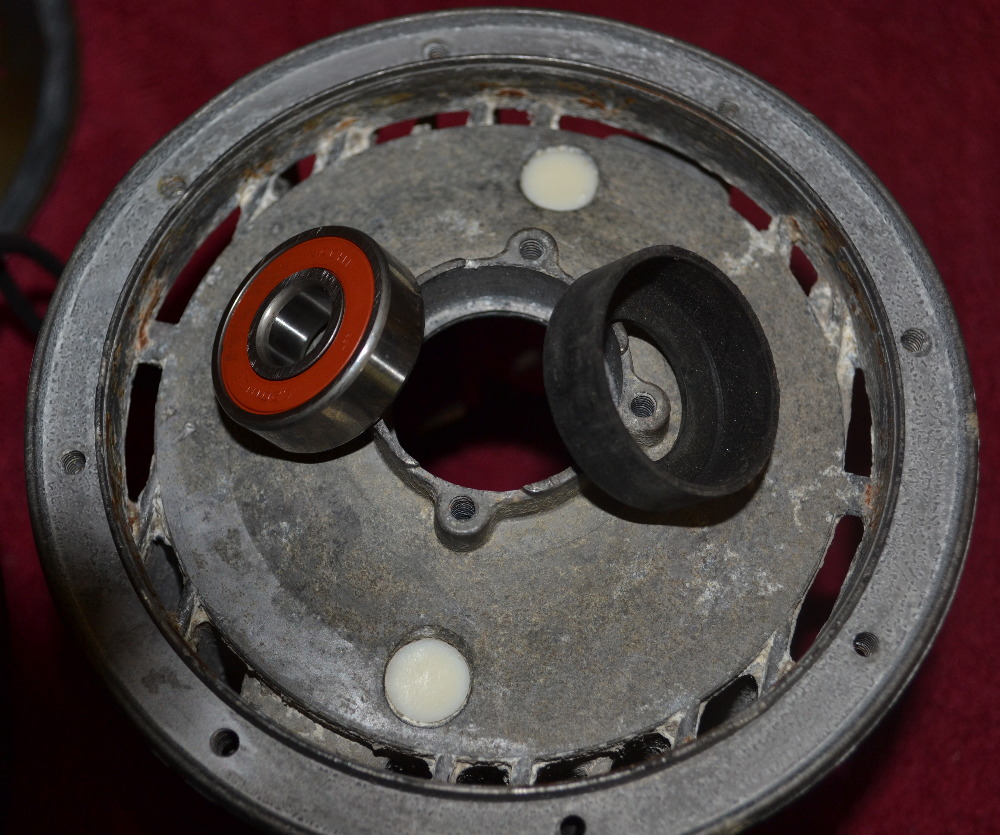
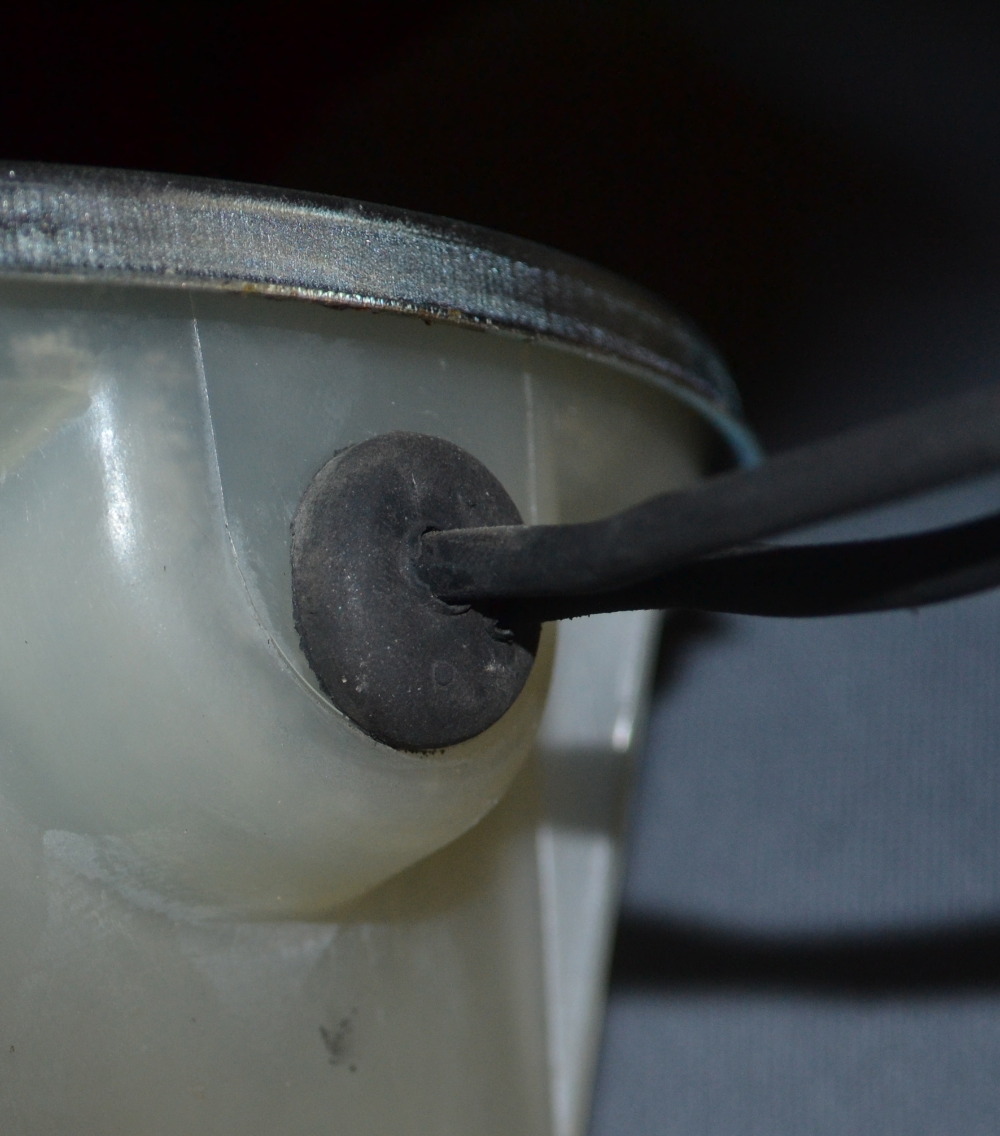
During the rebuild process, I messed up the end of the armature shaft while trying to loosen a stubborn nut. So I had to do some filing in order to knock off the high spots so the separator nut would fit. One of the things I find interesting is that the motor support ring has a lip that also serves as a secondary gasket for the water basin. In case someone is wondering, I did install the rest of the screws in the flange! LOL! I mention that, because I often forget to do something! 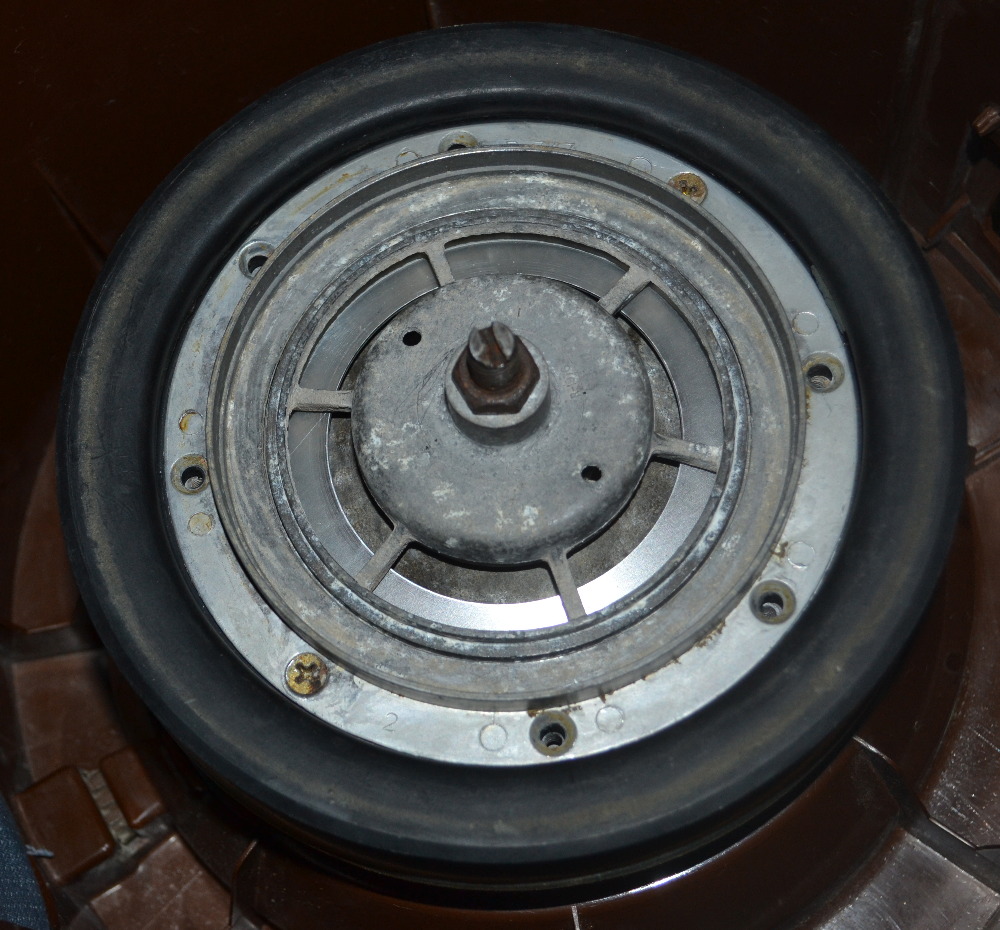
| ||
| Post# 191980 , Reply# 12 7/28/2012 at 21:59 (4,286 days old) by eurekastar (Amarillo, Texas) | ||
|
| ||
| Post# 191982 , Reply# 13 7/28/2012 at 22:00 (4,286 days old) by eurekastar (Amarillo, Texas) | ||
|
| ||
| Post# 191983 , Reply# 14 7/28/2012 at 22:03 (4,286 days old) by eurekastar (Amarillo, Texas) | ||
|
EPILOGUE | ||
Post# 191992 , Reply# 15 7/28/2012 at 22:36 (4,286 days old) by kloveland  (Tulsa) (Tulsa) |
||
|
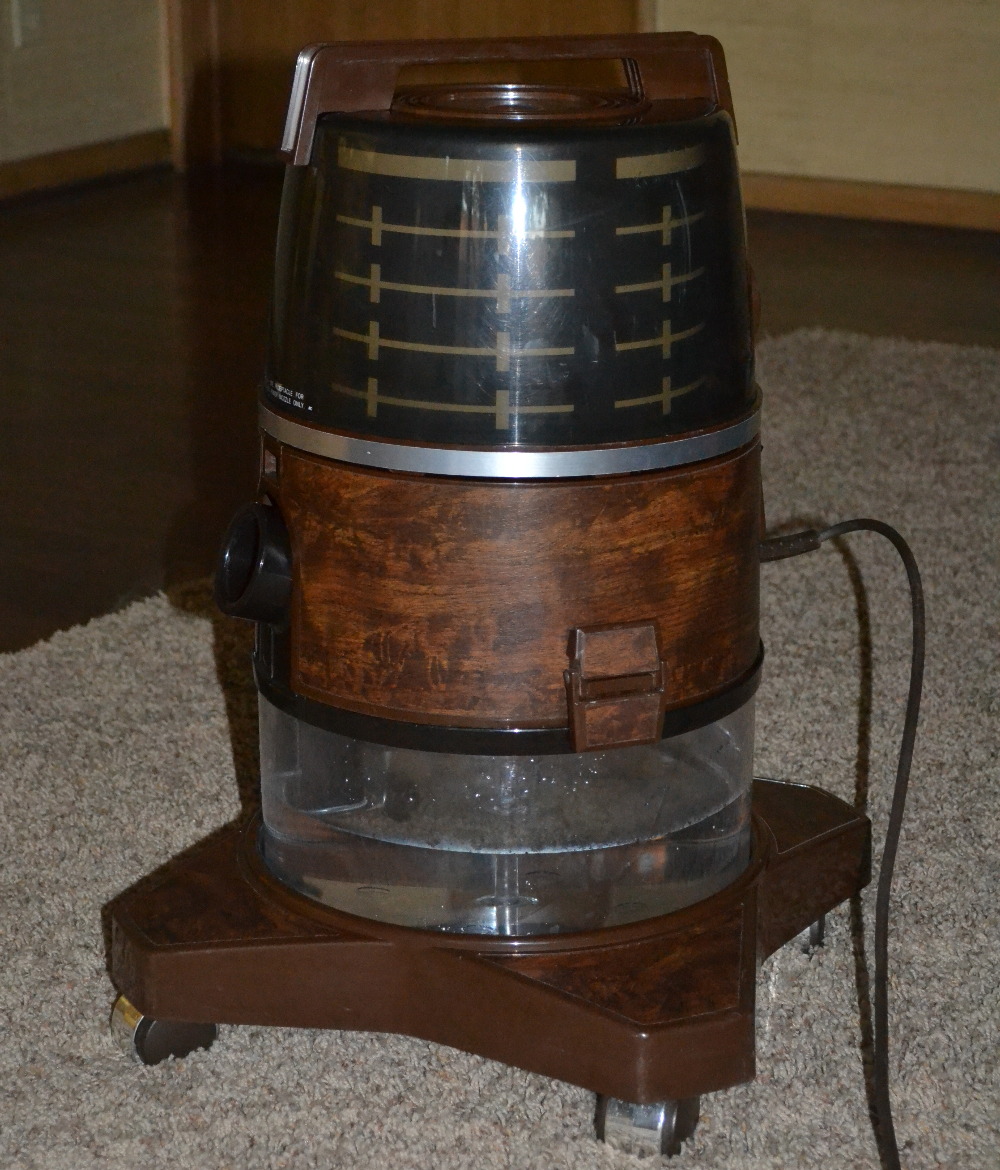
Looks almost new!
Just found a Rainbow D2 at an Estate Sale today. It would not run so I got it for six bucks. Brought it home and took off the switch housing and made sure the wires were tight because the switch was loose. It fired right up, but sounds horrible. It needs some bearing work. May have to ask for assistance on this one. I've never repaired bearings on a rainbow.
| ||
| Post# 191993 , Reply# 16 7/28/2012 at 22:54 (4,286 days old) by rainbowjoel (Dexter NM) | ||
|
so cool, but I am confused. So the top of motor is just sucking just air? | ||
| Post# 192031 , Reply# 17 7/29/2012 at 07:41 (4,286 days old) by eurekastar (Amarillo, Texas) | ||
|
@ Kenny -- the motor setup in your D2 is very similar to this one. However, there is ONE major difference. Air flows through the motor instead of around the motor.
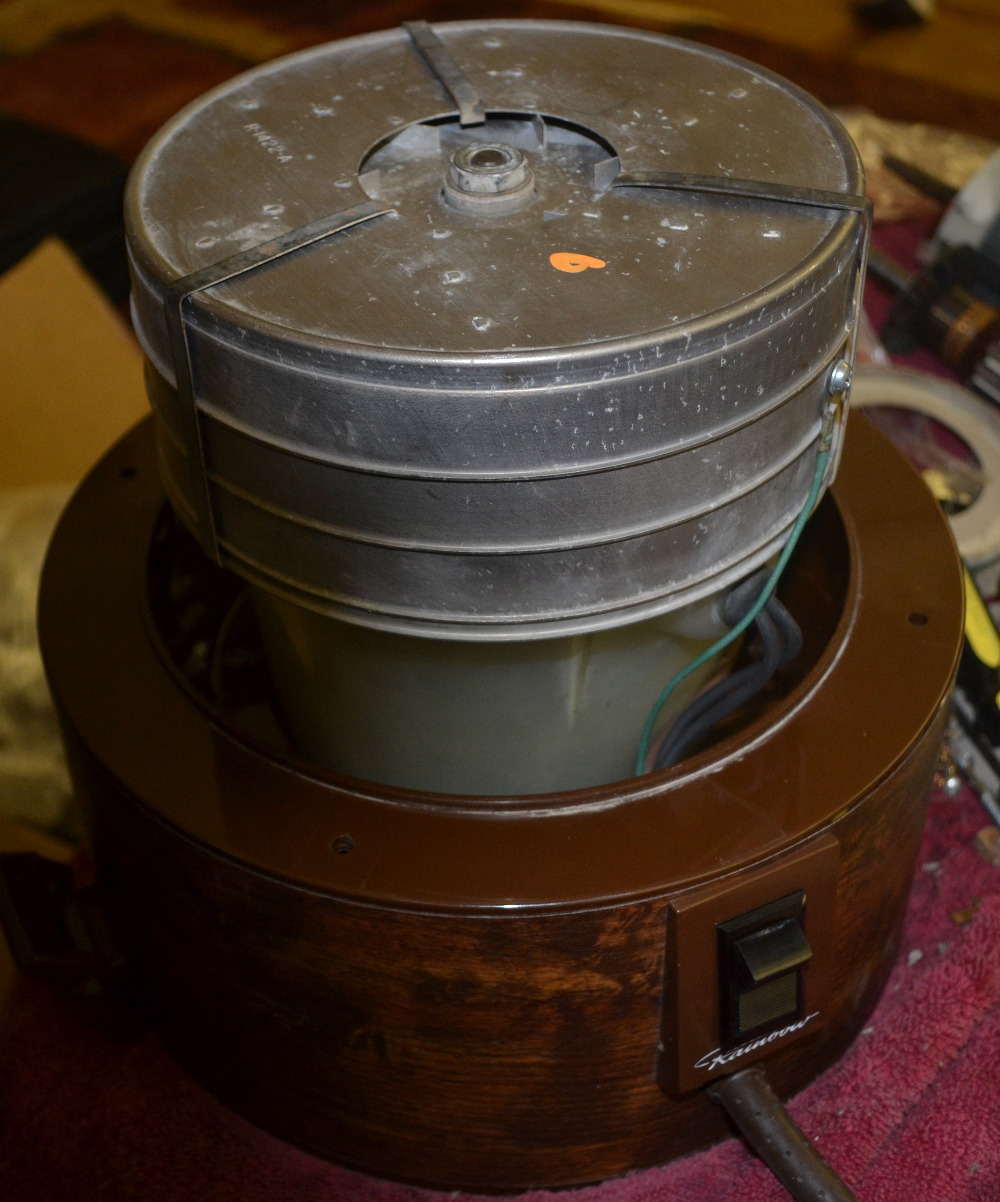
@ Joel -- You've noticed the MAJOR difference in this motor from the D4 and E2 designs. With the newer models, the fans sit directly on the water basin. However with the D3 and earlier models, everything is flipped. The fans are on top and the motor sits directly on the water basin. | ||
| Post# 192076 , Reply# 18 7/29/2012 at 13:58 (4,285 days old) by rainbowjoel (Dexter NM) | ||
|
Yes I am glad u posted pictures. So the fans on top are just keep the motor cool? | ||
| Post# 192139 , Reply# 19 7/29/2012 at 16:18 (4,285 days old) by eurekastar (Amarillo, Texas) | ||
|
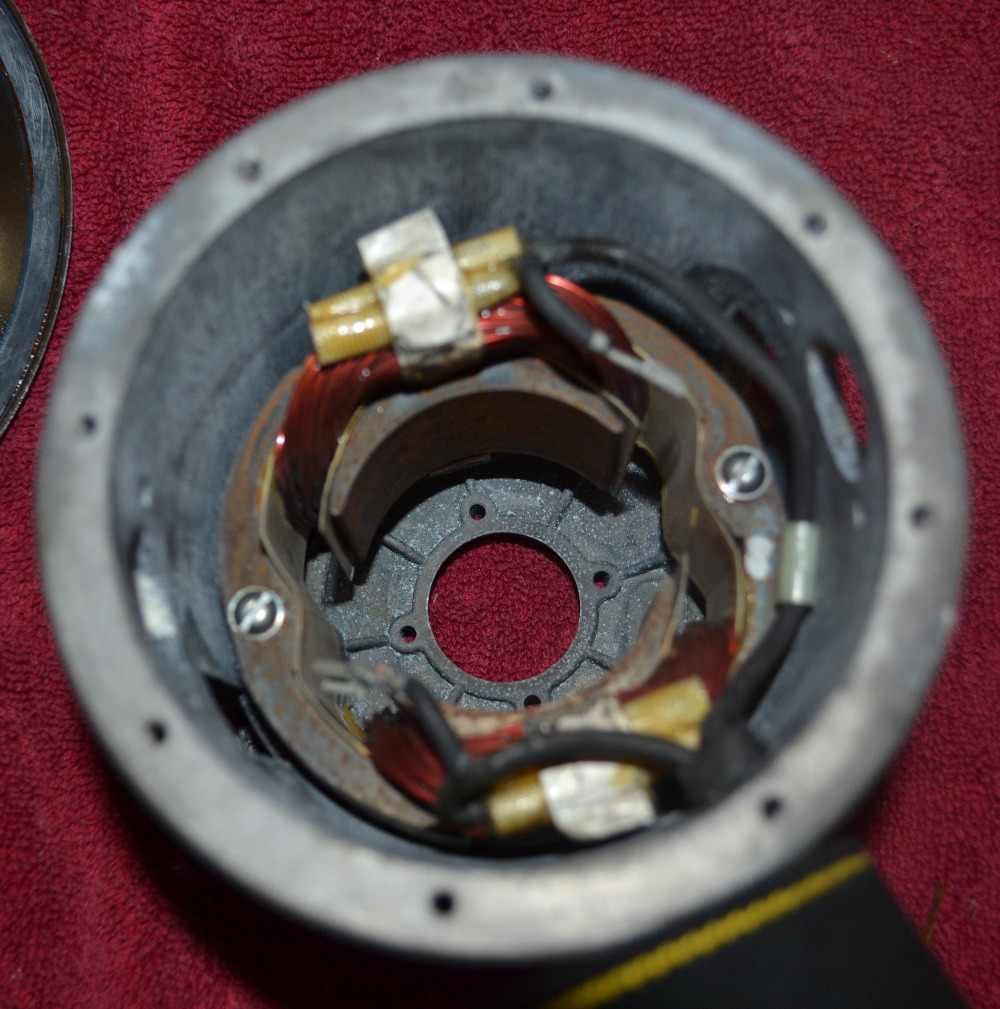
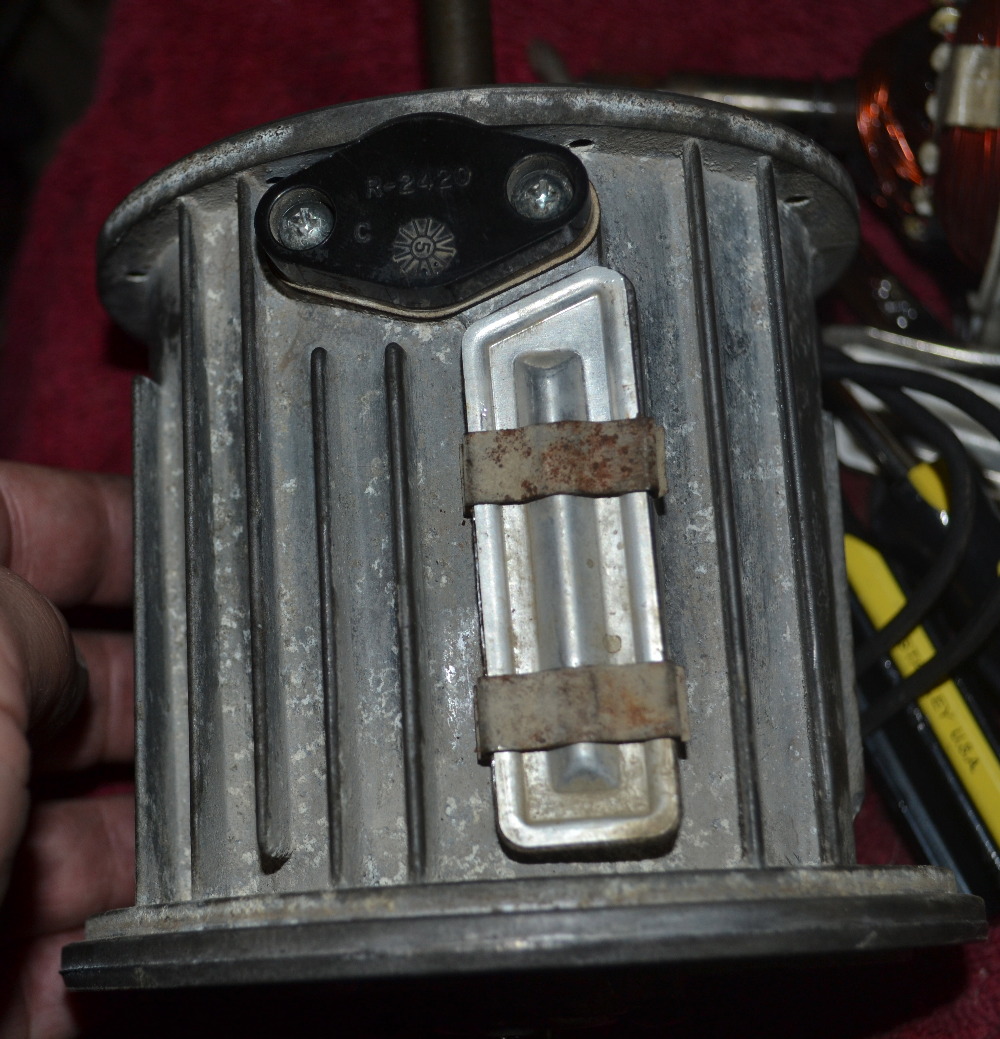
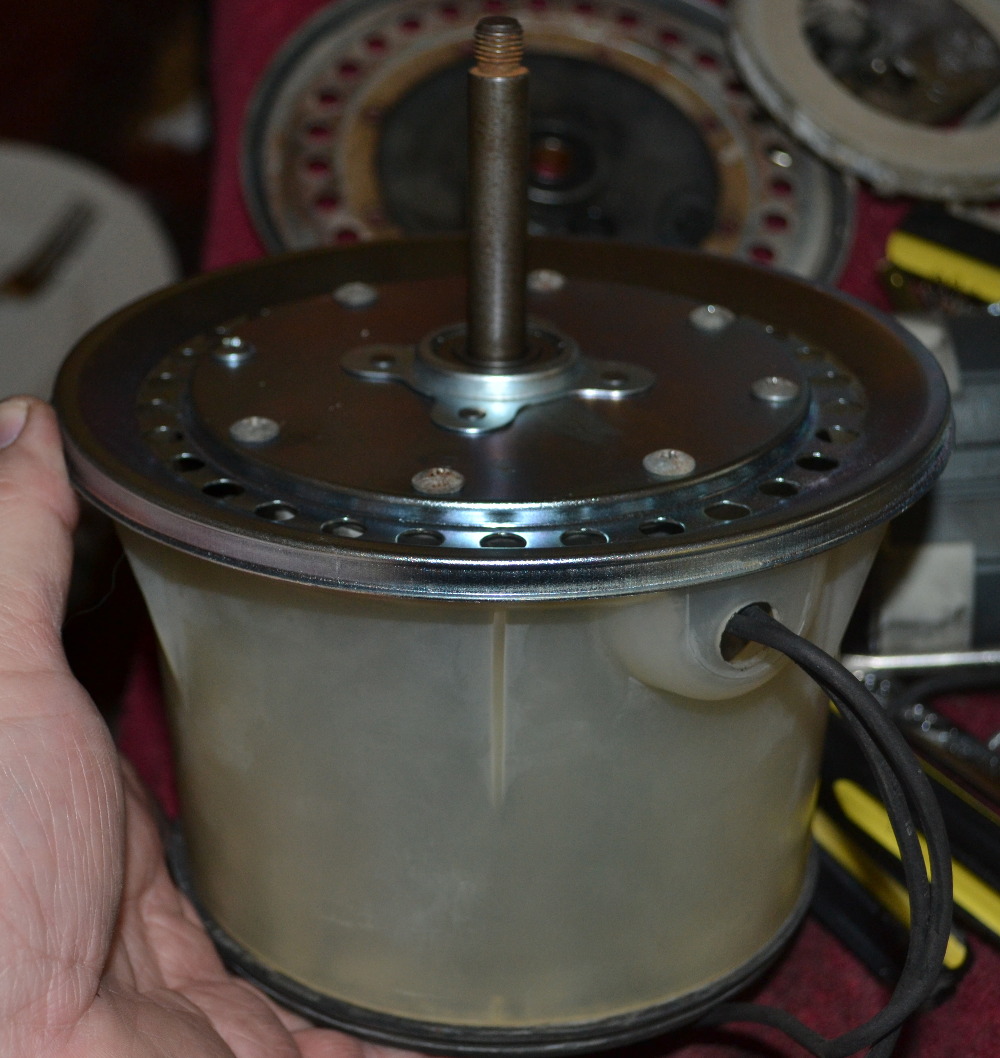
@ Joel No, the fans on top are the suction fans. Take a look at the above photos. In the photo of the bottom bearing and bearing boot -- that is actually the bottom of the motor assembly where the spider and separator attaches. Notice all the slots around the the periphery. Air is sucked by the fans (on top) through those holes. The air is then vented around the sides of the motor before passing through the holes around the periphery of the bearing plate and finally into the fan assembly itself. The fan assembly sits on top of that bearing plate. Notice too the plastic shroud that surrounds the motor. It keeps the air flow concentrated and directed from the slots on the bottom of the motor (water pan side) and up through the periphery of the bearing plate and finally through the suction fans themselves. With the D4, Rainbow went to a completely different (and more efficient and compact) motor/fan design with the motor itself on top and the fan assembly on the bottom where the spider and separator are attached. The D3 motor does look awkward because it looks top heavy. But the fan assembly on top is actually very light (being made of aluminum, I think). Once the motor is attached to its support ring and the support ring is attached to the lower vacuum housing, it is very stable. Additional support and stability is provided by the plastic baffle inside the top housing of the vacuum. You can see the stripped baffle through the opaque plastic on top. By the way, there is an internal cooling fan on the armature too. You can see that in the second photo. The attached photo is a more clear view of the top of the bearing plate where the fan assembly sits. Again, the fans draw air through those holes around the periphery. (I took this photo while "bench testing" the motor before I assembled the fans on top of it) 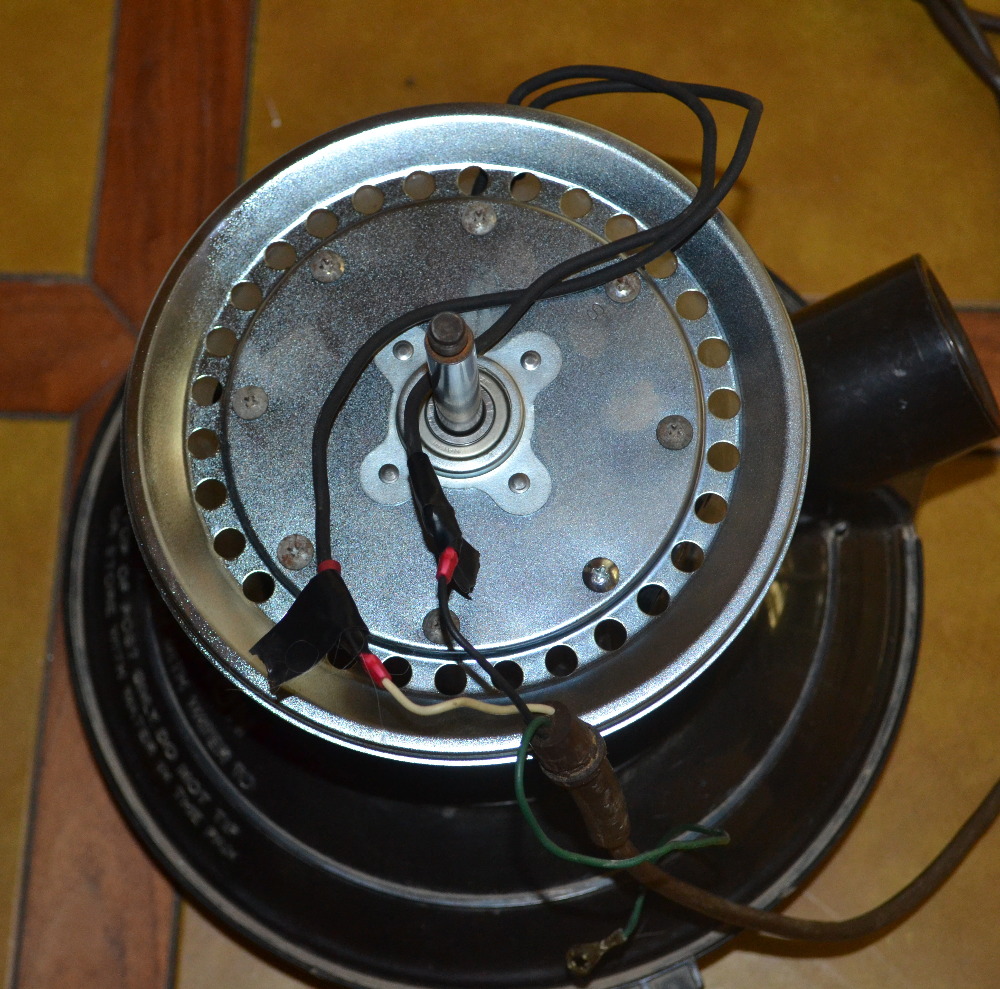
| ||
| Post# 192147 , Reply# 20 7/29/2012 at 16:42 (4,285 days old) by cam2s (Nebraska) | ||
|
D3C Very interesting! I haven't taken the time to take my D3 apart, but at least I know what the inside of the machine looks like now. Thanks for the insights! | ||
| Post# 192239 , Reply# 21 7/30/2012 at 09:33 (4,284 days old) by rainbowjoel (Dexter NM) | ||
|
eurekastar thanks explaining. I got it now. How is the suction compared to D4? I love to see it running on youtube? | ||
| Post# 385762 , Reply# 22 2/10/2018 at 19:07 (2,263 days old) by vacuumdevil (Vacuum Hell ) | ||
|
rather than creating a new thread. | ||
| Post# 385767 , Reply# 23 2/10/2018 at 19:59 (2,263 days old) by kenkart () | ||
|
If you dont know any swear words Rebuild one or 2 of these...You will!!!! | ||
| Post# 385776 , Reply# 24 2/10/2018 at 20:46 (2,263 days old) by eurekastar (Amarillo, Texas) | ||
|
| ||
| Forum Index: | 
| Other Forums: |

|

|

|

|

|

 Comes to the Rescue!