Thread Number: 17577
Electrolux Prolux Plus take apart help
[Down to Last]

Vacuumland's exclusive eBay Watch:
scroll >>> for more items --- [As an eBay Partner, eBay may compensate vacuumland.org if you make a purchase using any link to eBay on this page]
Post# 190088   7/15/2012 at 20:34 (4,295 days old) by macmansam (Minnesota )        

macmansam's profile picture
I can't for the life of me get it to open. Does anyone have like a "how to" or an owners manual? My serial number is P09236E if that helps. I want to take it apart and clean out the motor and inside. There are 2 screws underneath where the bag goes, but they are in a really awkward spot. Thanks in advance!

Post# 190112 , Reply# 1   7/15/2012 at 23:13 (4,295 days old) by dustin (Jackson, MI)        

dustin's profile picture
Yep... those are the screws that need to come out. I replaced the motor in one once and they are a huge pain to get to. It took me about 45 minutes and managed to bang up my knuckles and make them red and swollen. If it runs ok now I would suggest leaving it alone.

Post# 190162 , Reply# 2   7/16/2012 at 09:47 (4,295 days old) by rugsucker (Elizabethton TN)        
ProLux

As with most jobs the right tool helps.There is a screwdriver with extra long shaft that allows the handle to extend beyond bag compartment.Perhaps you can buy(check auto or tool stores)or borrow(have a neighborhood mechanic you deal with?).Handle comes off first.

Post# 372482 , Reply# 3   5/20/2017 at 22:04 (2,525 days old) by camelotshadow (Valley Village)        
Prolux Plus Anyone help me get the bottom plate off?

I got all 5 screws out but its not budging. I think the rubber trim has to come off but its tight & I dont want to damage it removing it.
Is there a secret>
I've had the new duct since 2013 & finally today wanted to play with it.
I taped the old torn duct to try it & it works well.

I also need the front of the top handle as where the top screw goes i the inside of the plastic is broken so it won;t tighten. I seem to be plagued by handle problems as been holding off fixing the simplicity 7350's handle for over 3 years.

I have cancer & will be getting chemo so this is my last chance to play with them for a while so if yo can help...Thank You.

I have been comparing it to the discovery 2 & I think that one was made better because it has metal brush guards & a metal lock for the bag where as the prolux has plastic.

They are both cumbersome to push & the prolux does not seem to lock in up position so its hard to carry around.

Frankly I think I like the Riccar 8950 & the simplicity better so not wanting to spend too much time on the prolux but for some reason it called to me today & said....help me! I think it enjoyed its few spins around.

Did a baking soda test wo brushroll w discovery 2 & prolux + & they are about the same but Disc 2 is 8.5 A & prolux plus is 10A & has a nice long thick red cord...
Its sweet!

LOL


  Photos...       <              >      Photo 1 of 3         View Full Size
Post# 372484 , Reply# 4   5/20/2017 at 22:37 (2,525 days old) by vacuumlad1650 (Wauponsee, IL)        

vacuumlad1650's profile picture
On the bottom put a flatblade I to the two slots and pry so the hood will lift up. Took me a few tried the first time.
Andy


Post# 372495 , Reply# 5   5/21/2017 at 01:32 (2,525 days old) by camelotshadow (Valley Village)        
Got it~

Thanks not too much on this model & it is a stinker...I was messing w the scewdriver in the slots on the back, flipped it over & it opened.

What a mess. ts clean inside now & got access to add some more duct tape.

Closed it back up as I had enough & think to get the duct on I may have to get inside the motor compartment.

I didn;t even remember it was a prolux as its been in storage 3 1/2 years.

I usually clean all new vacs but guess back then I had trouble opening it too.

Its a 1717C which I think dates it to 92/93

Have to put that duct on another time.

A black part came out...unfortunately it looks like one of the plastic pieces that hold s the hood broke off but there are no threads inside...phew!!!!.

I hate that!!! This plastic is pretty strong sort of abs too...

Could have been something the vac picked up that was stuck in there or its part of it but luckily it does not look like it heald a screw....yeah!
I've tried to rebuild those plastic things but its rarely successful.

If anyone can help w getting that duct replaced I'd appreciate it as I think its worthwhile keeping....No rush as its been over 4 years & I got the part 2/13...LOL


  Photos...       <              >      Photo 1 of 4         View Full Size
Post# 374618 , Reply# 6   6/28/2017 at 22:01 (2,486 days old) by compactc9guy (Bathurst NB)        
Hey

compactc9guy's profile picture
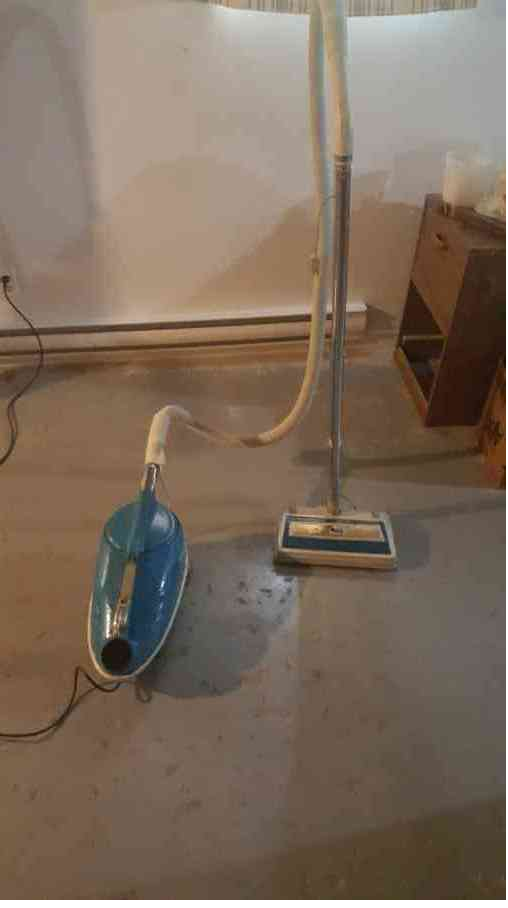
first and for most those are tricky i rebuilt one like it few years back mine was discovery 2 tho same thing different color .
the screws on the bottom of the power foot 4 then take out the screws on the back of the machine that hold the two half of the unit then the handle should come off then pry it off gently the cord the upper half then the bottom half then the suction tube inside motor comes out of the bottom msg me if you need help i had a lux upright Electrolux Discovery 2 and i KEPT ALL MY RESTORATION PICTURES

to replace the duct you need to open her up msg me i have a discovery 2


Post# 374925 , Reply# 7   7/5/2017 at 14:26 (2,479 days old) by human (Pines of Carolina)        

human's profile picture
One interesting difference (improvement, really) I noticed between the ProLux pictured and my Discovery II is the funnel-shaped collector that goes between the brush roll and the duct tube is held down to the chassis with two screws, which keeps the collector firmly in place when the cover and chassis are separated. My Discovery II has a couple of locator pins on the chassis that allow the collector to be properly positioned for assembly but don't hold it in place. When the cover is removed, the collector tends to stay with the cover instead of on the chassis. Those two little screws make things a lot easier to take apart and put back together.

Post# 374962 , Reply# 8   7/6/2017 at 15:45 (2,478 days old) by fantomfan57 (Central Texas)        
My fix for...

when I open up a vacuum and find that the "chimney/tower"..that the screw screws into is damaged, I crazy glue/baking soda affix the chipped piece back, then use a slightly longer screw. There is usually more thread in the bottom.

The repair using crazy glue and baking soda goes like this: use only liquid glue, drip it on completely and quickly dust the repair area with backing soda. There is a chemical reaction where the plastic re-bonds. You can feel the area warm up.
It leaves a hard shell that can be Dremel-ed or sanded if needed.

For the repair I mentioned above, do not run the glue or soda into the hole.


Post# 374963 , Reply# 9   7/6/2017 at 15:46 (2,478 days old) by fantomfan57 (Central Texas)        
Oops...

I forgot to mention that you clean the surfaces with alcohol first to remove oils, dust and grime.


Forum Index:       Other Forums:                      


Comes to the Rescue!

Woops, Time to Check the Bag!!!
Either you need to change your vacuum bag or you forgot to LOG-IN?

Discuss-O-MAT Log-In


New Members
Click Here To Sign Up.


automaticwasher.org home
Discuss-o-Mat Forums
Vintage Brochures, Service and Owners Manuals
Fun Vintage Washer Ephemera
See It Wash!
Video Downloads
Audio Downloads
Picture of the Day
Patent of the Day
Photos of our Collections
The Old Aberdeen Farm
Vintage Service Manuals
Vintage washer/dryer/dishwasher to sell?
Technical/service questions?
Looking for Parts?
Website related questions?
Digital Millennium Copyright Act Policy
Our Privacy Policy